diy vintage rose jewelry box
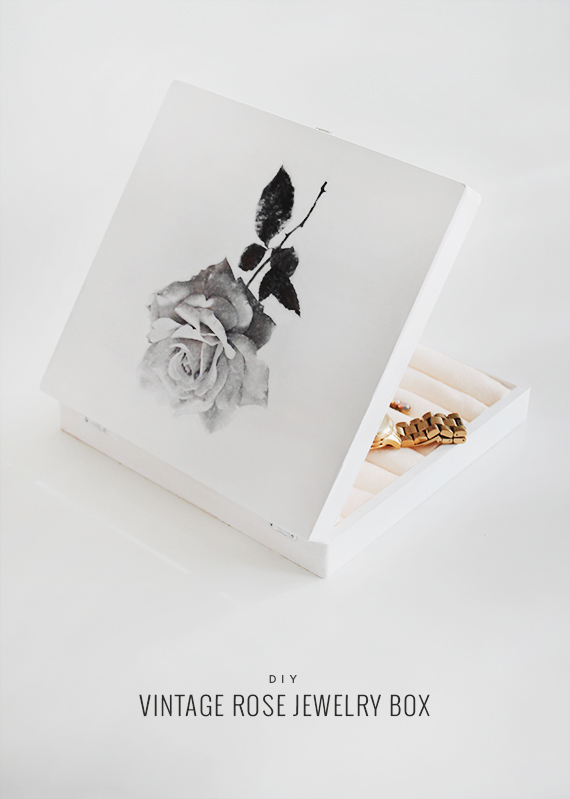
i know what you might be thinking. whoa. that’s a girly jewelry box and totally not what you normally see on almost makes perfect. i think you’re right — it turned out QUITE feminine looking. but it’s almost valentines day, so i think that allows me to girl it up. this simple little jewelry box would make the perfect valentines gift for your mom or sister or niece or … a girl. that’s in your life. you get it.
materials
wooden craft box
gel medium
a paintbrush
a brayer tool
white craft paint
felt
liquid stitch
scissors
sponge
a print out of your choice
 directions
01. sand and paint your craft box if you choose and let dry overnight. paint the inside edges but don’t worry about the inside of the box which will be covered by your felt.
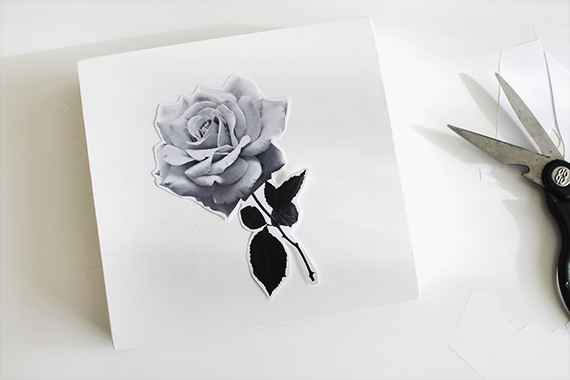
02. find an image you like, measure your box, and print it to fit. many internet sources say inkjet prints don’t work with gel medium, but they actually do.
03. cut out your image as best as you can, and keep in mind that it will reverse once it’s adhered to your box, so if you’re using text, print backwards.
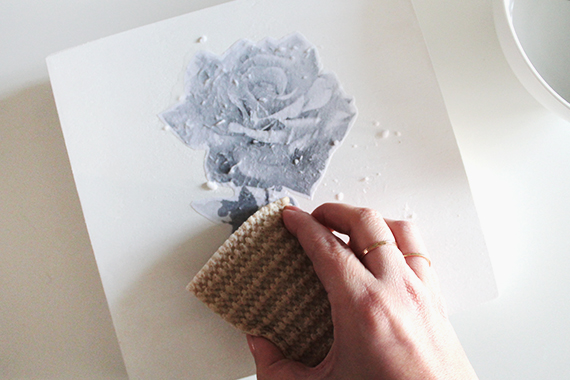
04. brush your image liberally with your gel medium, once saturated, lay down on top of your box.
05. make sure all the sides are covered and it’s sitting tightly on top with no loose corners.
06. using your brayer (if you don’t have one, you can just use a book or credit card), burnish your image for a couple minutes.
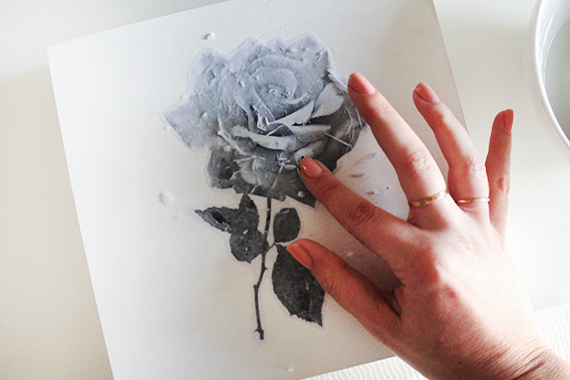

07. let dry for about three hours. then, using a bowl of water and a sponge, gently wet your sponge and dampen your entire image. you’ll begin to see the image coming through. keep patiently wetting and removing the paper backing.
08. wet your fingers and keep rubbing more paper off. it will become messy but the darker detail of your image will start showing through even more.
09. once you’re happy with your image, brush away the paper and let dry for an hour.
10. measure your box width and cut your felt to the same width. as tightly as you can, roll up pieces and wedge them into your box. add glue to the bottom of the box and secure them into place. my box fit eight rolled pieces (eight pieces of felt).
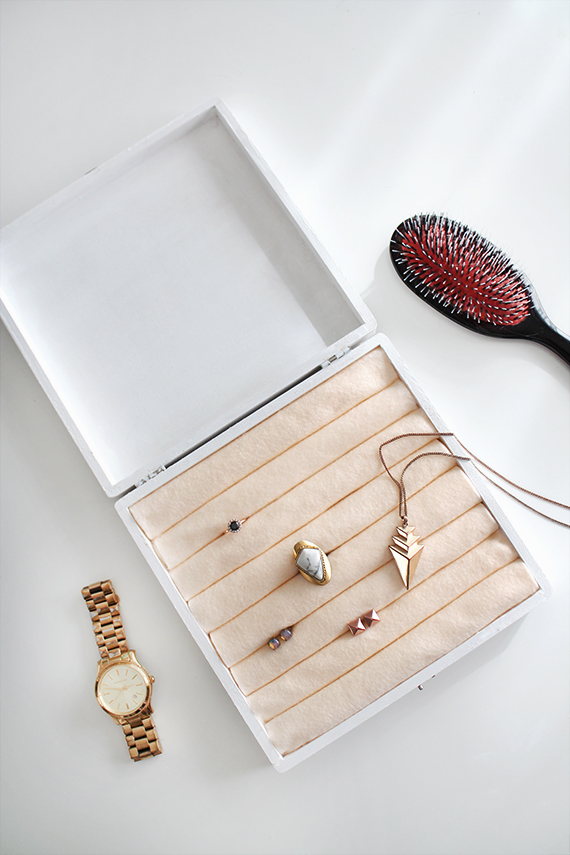
and there you have it. the girliest diy jewelry box i’ll ever make that i’m really not even sure i like that much. but if you like it – i’ll be happy.


I really like it 🙂
Beautiful!!!
Well it certainly IS girly, but it still is lovely! The monochrome rose is too pretty.
girly is great sometimes 🙂 that came out great!
The concept is great. You could put anything in place of the rose…maybe a geode print or a geometric design.
<3
That is exquisite. You really worked at making a good product. God bless your heart, mind and hands.
Hello Molly,
I really like this jewelry box and the picture of the rose look great,too.
Could you please share with us where you got this image from?
Greetings M.K.
This is so lovely! I love the crisp white and the simplicity of the black and white image. And doing the inside with the felt is a really good idea.
This is such a good idea. I have a friend who loves boxes; I’m totally going to make one for her. Also, I love your buffalo turquoise ring, would you please share where you found it?
Thank you!
I need to do this! That felt is so simple and genius.
thanks kate! do it!
This is so cute ! I would love to try it out, I was wondering if you could share where you got that beautiful rose picture ? It would be greatly appreciated !