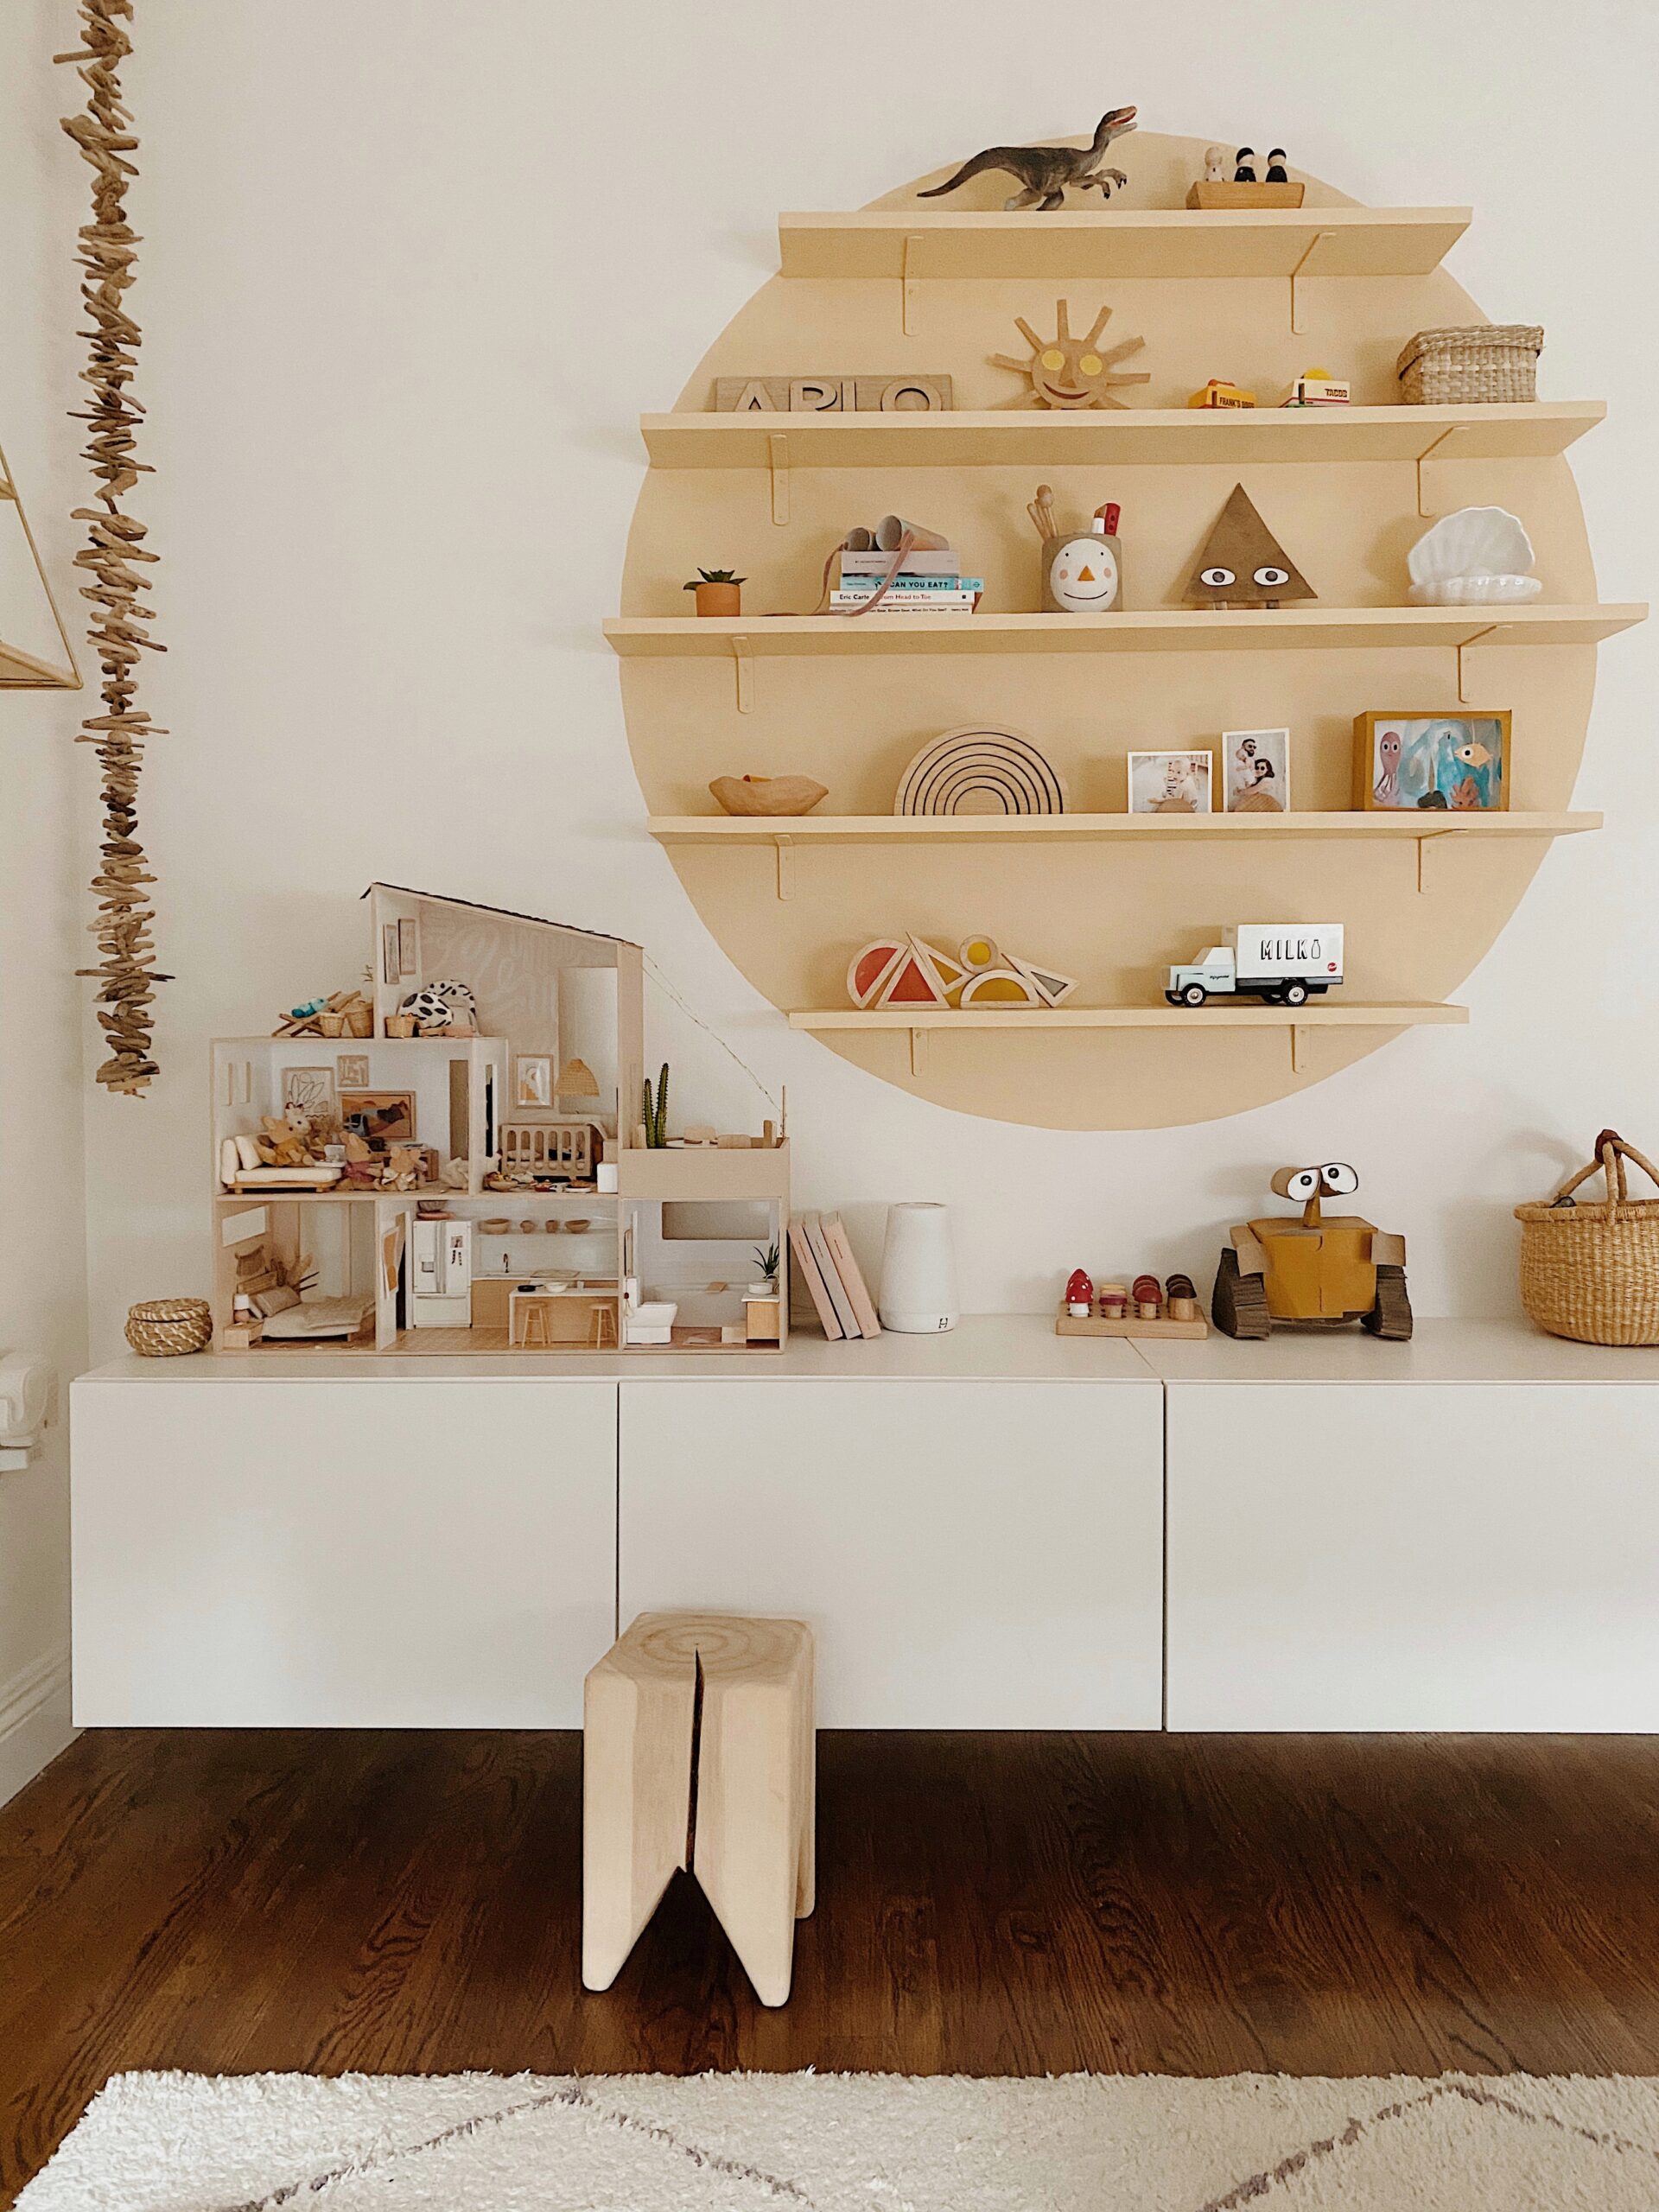
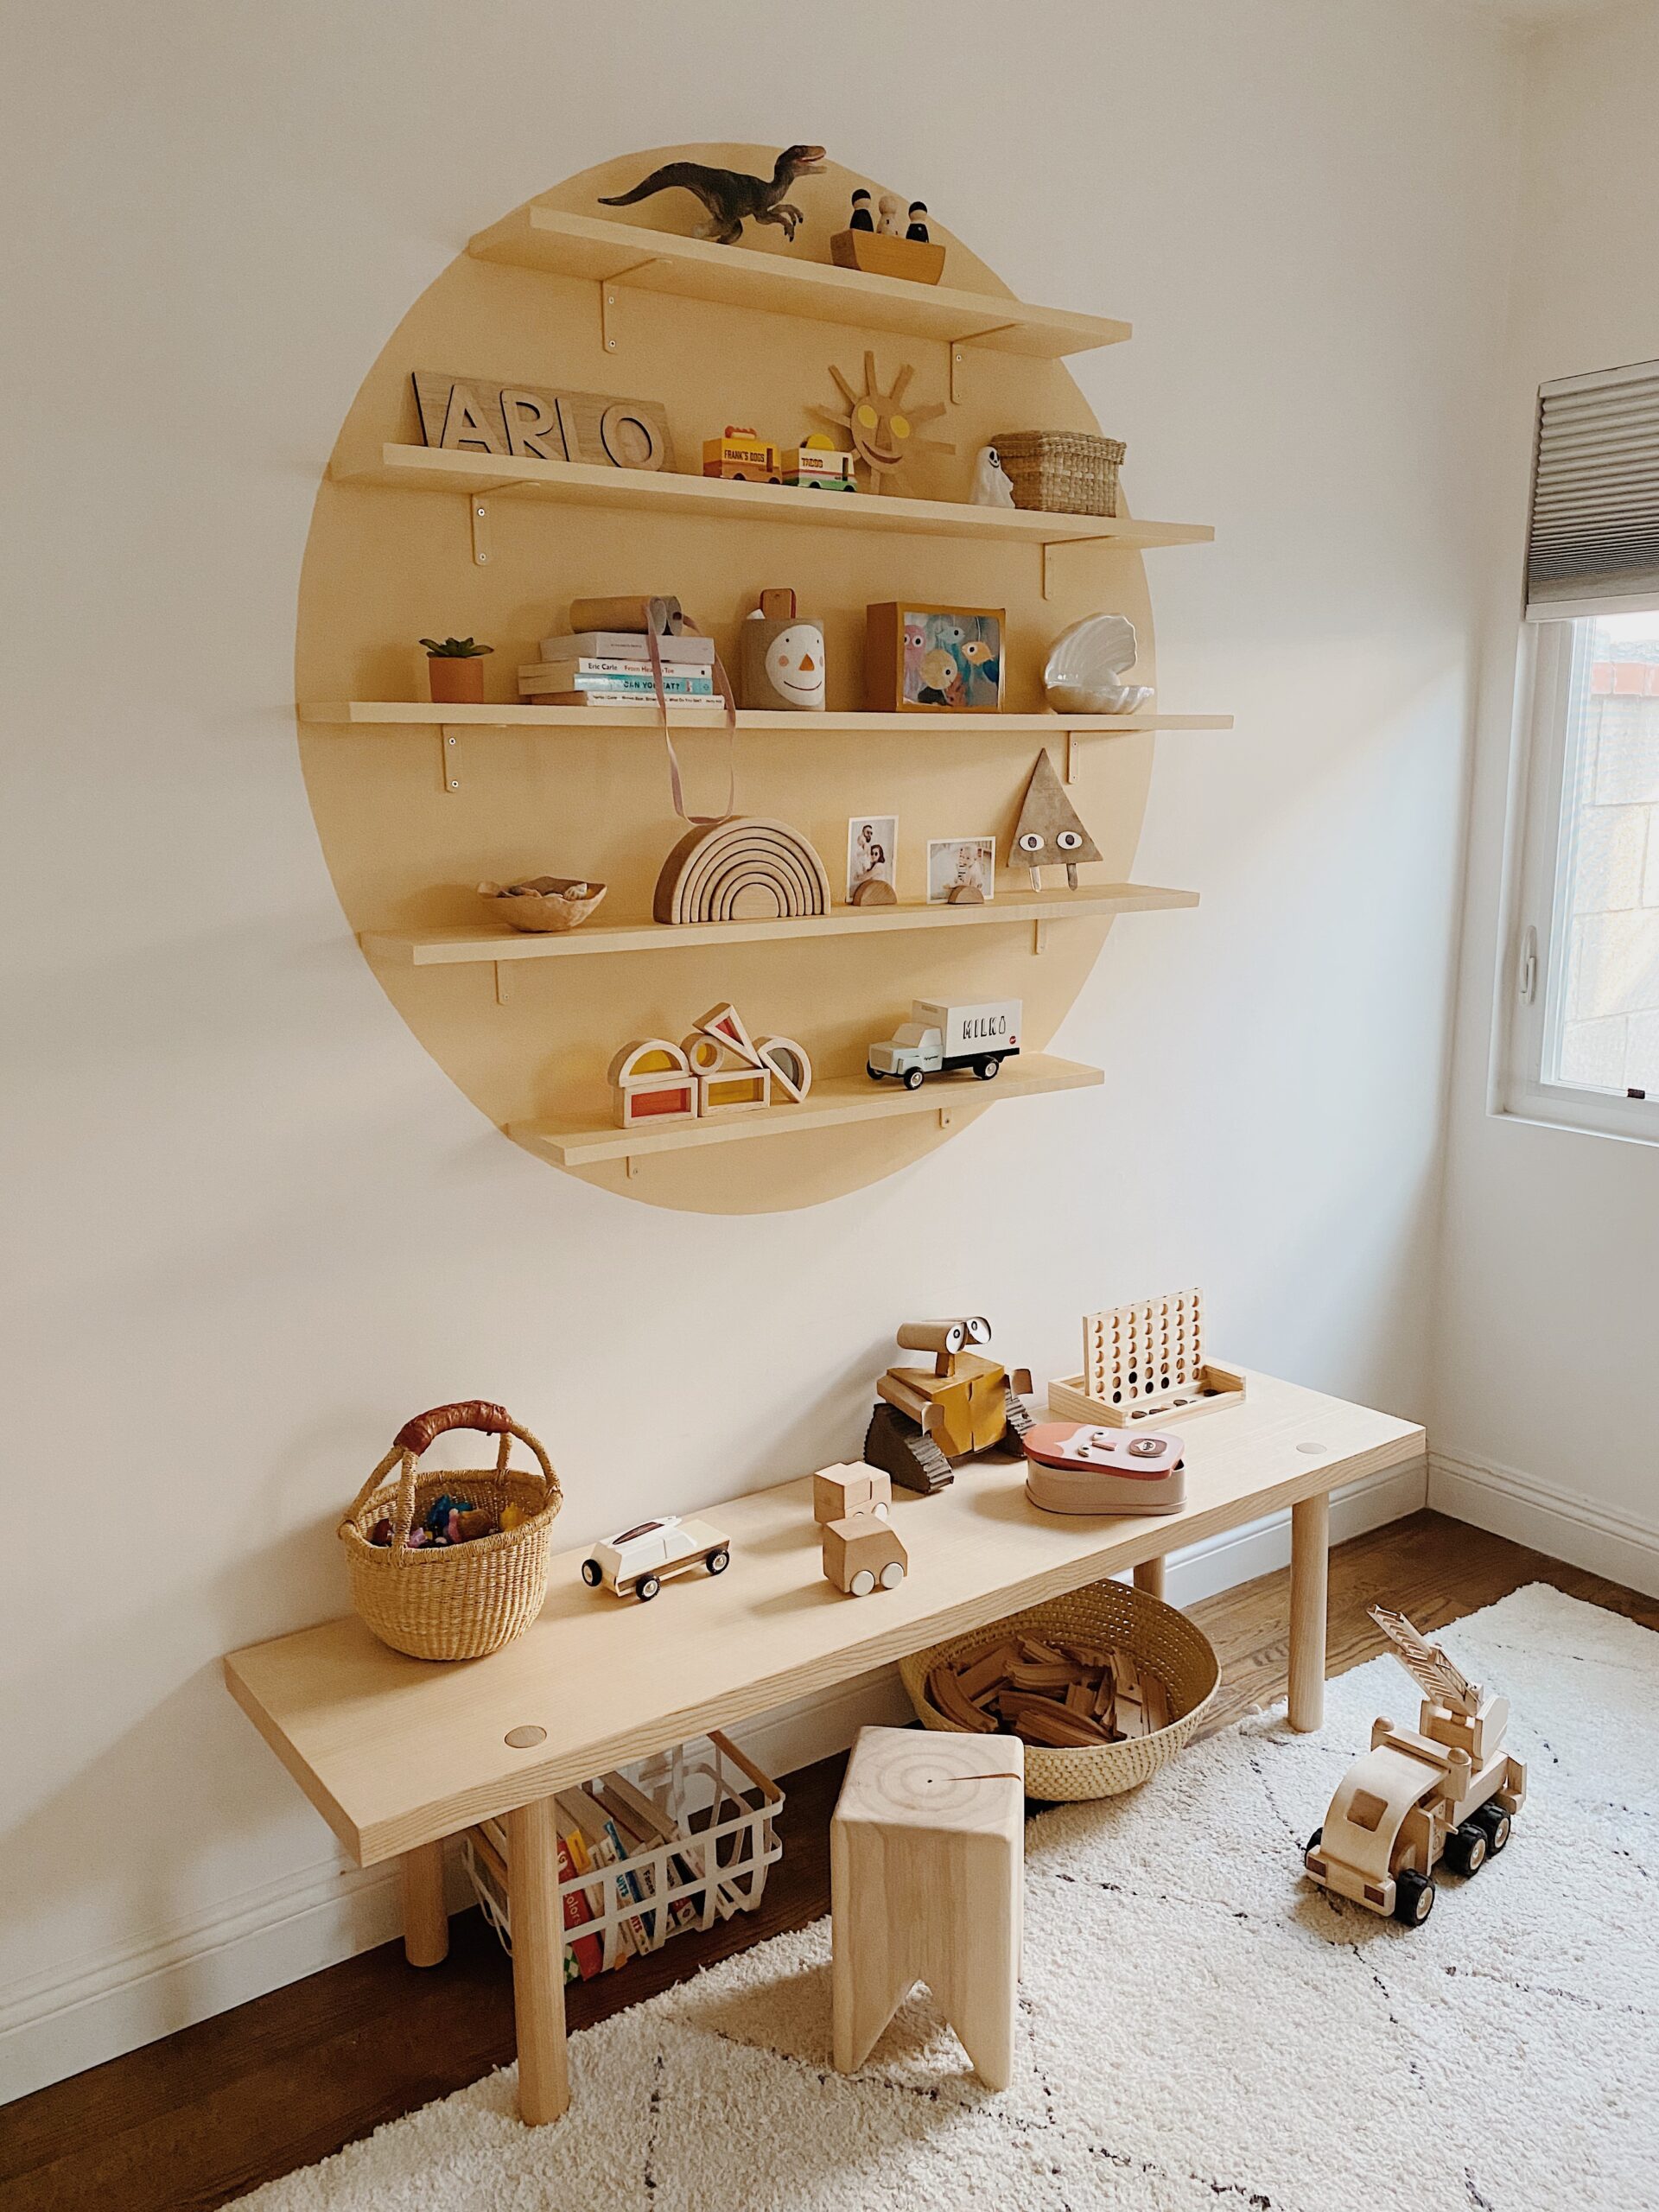
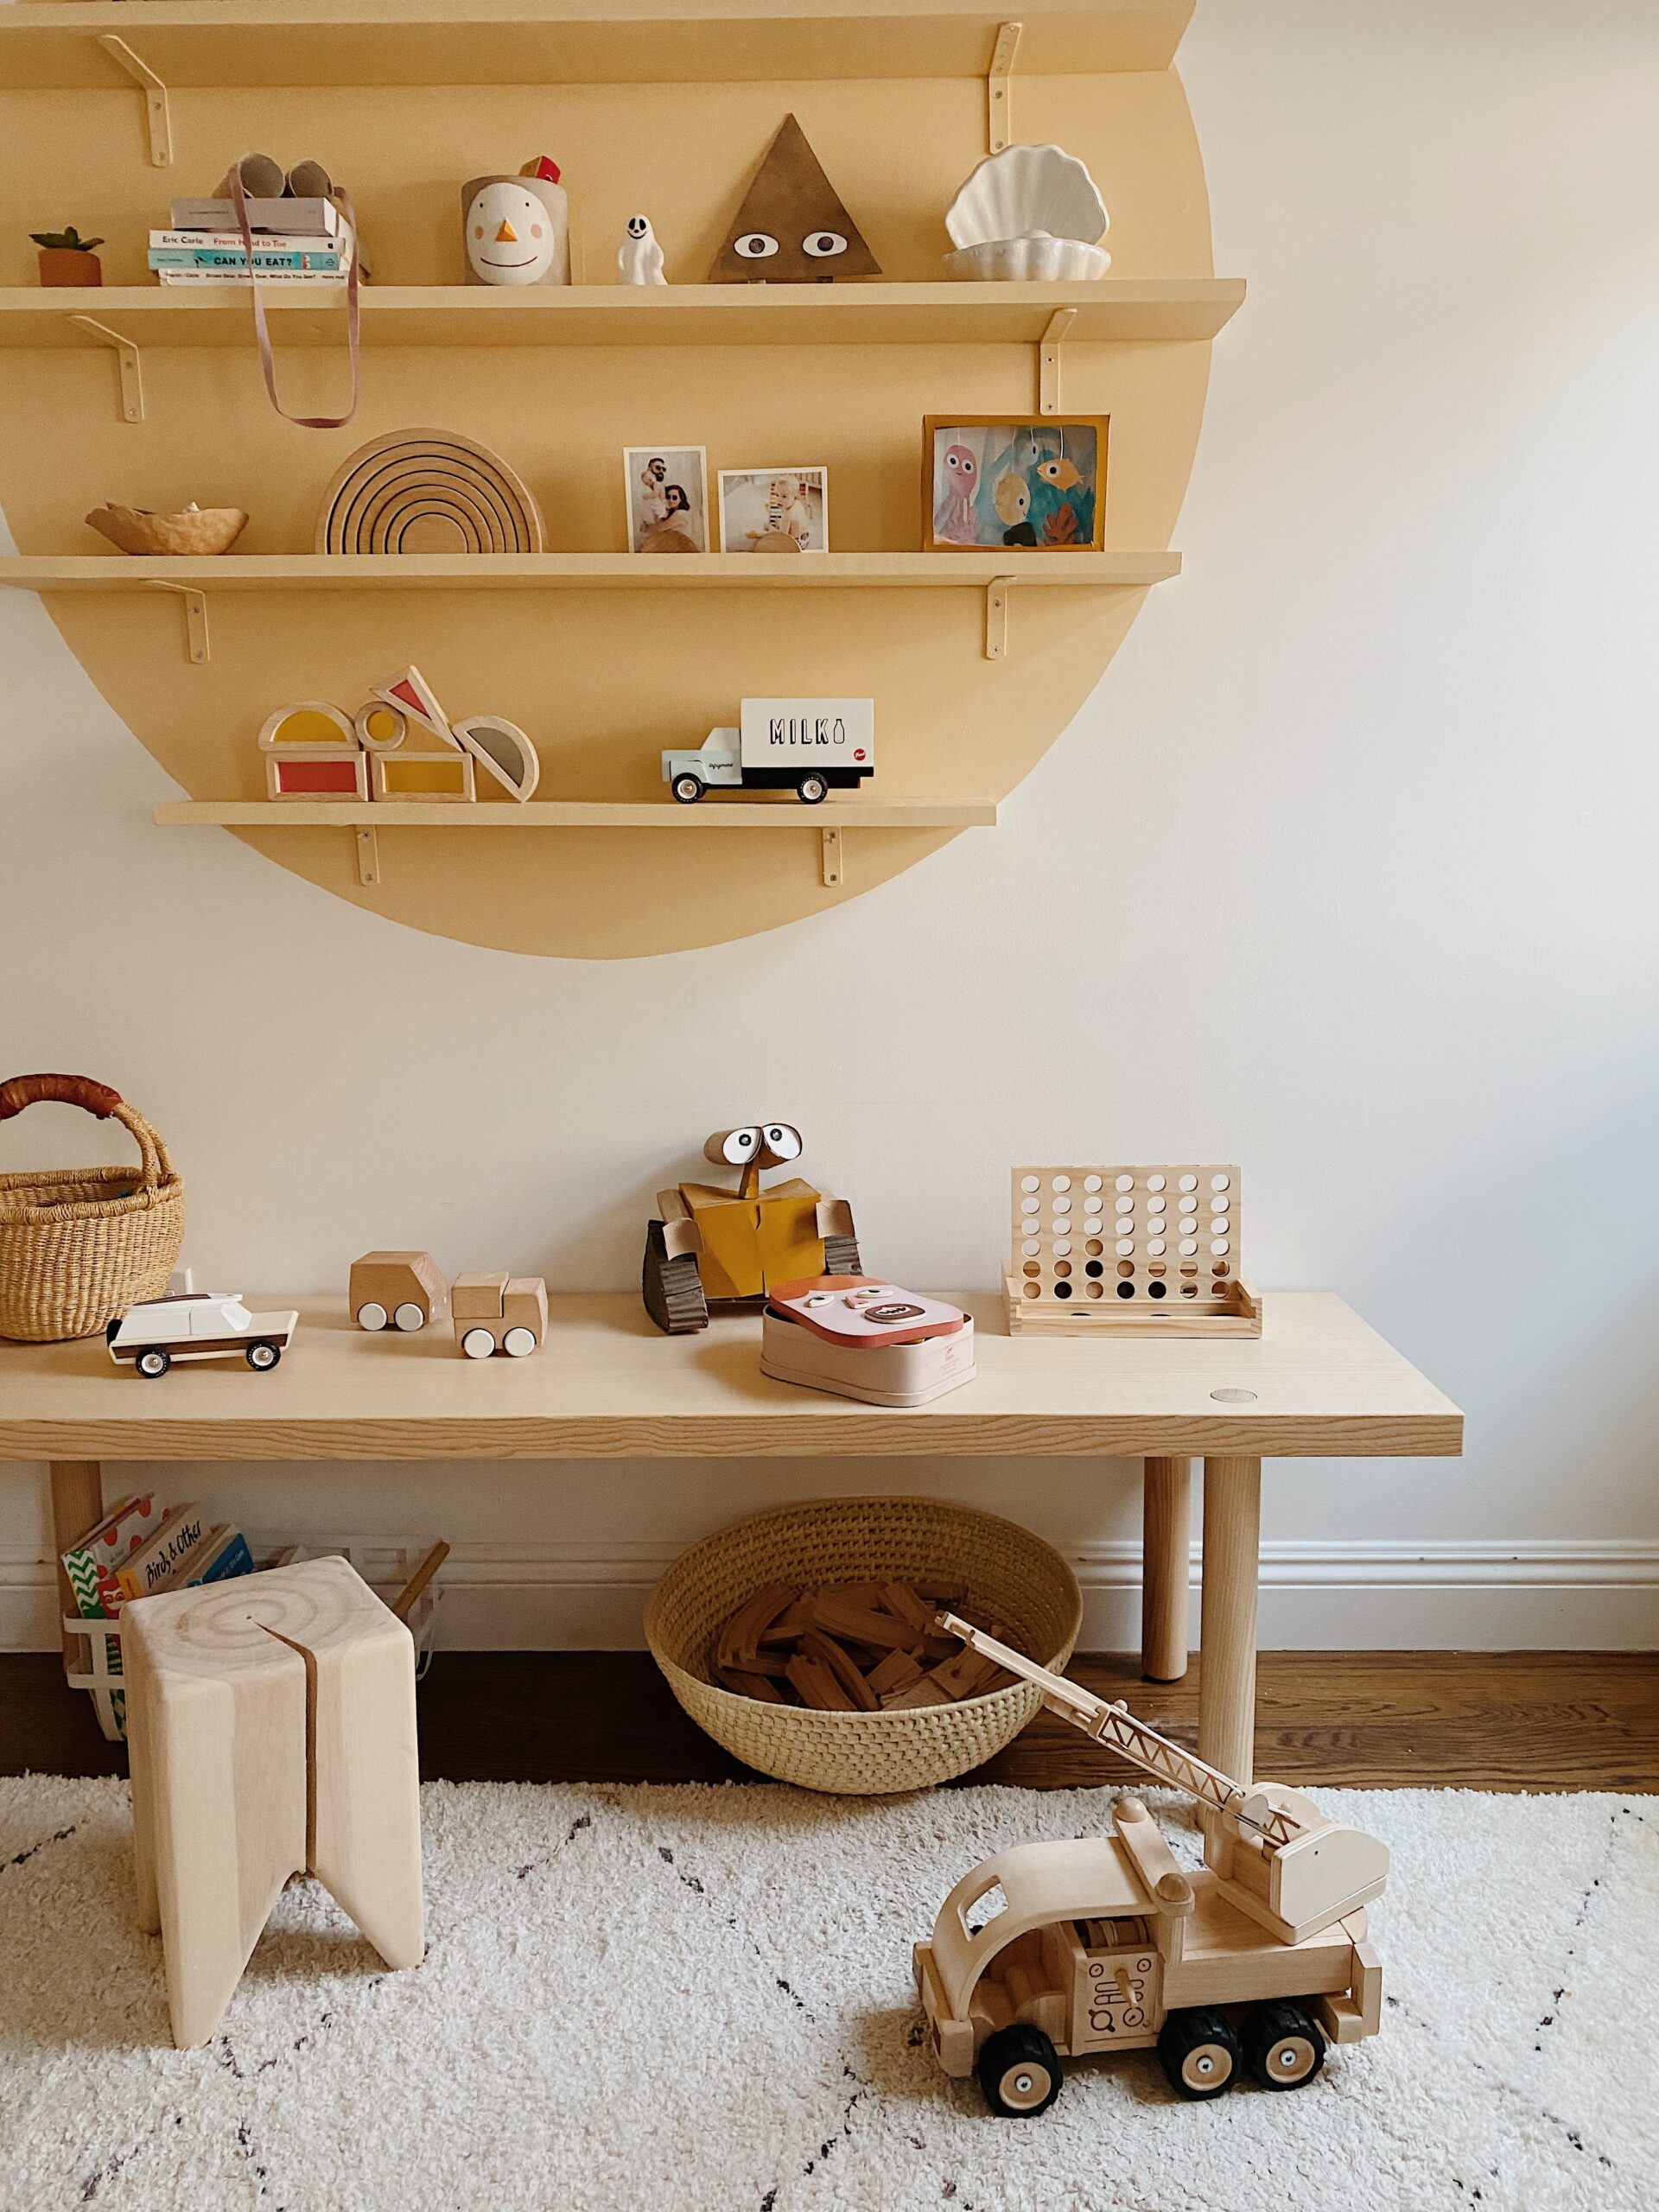
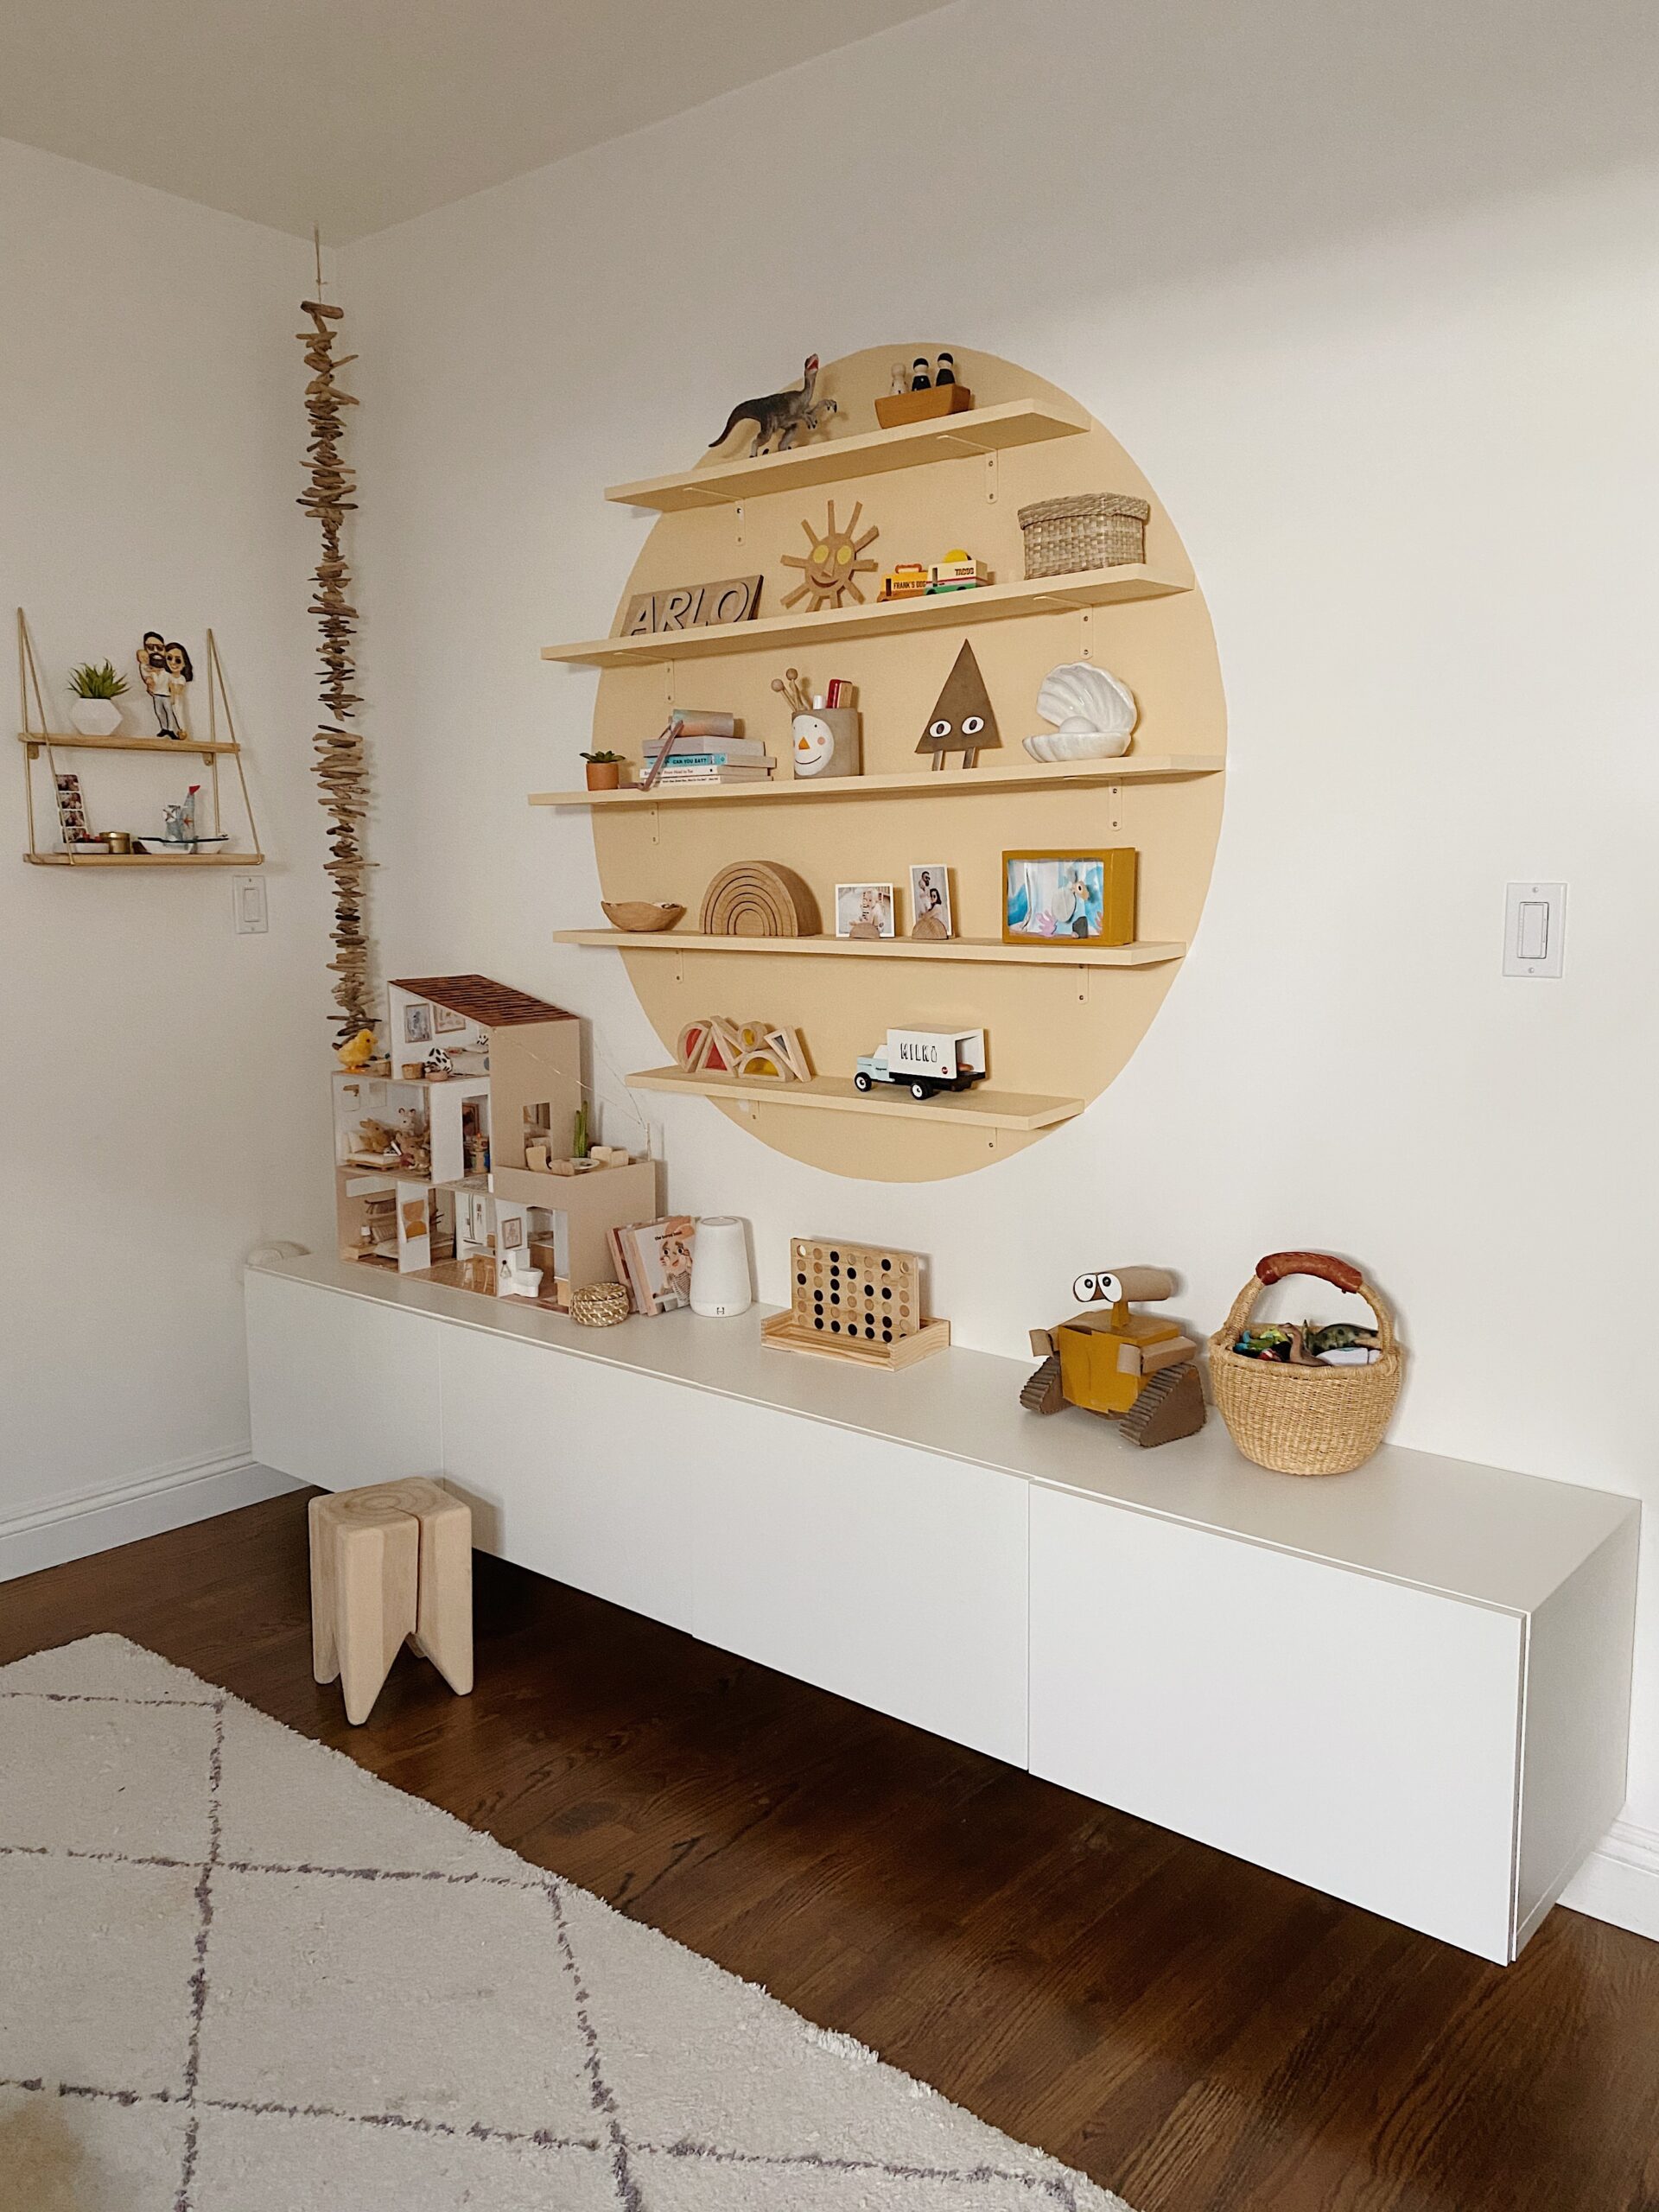
DIY painted circle shelf
been meaning to share how we did this circle shelf for a bit now!! i’m sort of an expert since i ended up doing it twice in arlo’s room– yes twice. i did it on one wall before bringing his big boy bed in, and once i did, i realized the layout of the room would be weird — so i had to change things around and decided it would just be best to just redo it on another wall haha. wow it was exhausting.
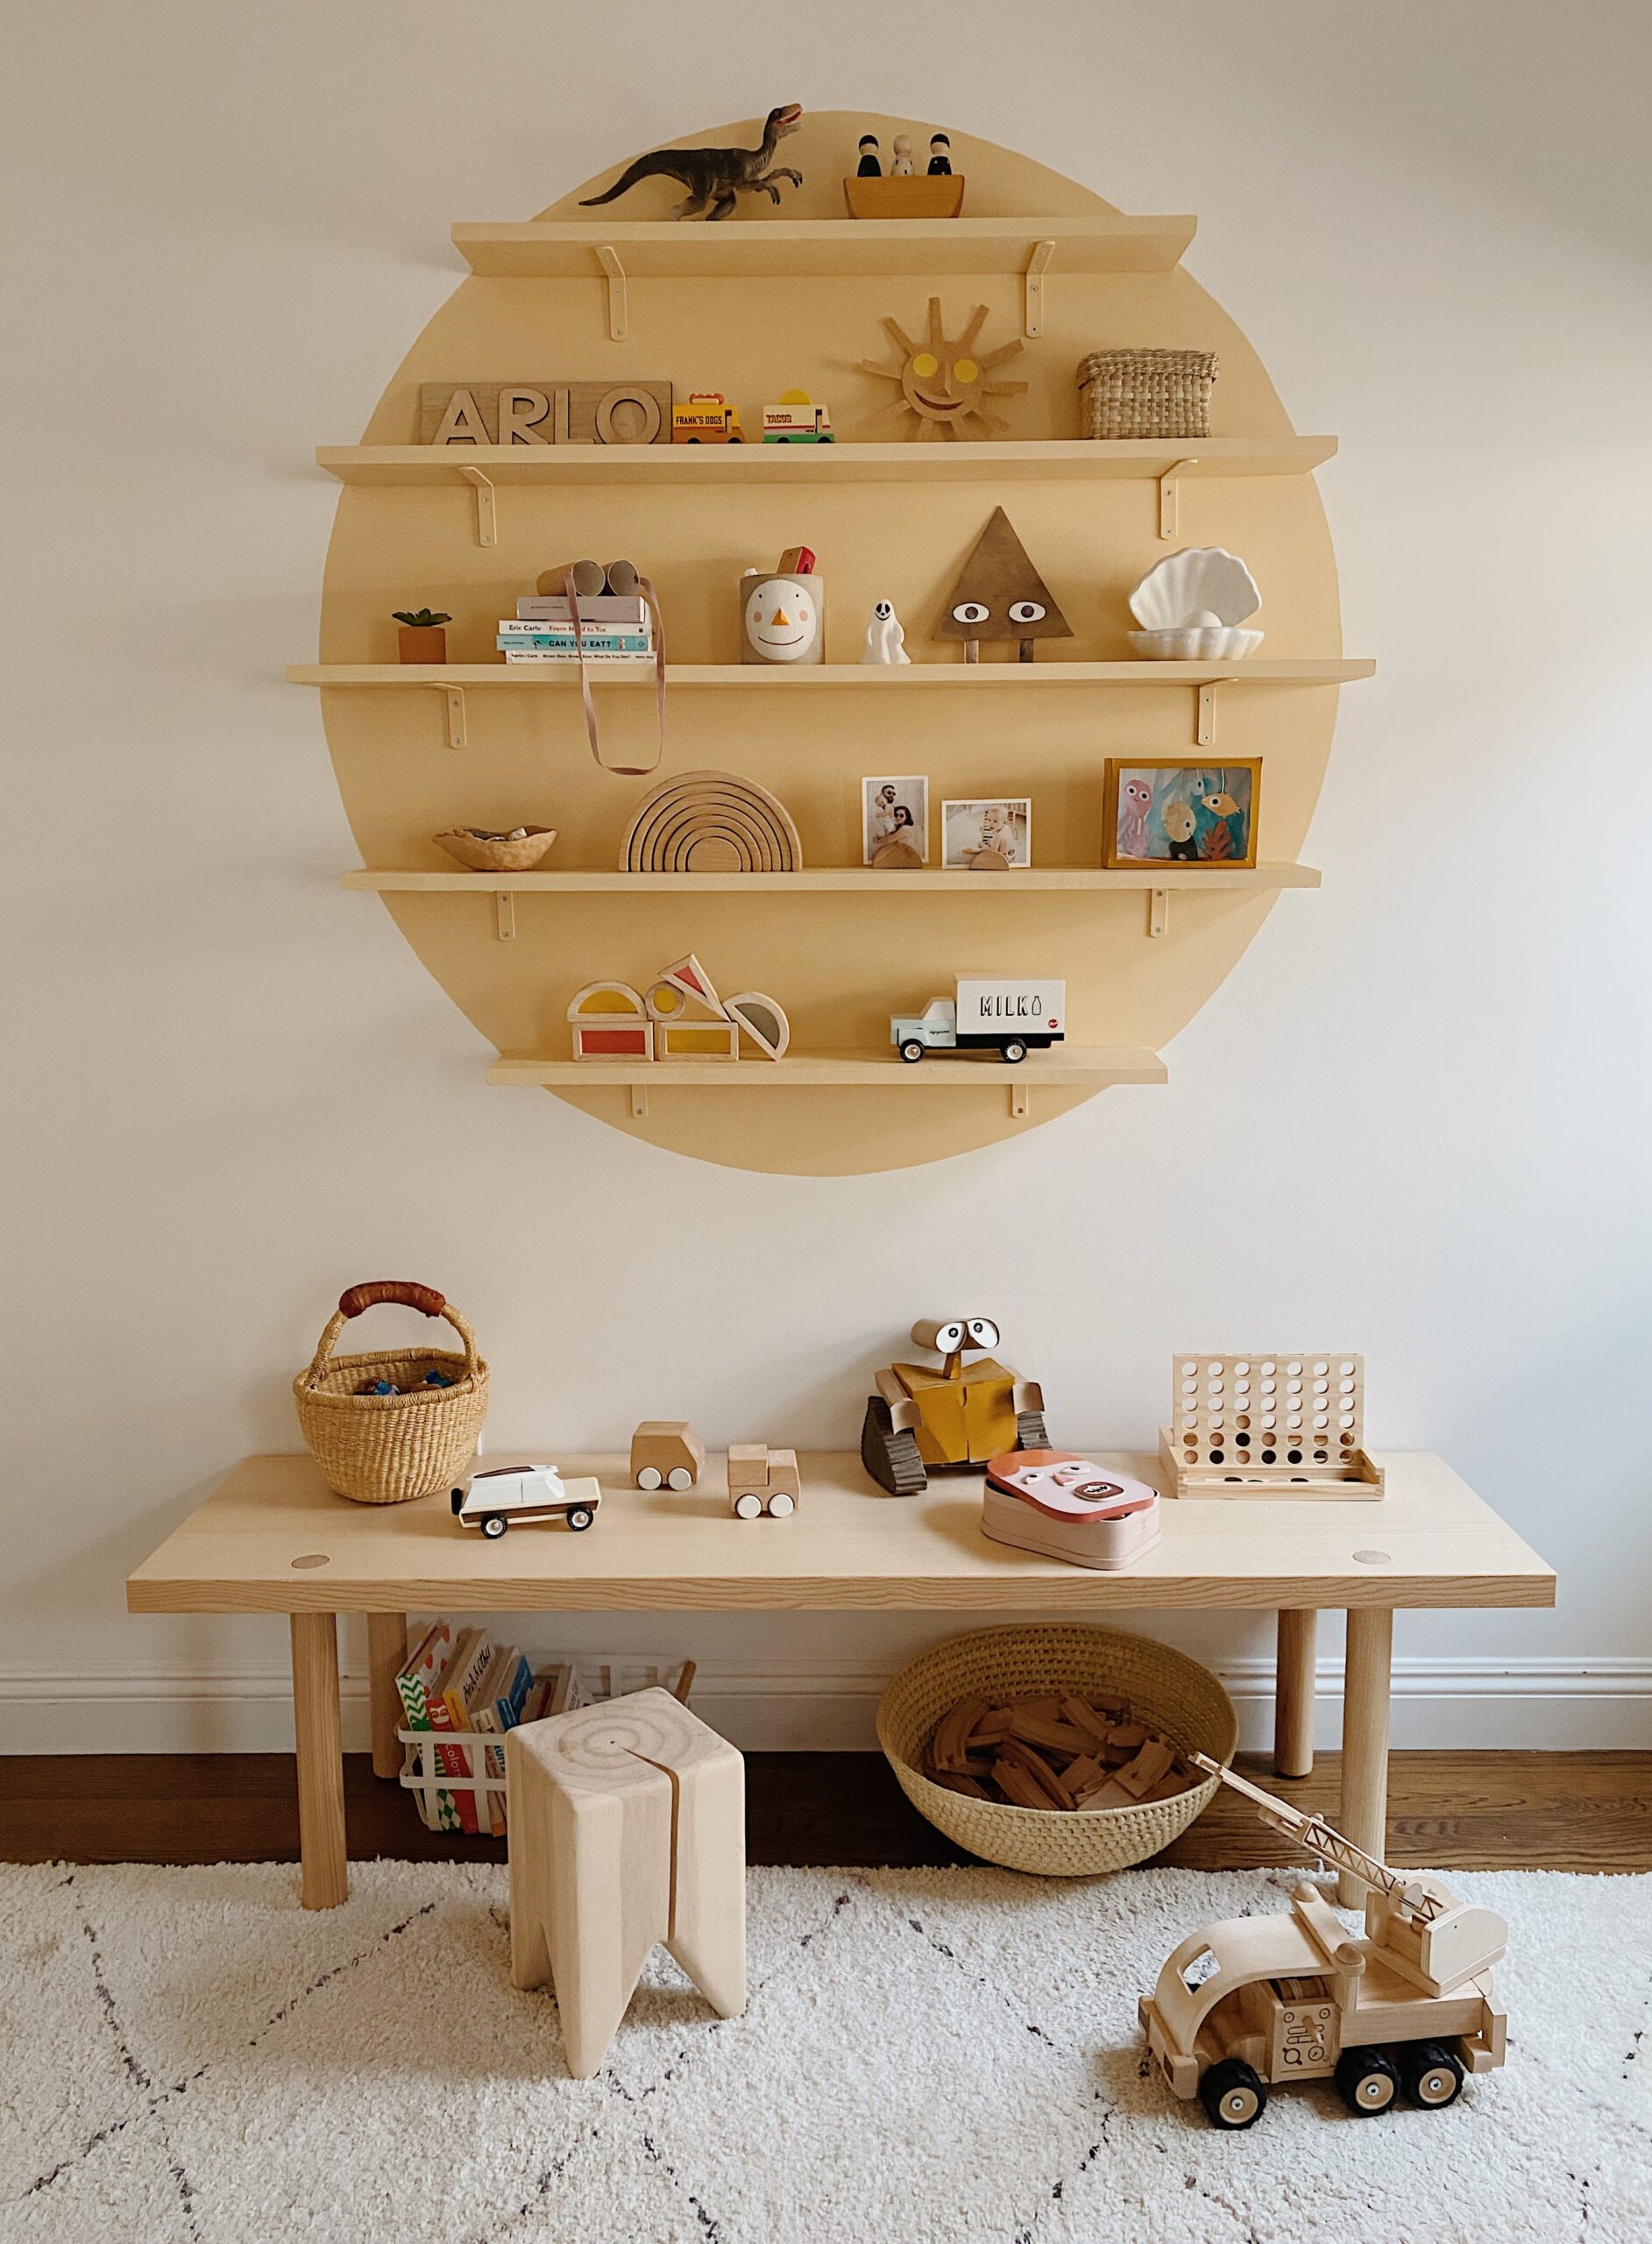
despite how tired doing it twice made me, the project itself is actually not super complicated, but it looks sooo special. i was so excited to create this in arlos room to display all his cute toys, tchotchkes and some of the prettiest crafts we’ve made over the year.
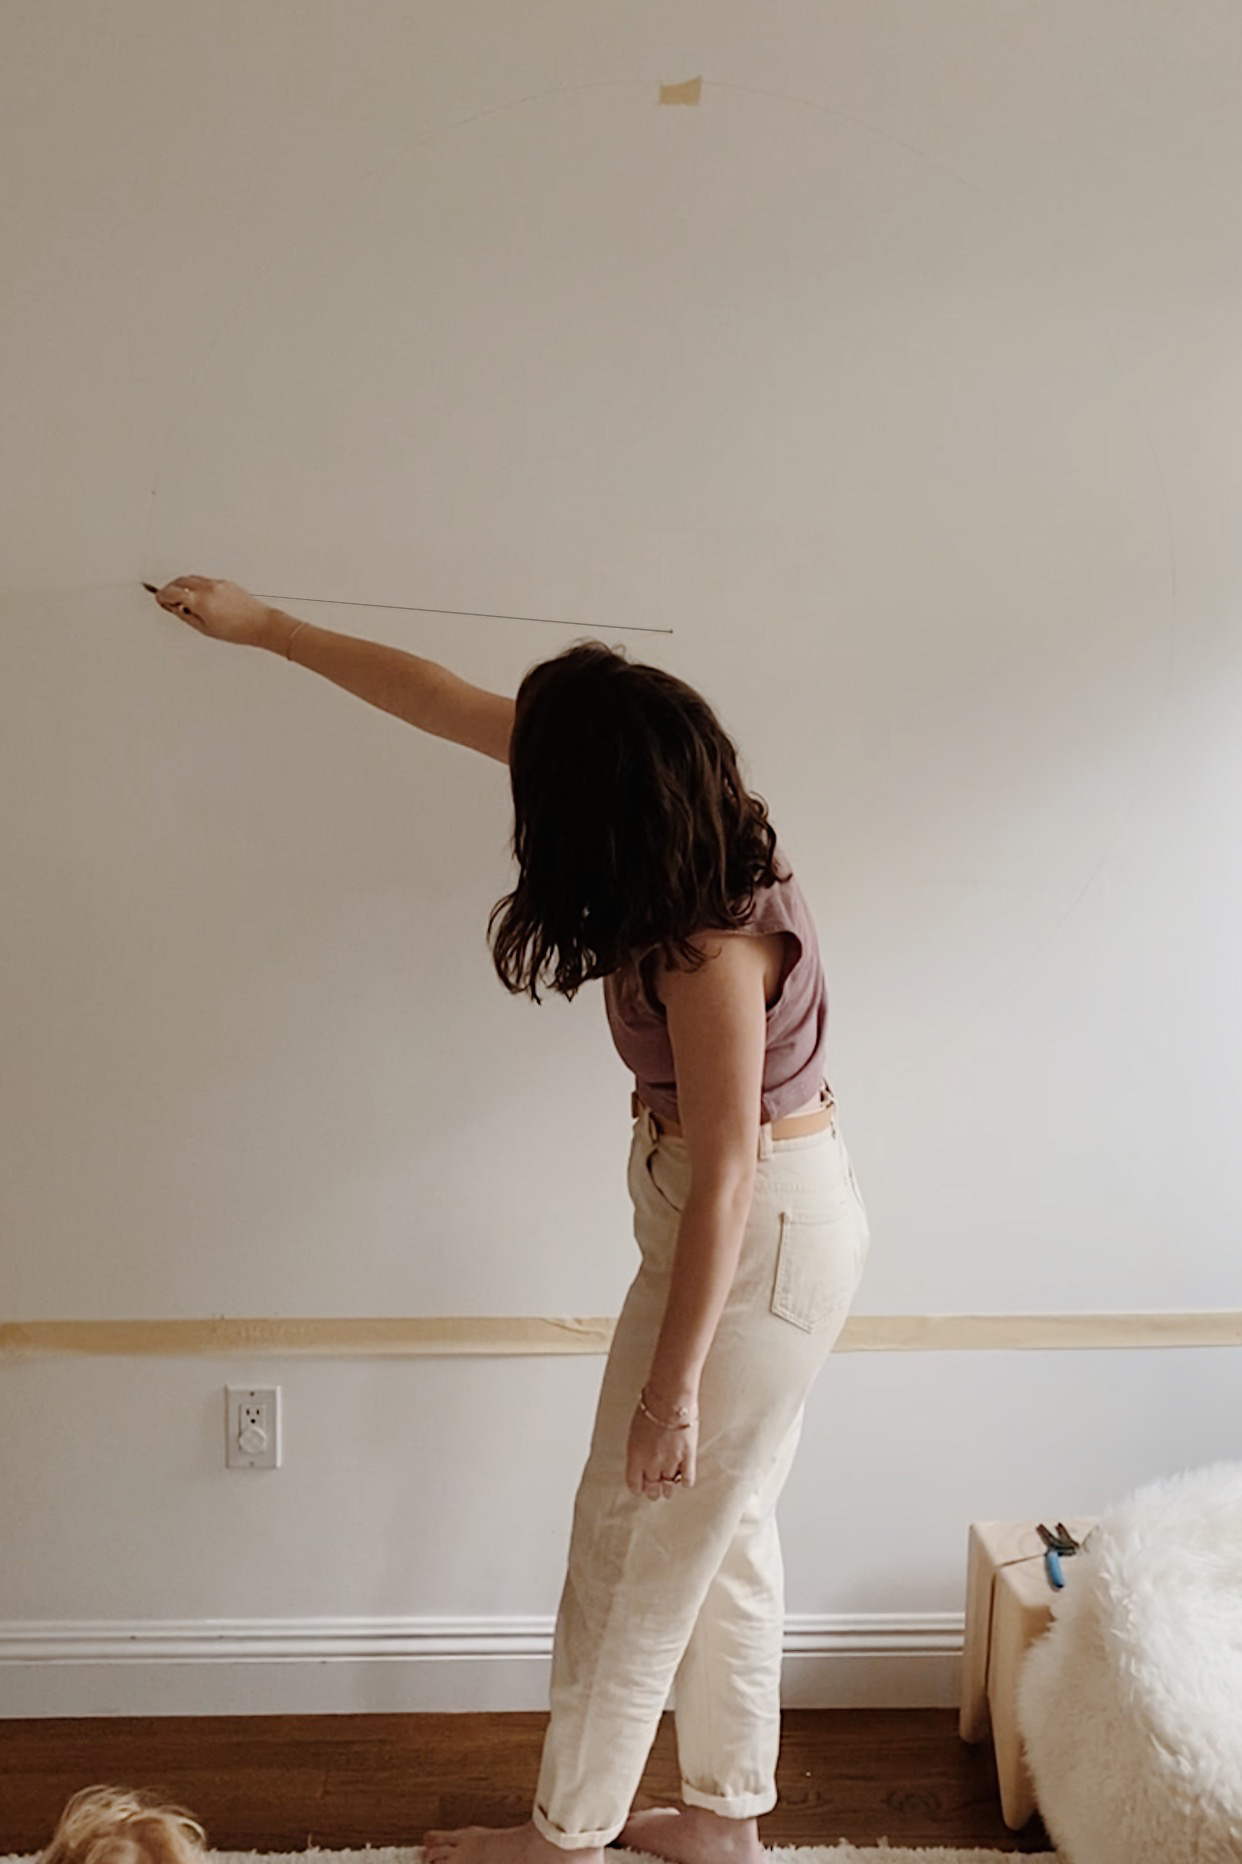
step one : drawing your circle
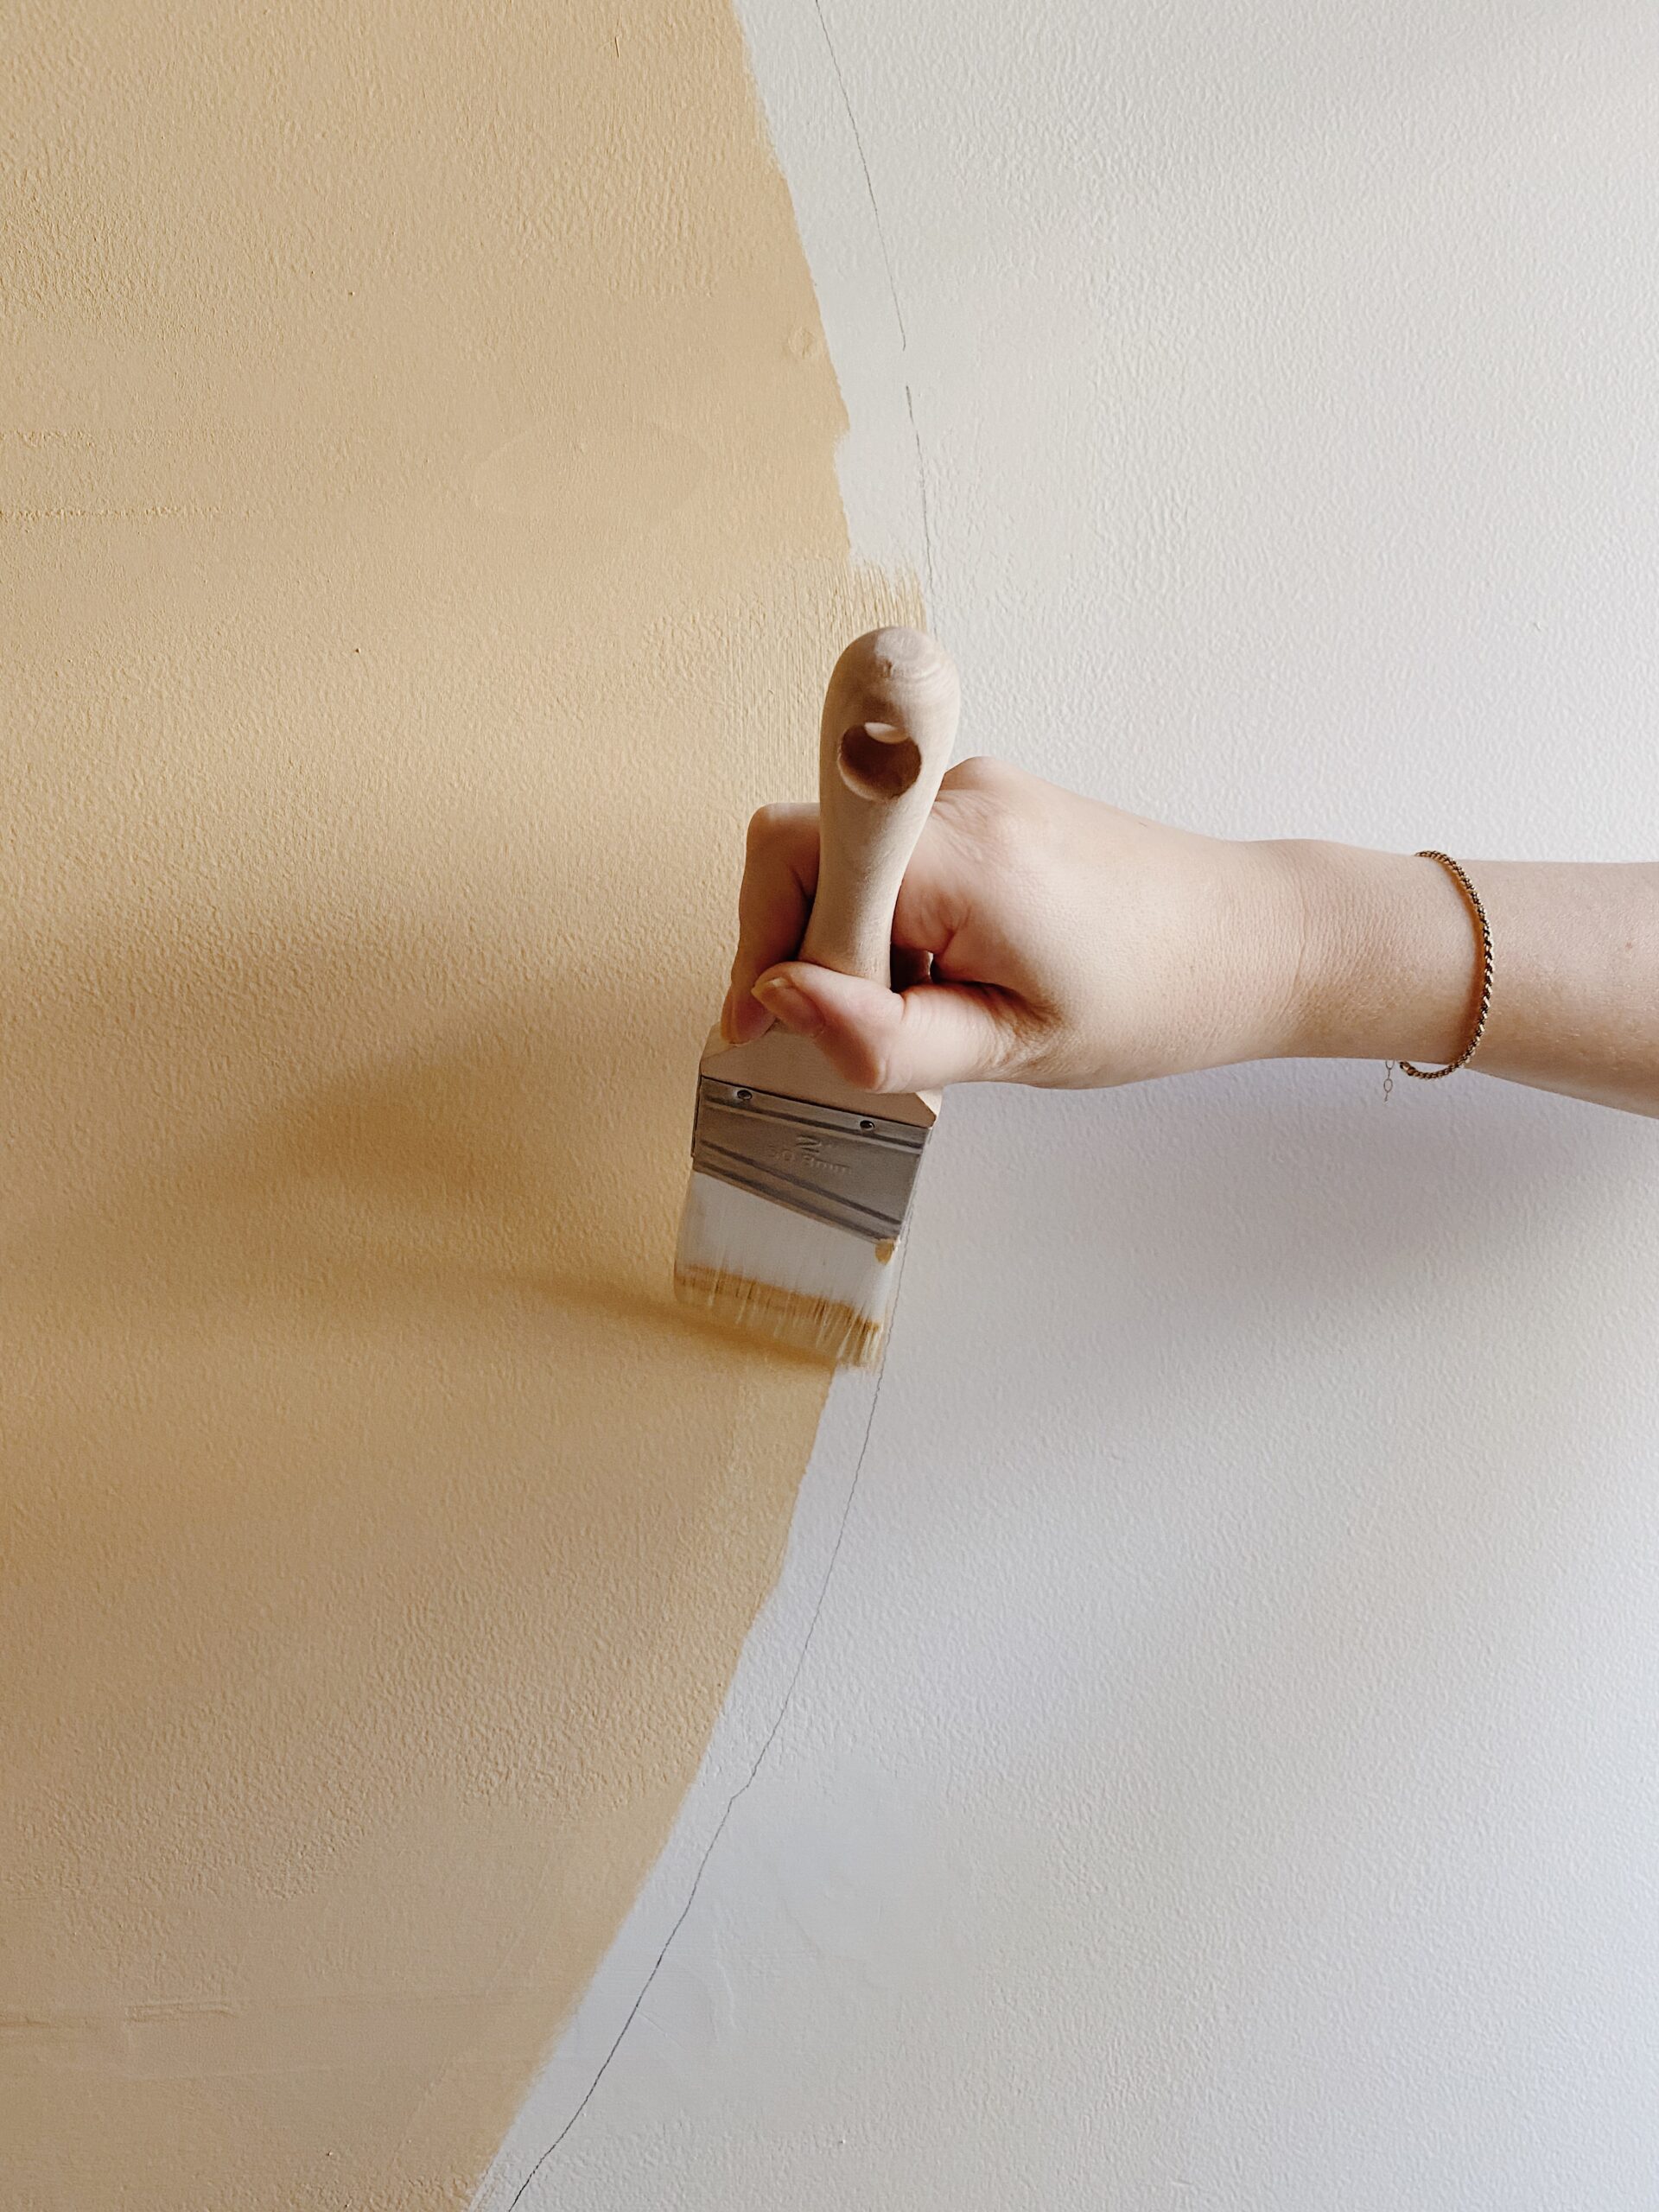
measure your wall and figure out where you want the circle, and what the diameter will be roughly. then hammer a nail in the center. attach a string or wire to the nail that’s as the length of your desired diameter. string can work, but i found thin wire to feel really sturdy. tie a pencil to the end and keep it taut, LIGHTLY draw the outline of your circle on the wall.
i say lightly because you don’t want to have to deal with removing pencil marks so it’s just easier to go nice and light. you can see below how lightly i drew on the wall. just dark enough so you can see it to use as your guide!
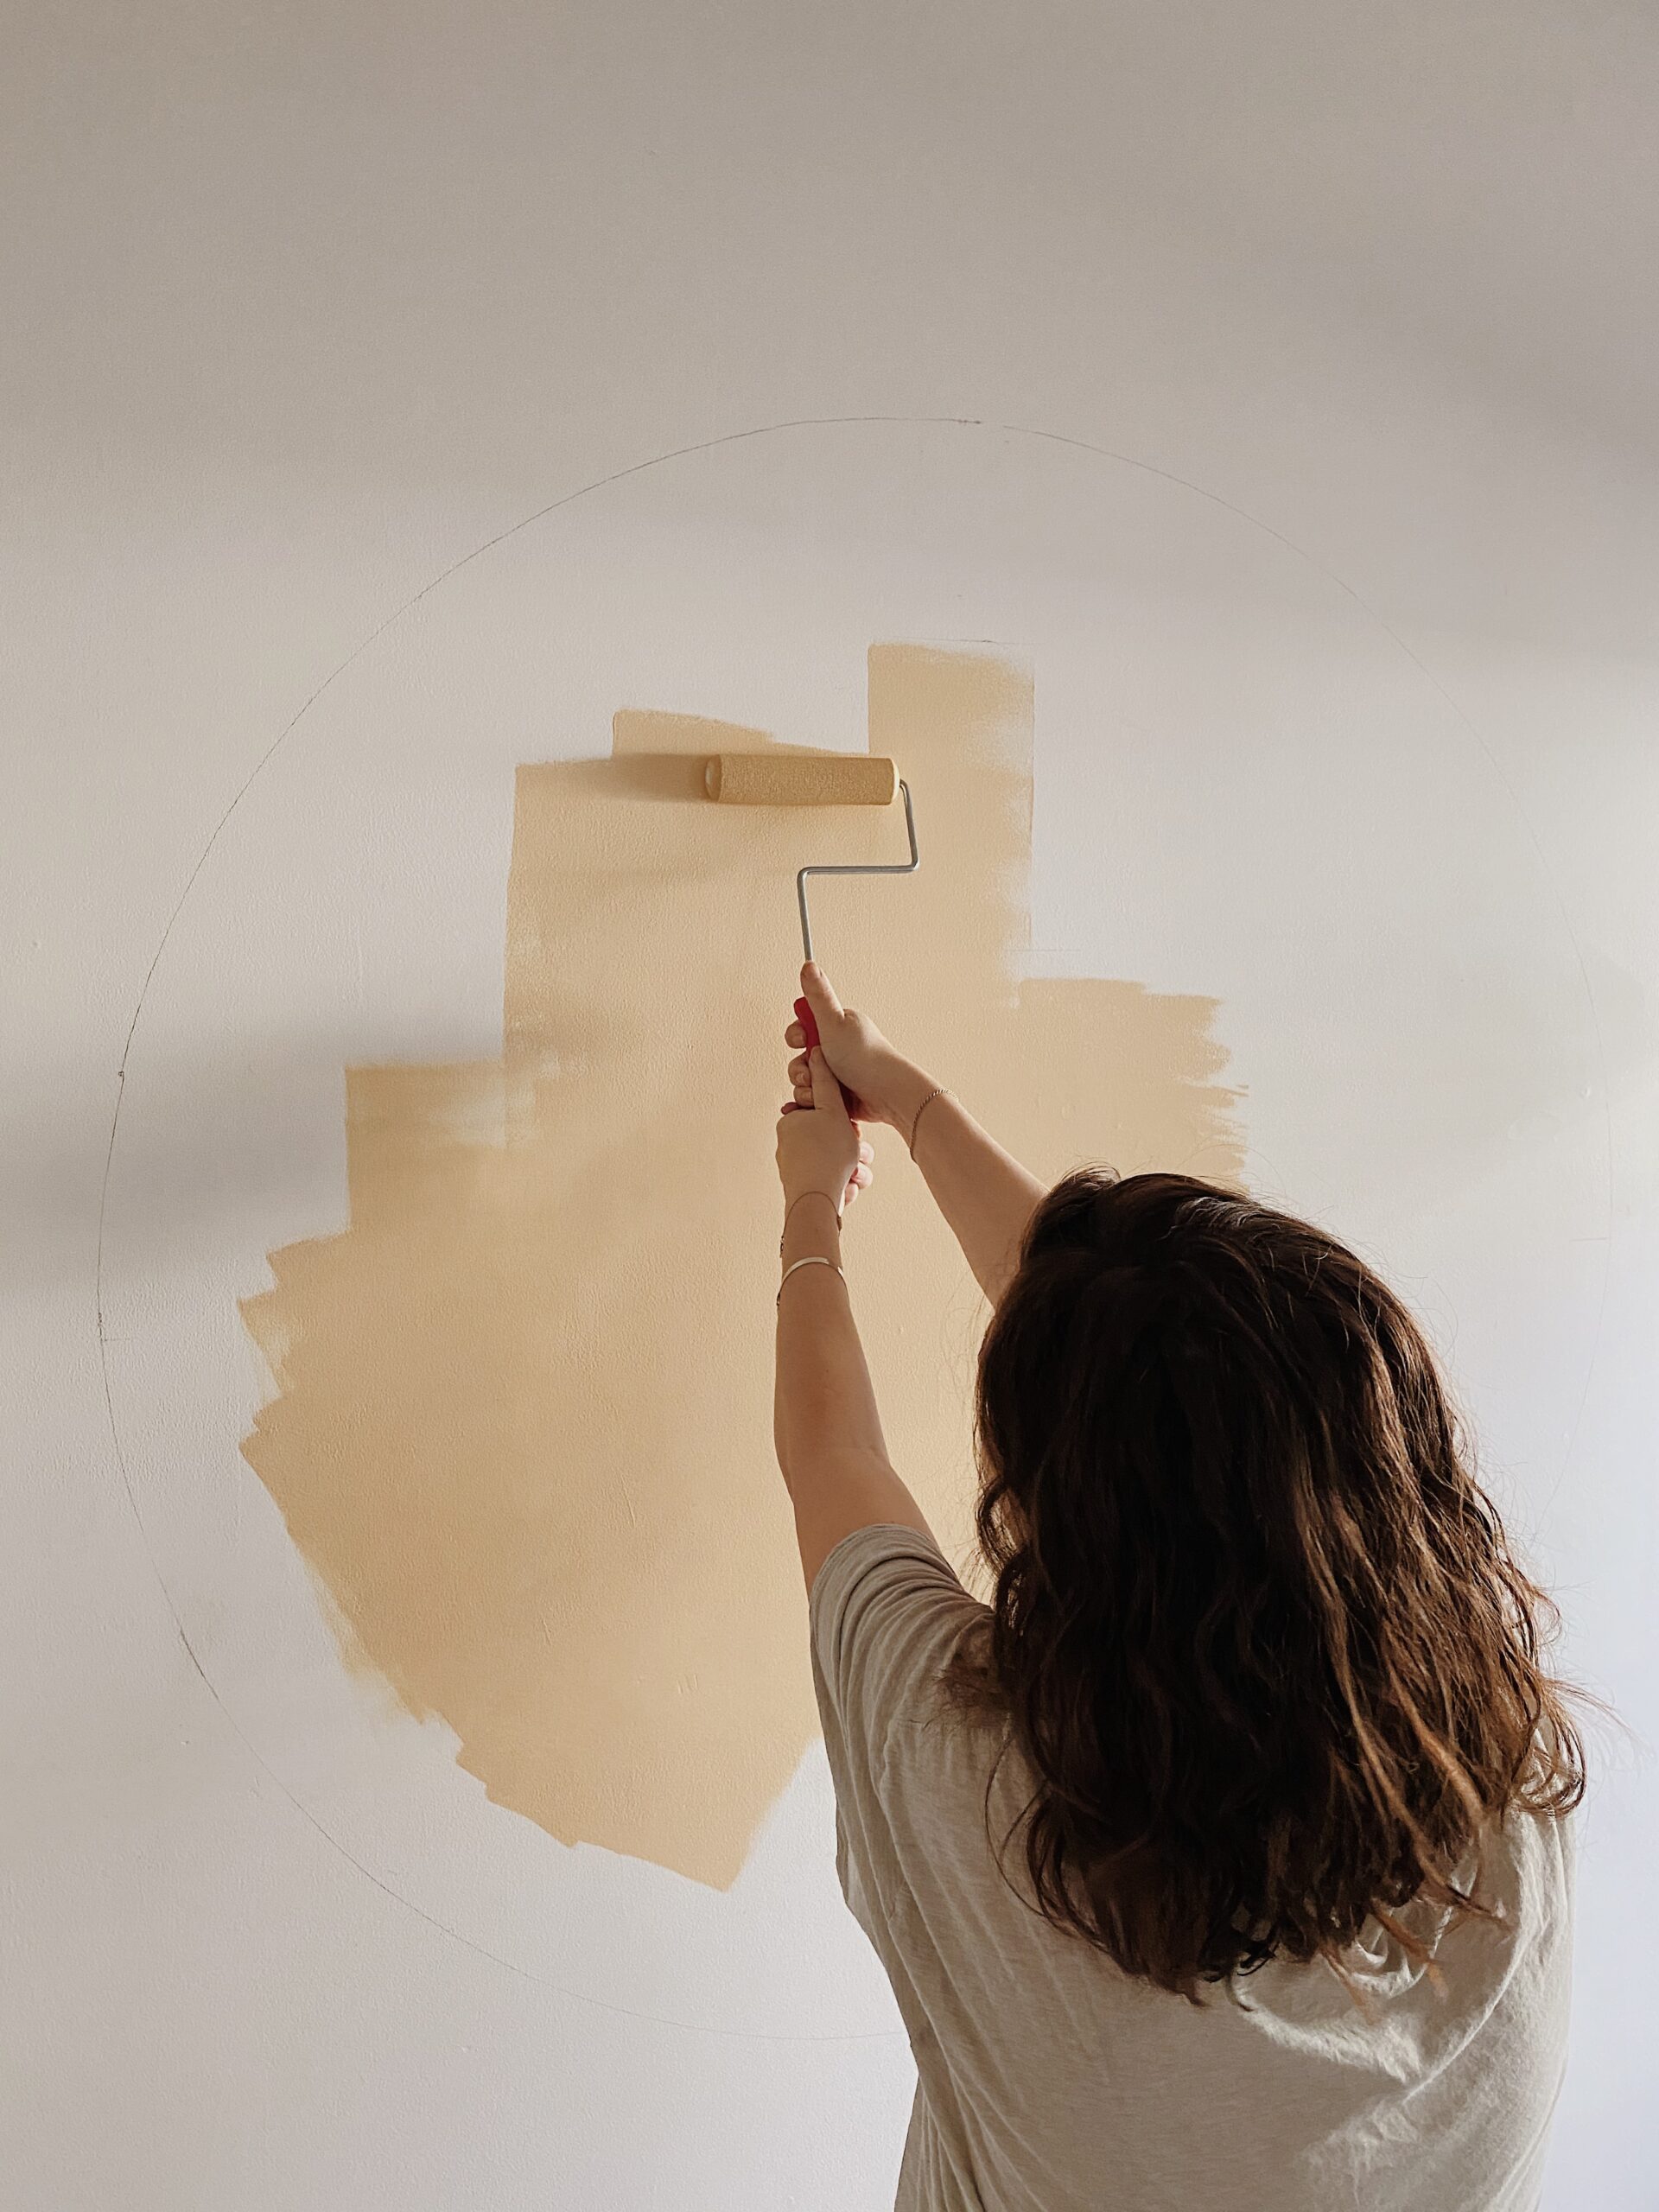
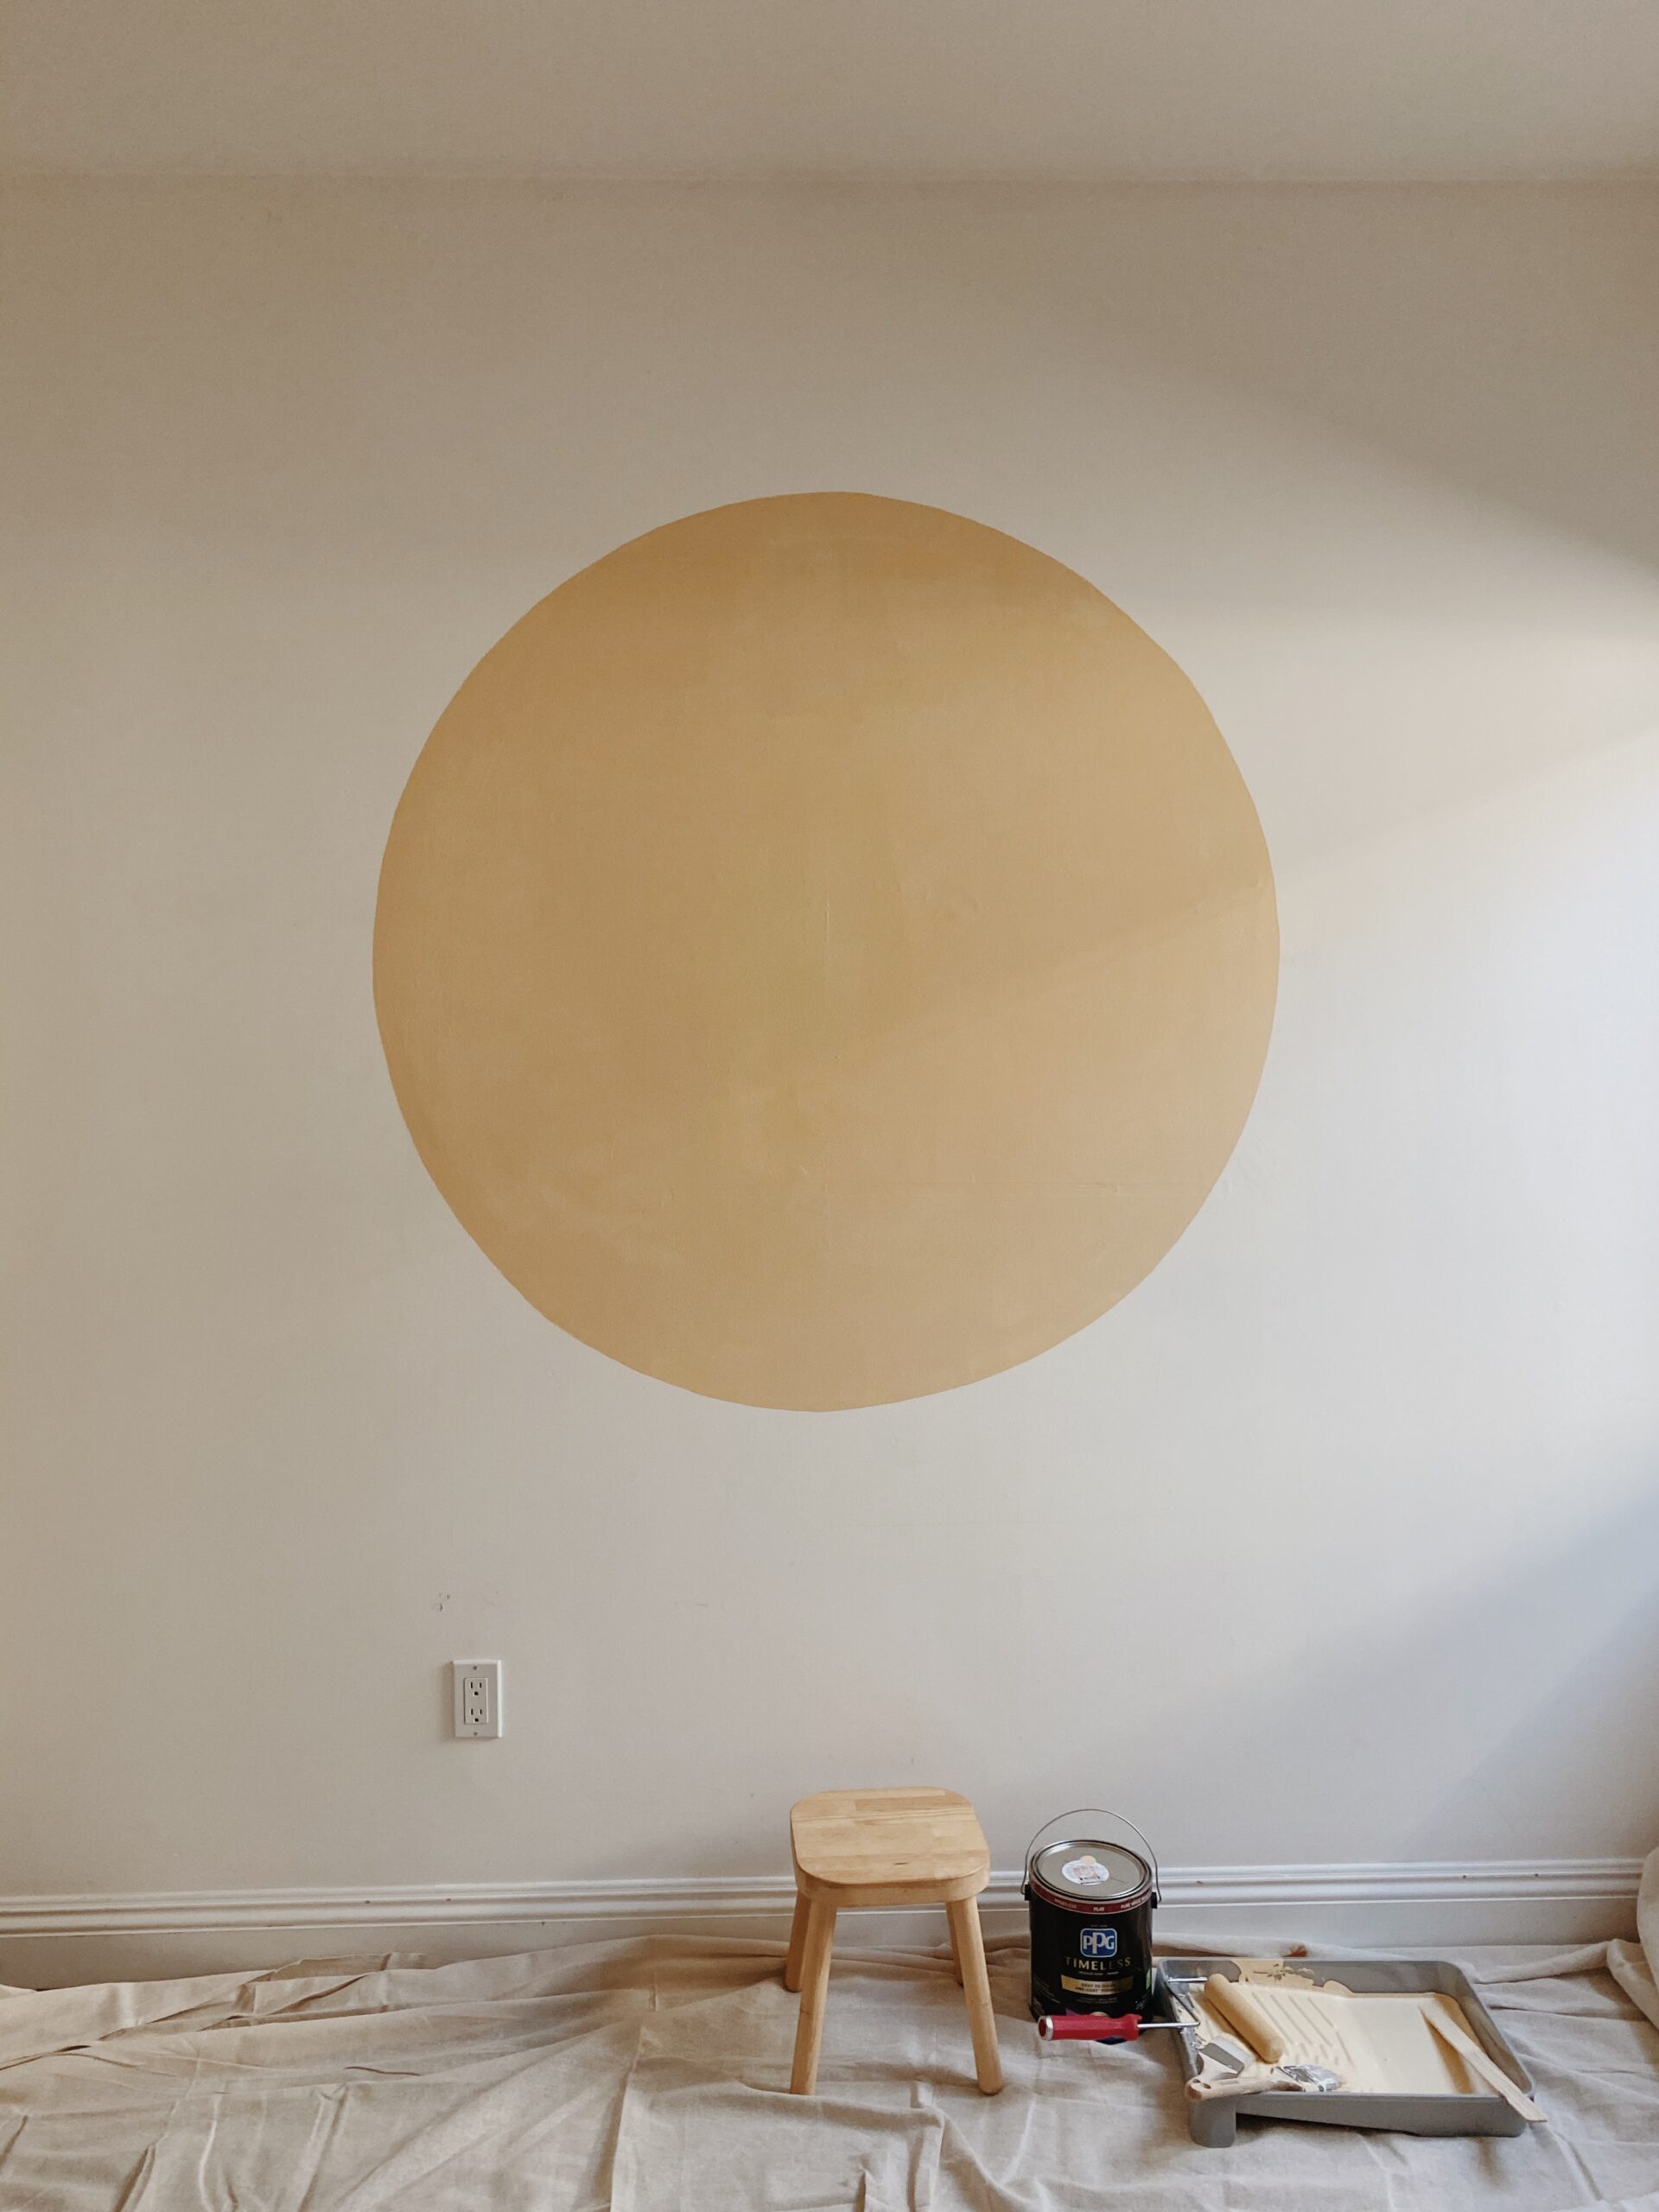
step two : paint
using a roller brush, do the inside of your circle and get as close as you can to the edge without having to get too detailed yet. once your circle is filled in, you can go in to with a brush to start on the edge.
obviously the edge is much more precise, so i used a high quality angled brush (when you get higher quality brushes you won’t have to worry about any hairs). i just put music on and took my time with the edge, you want to work really slowly. keep stepping back to make sure it’s looking good.
it seems really hard, but as long as you’re comfortable with a paint brush i think it’s pretty doable! you can also fix mistakes if you have your original wall paint color later.
step three: get your wood shelves cut
ok so this part requires math, and I’m going to say “shelf/shelves” a lot. once your circle is painted, you’ll measure the exact height and the exact width (at the center). if they’re the same number, congrats you just drew a perfect circle!! WAIT BUT HOW DID YOU DO THAT? mine was not exactly equal, so that just makes the math somewhat trickier.
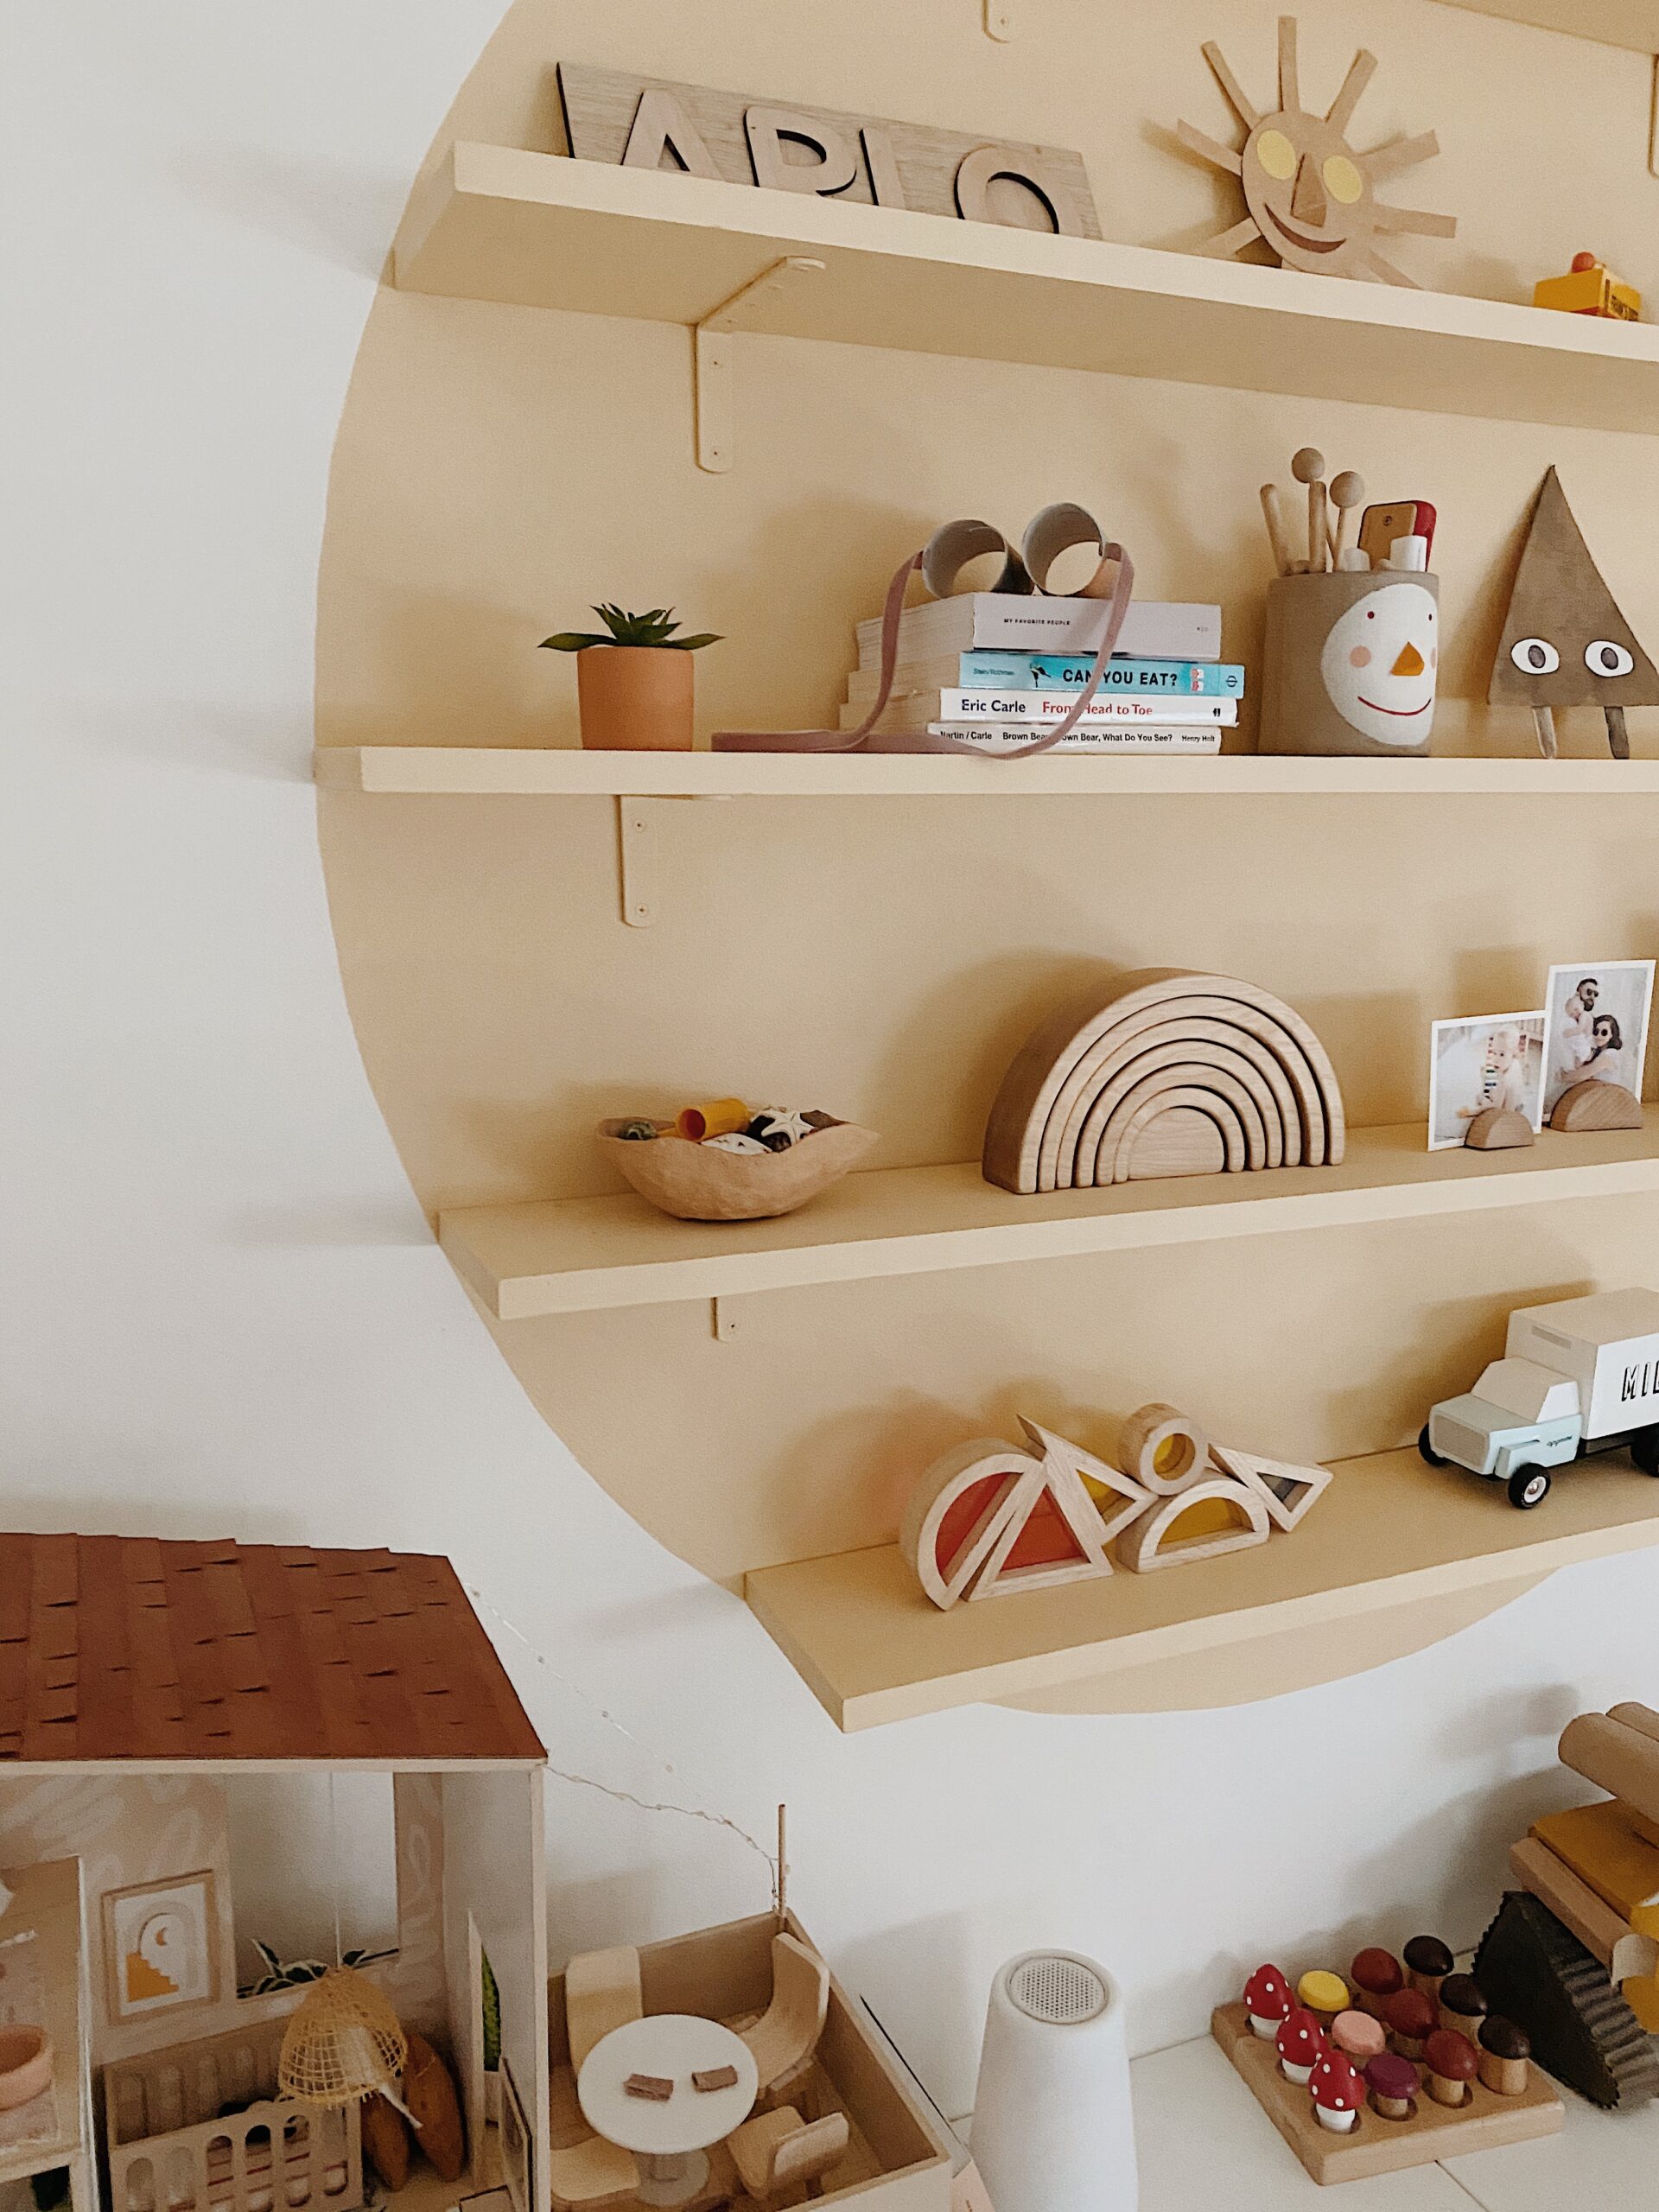
decide how many shelves you want to use, and then determine how spread-out they will be. we did 5 shelves that gave us about 9 inches of vertical space between each one. if you want a certain number of shelves you can math it out, just subtract the total thickness of all your shelves from the vertical circle measurement, and then divide that leftover space by the number of shelves.
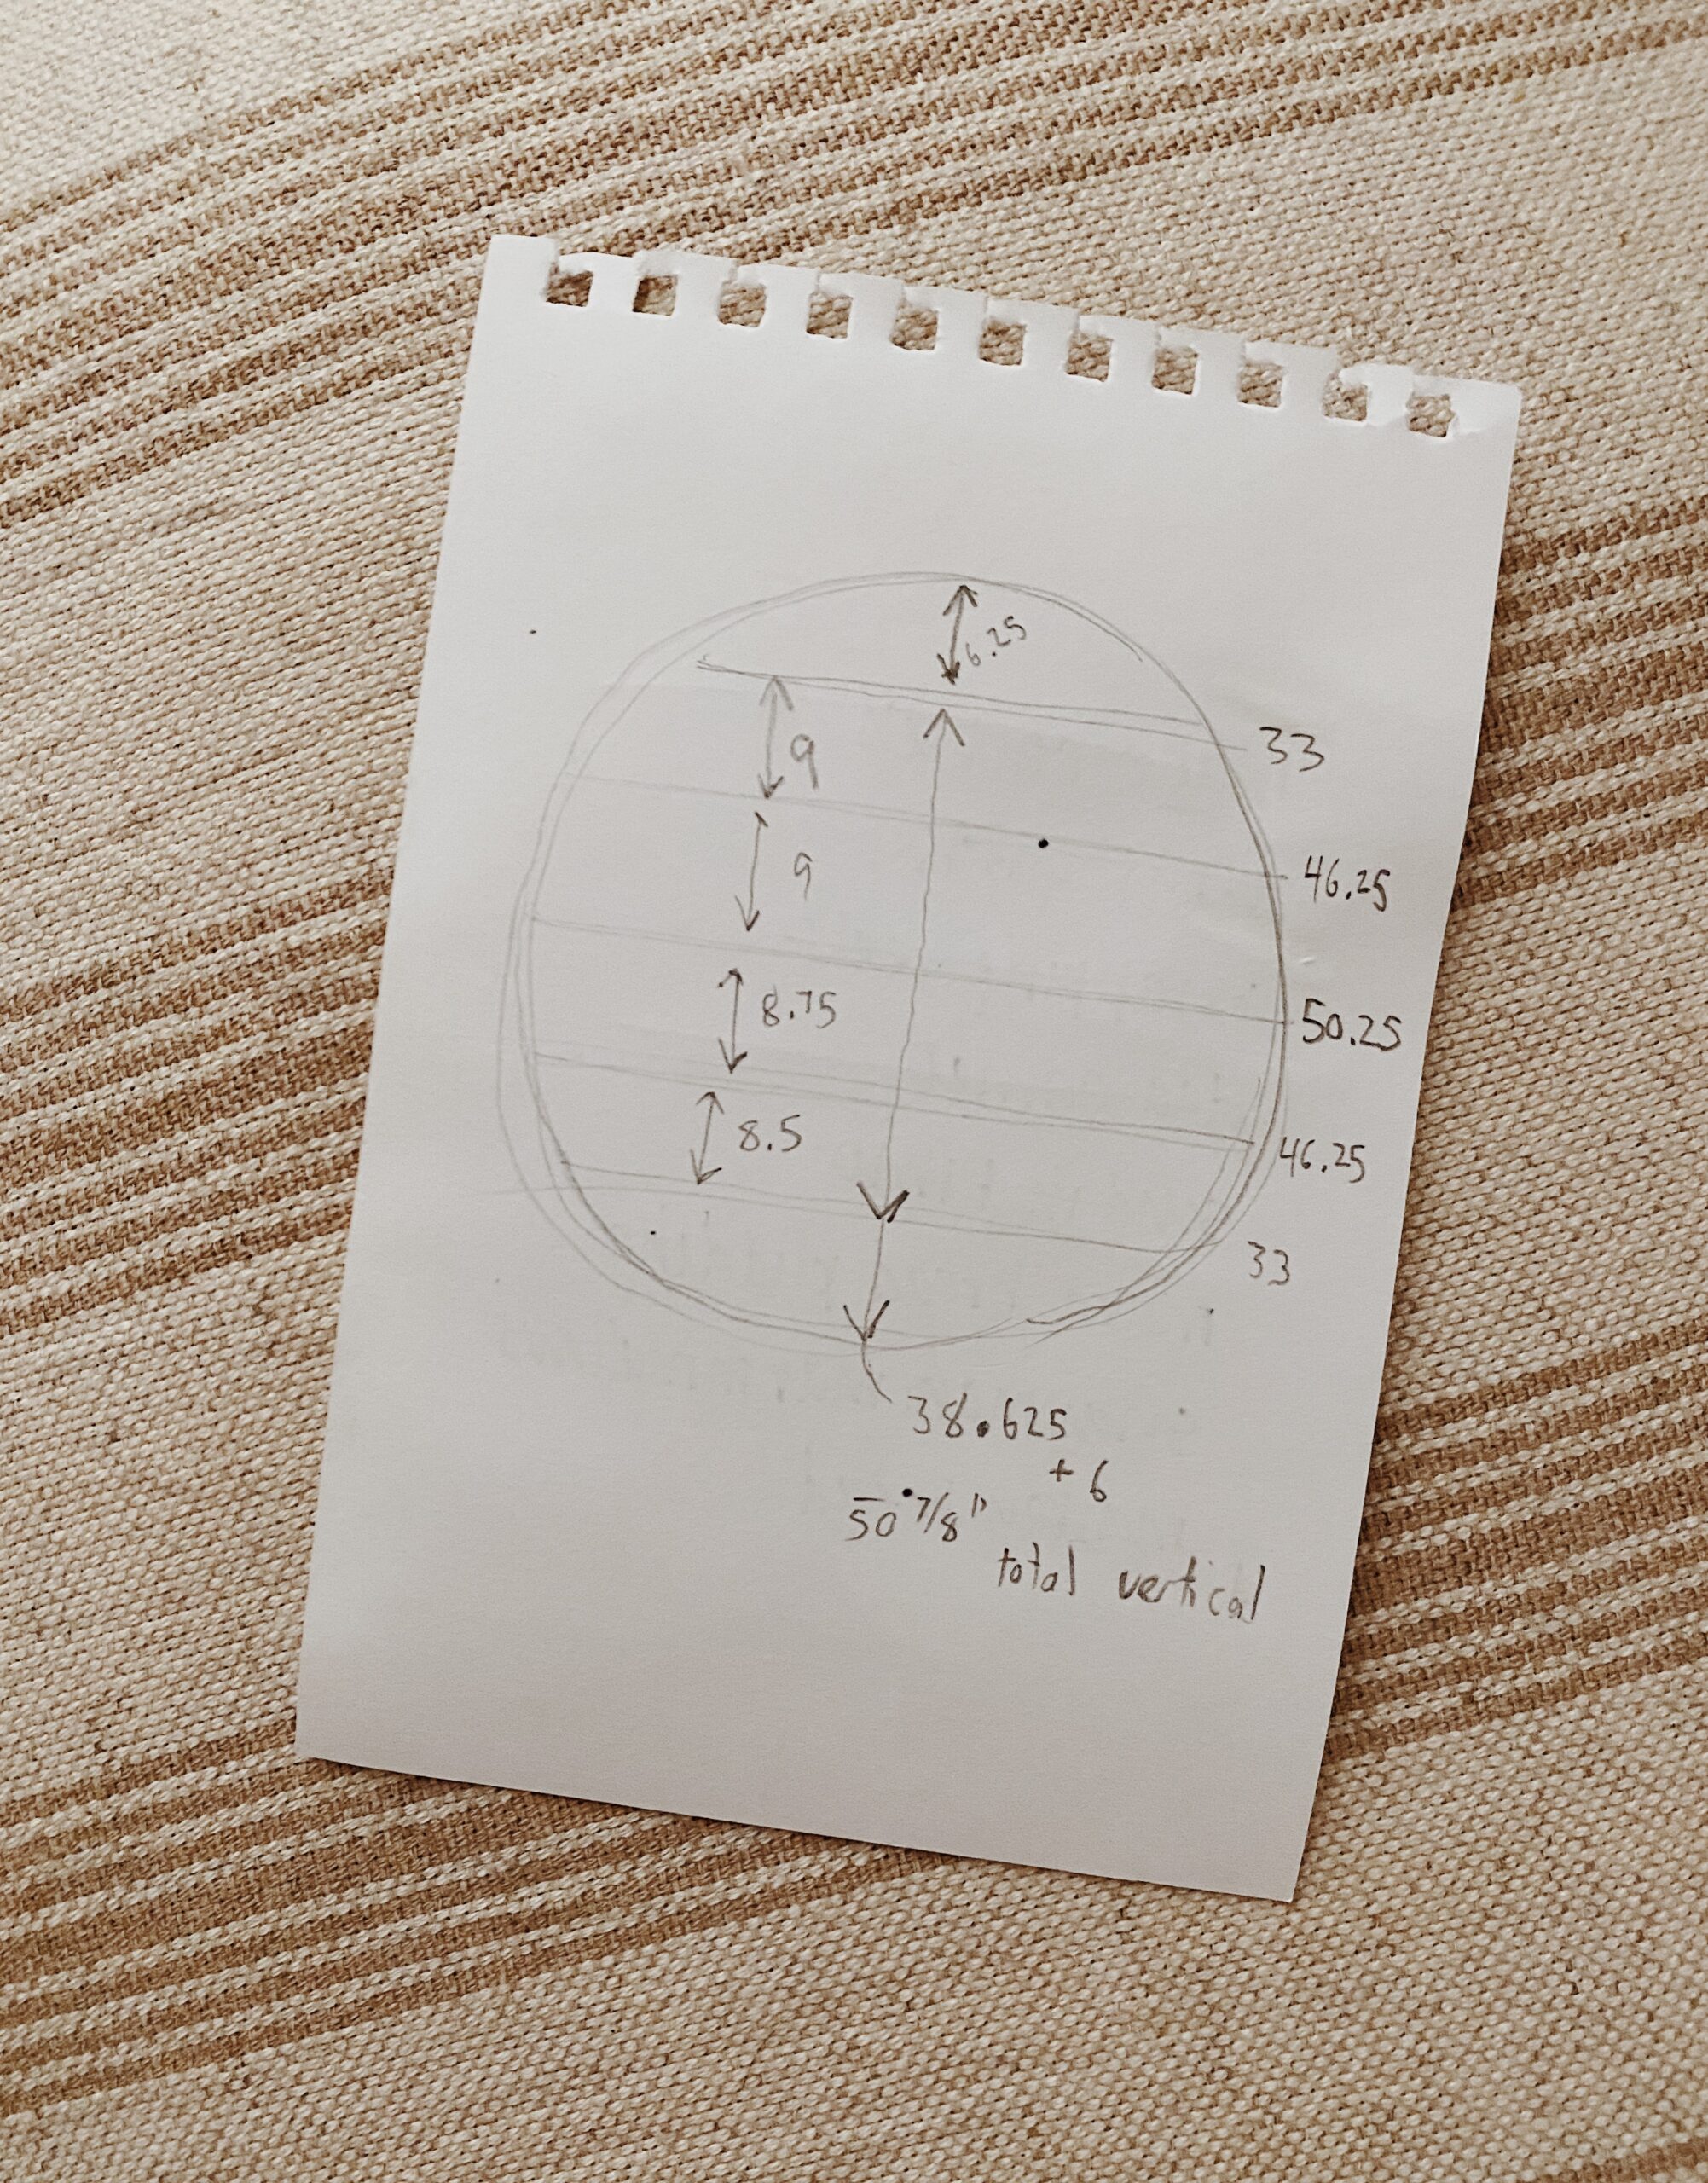
this is gids sketch prior to having the shelves cut!
here’s an example: a 10″ circle with two 1″ shelves would have 8″ of space left so, divided by 2 shelves would be 4″ between each shelf.
if you have a saw at home, then this is a step you can do yourself. but we went to the hardware store to do this. we chose an inexpensive poplar wood and gave the guy all the measurements, and then he cut them to size for us.
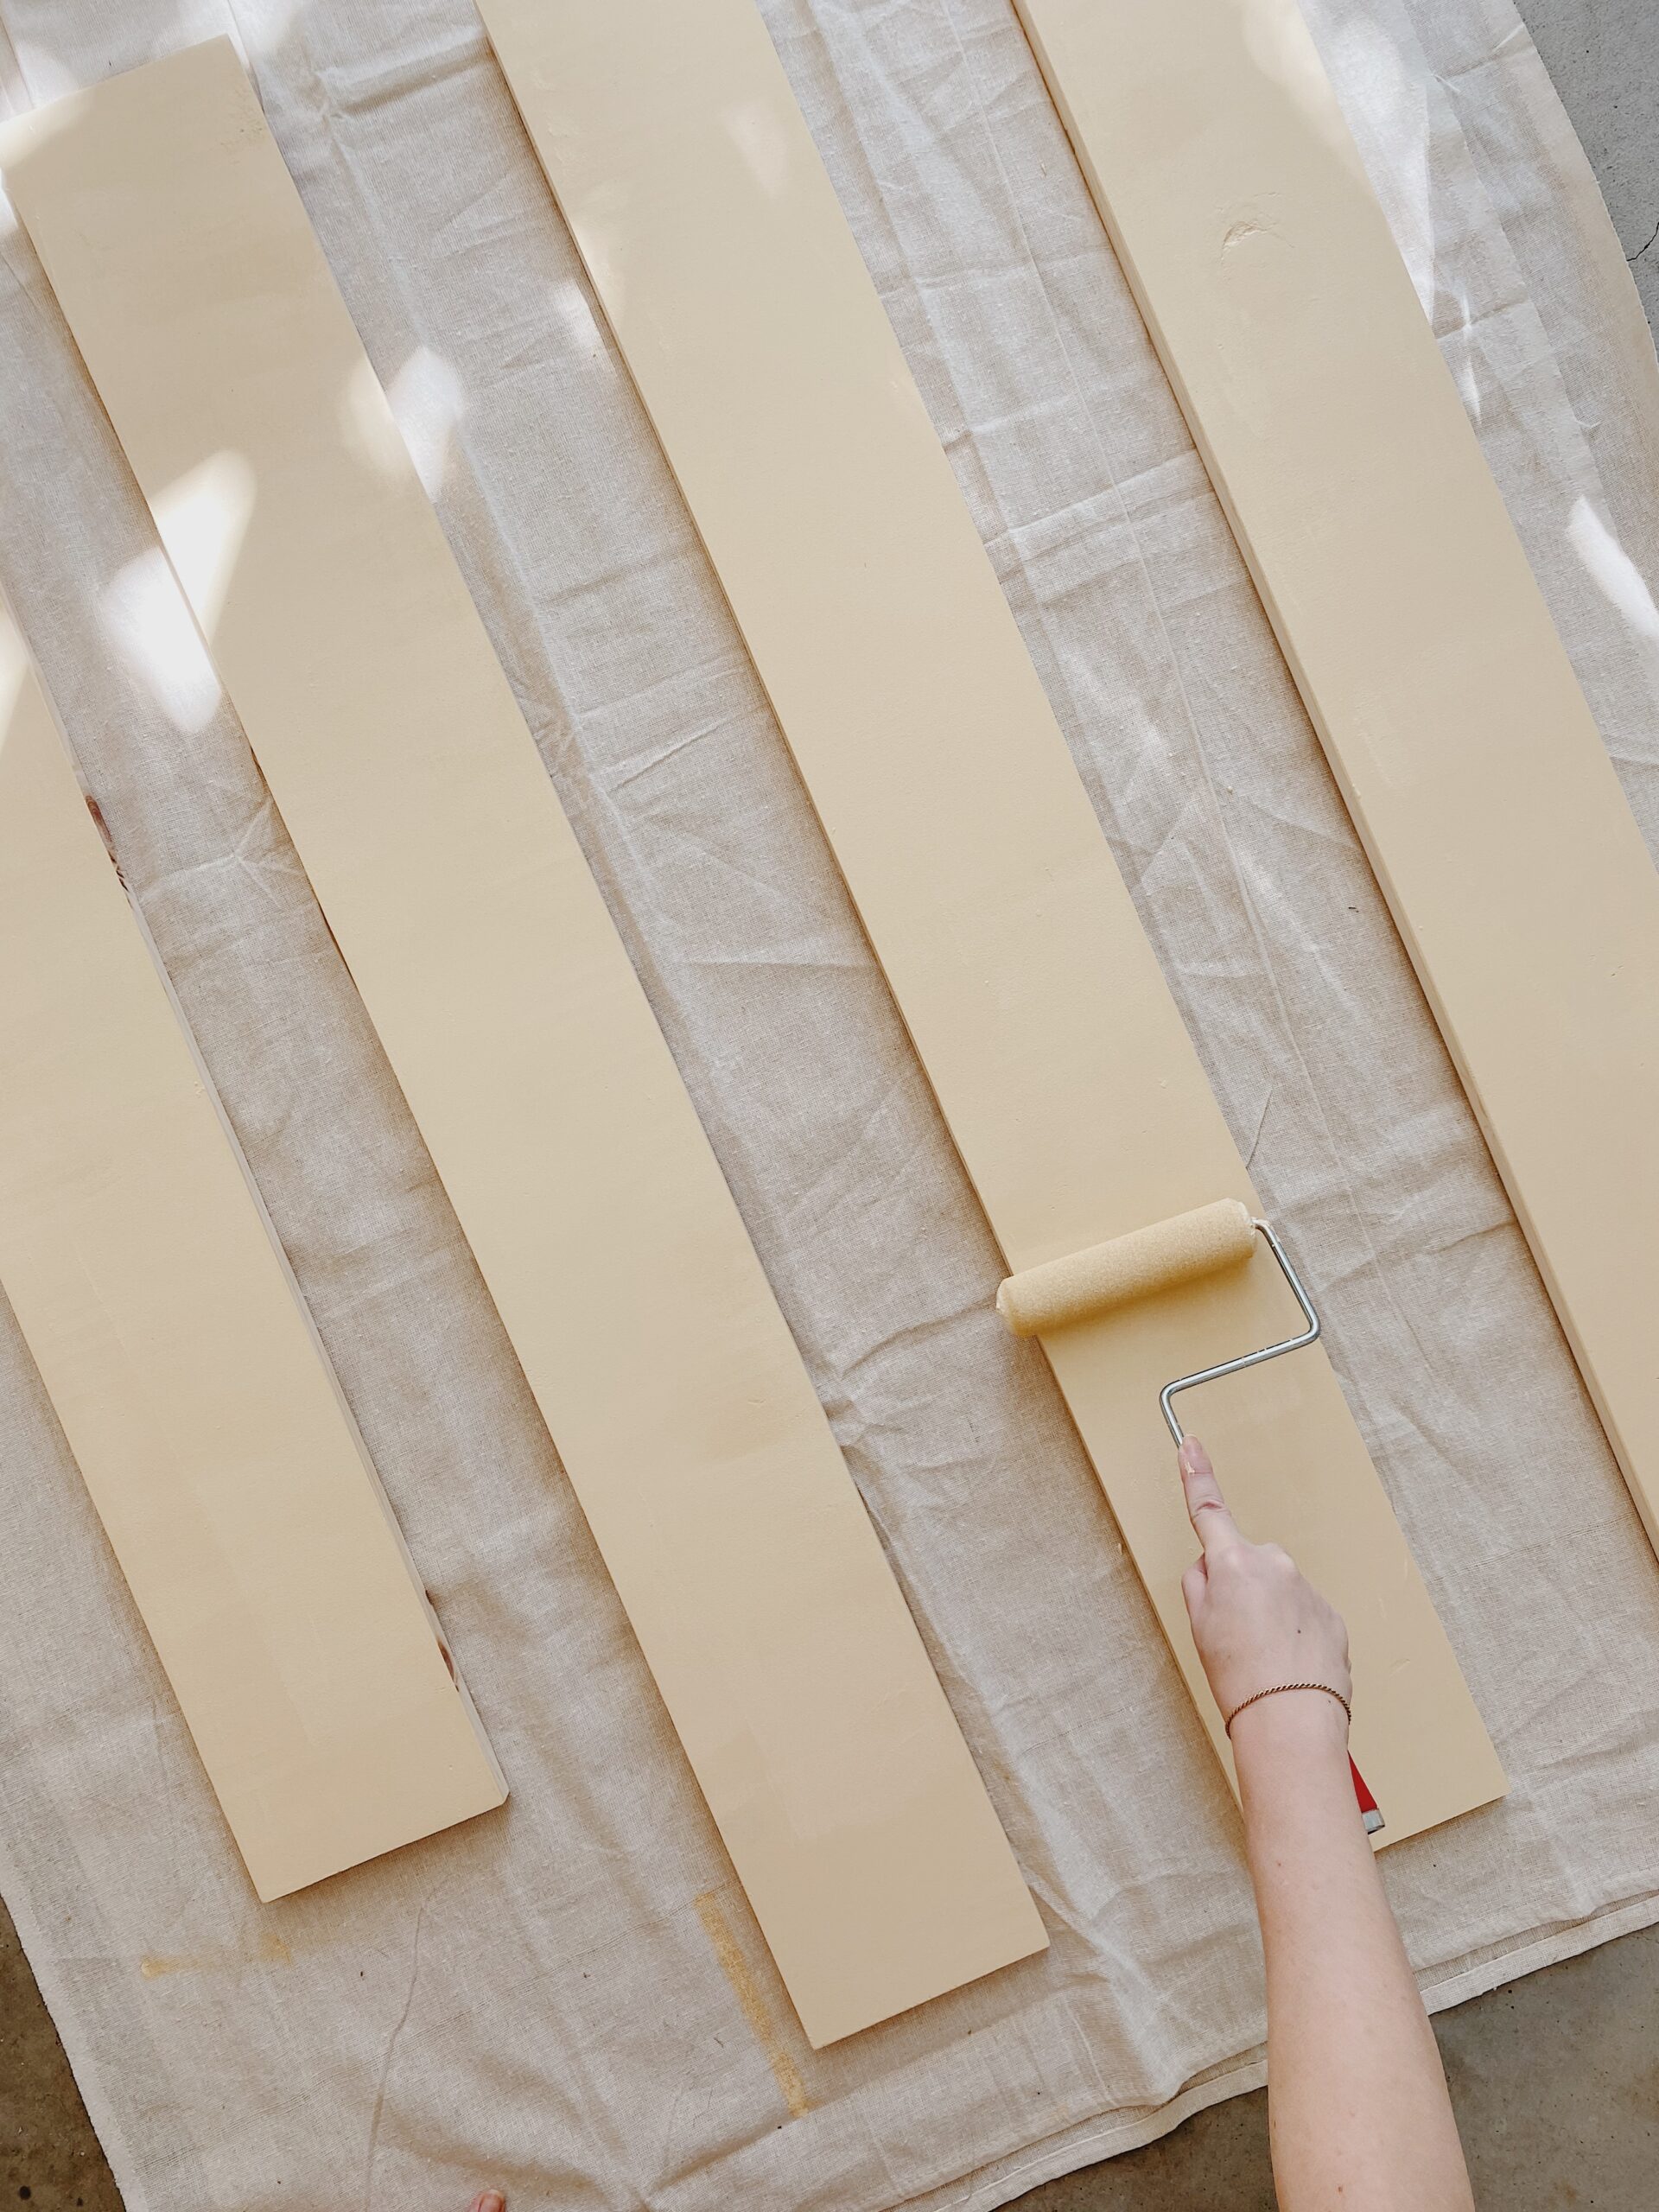
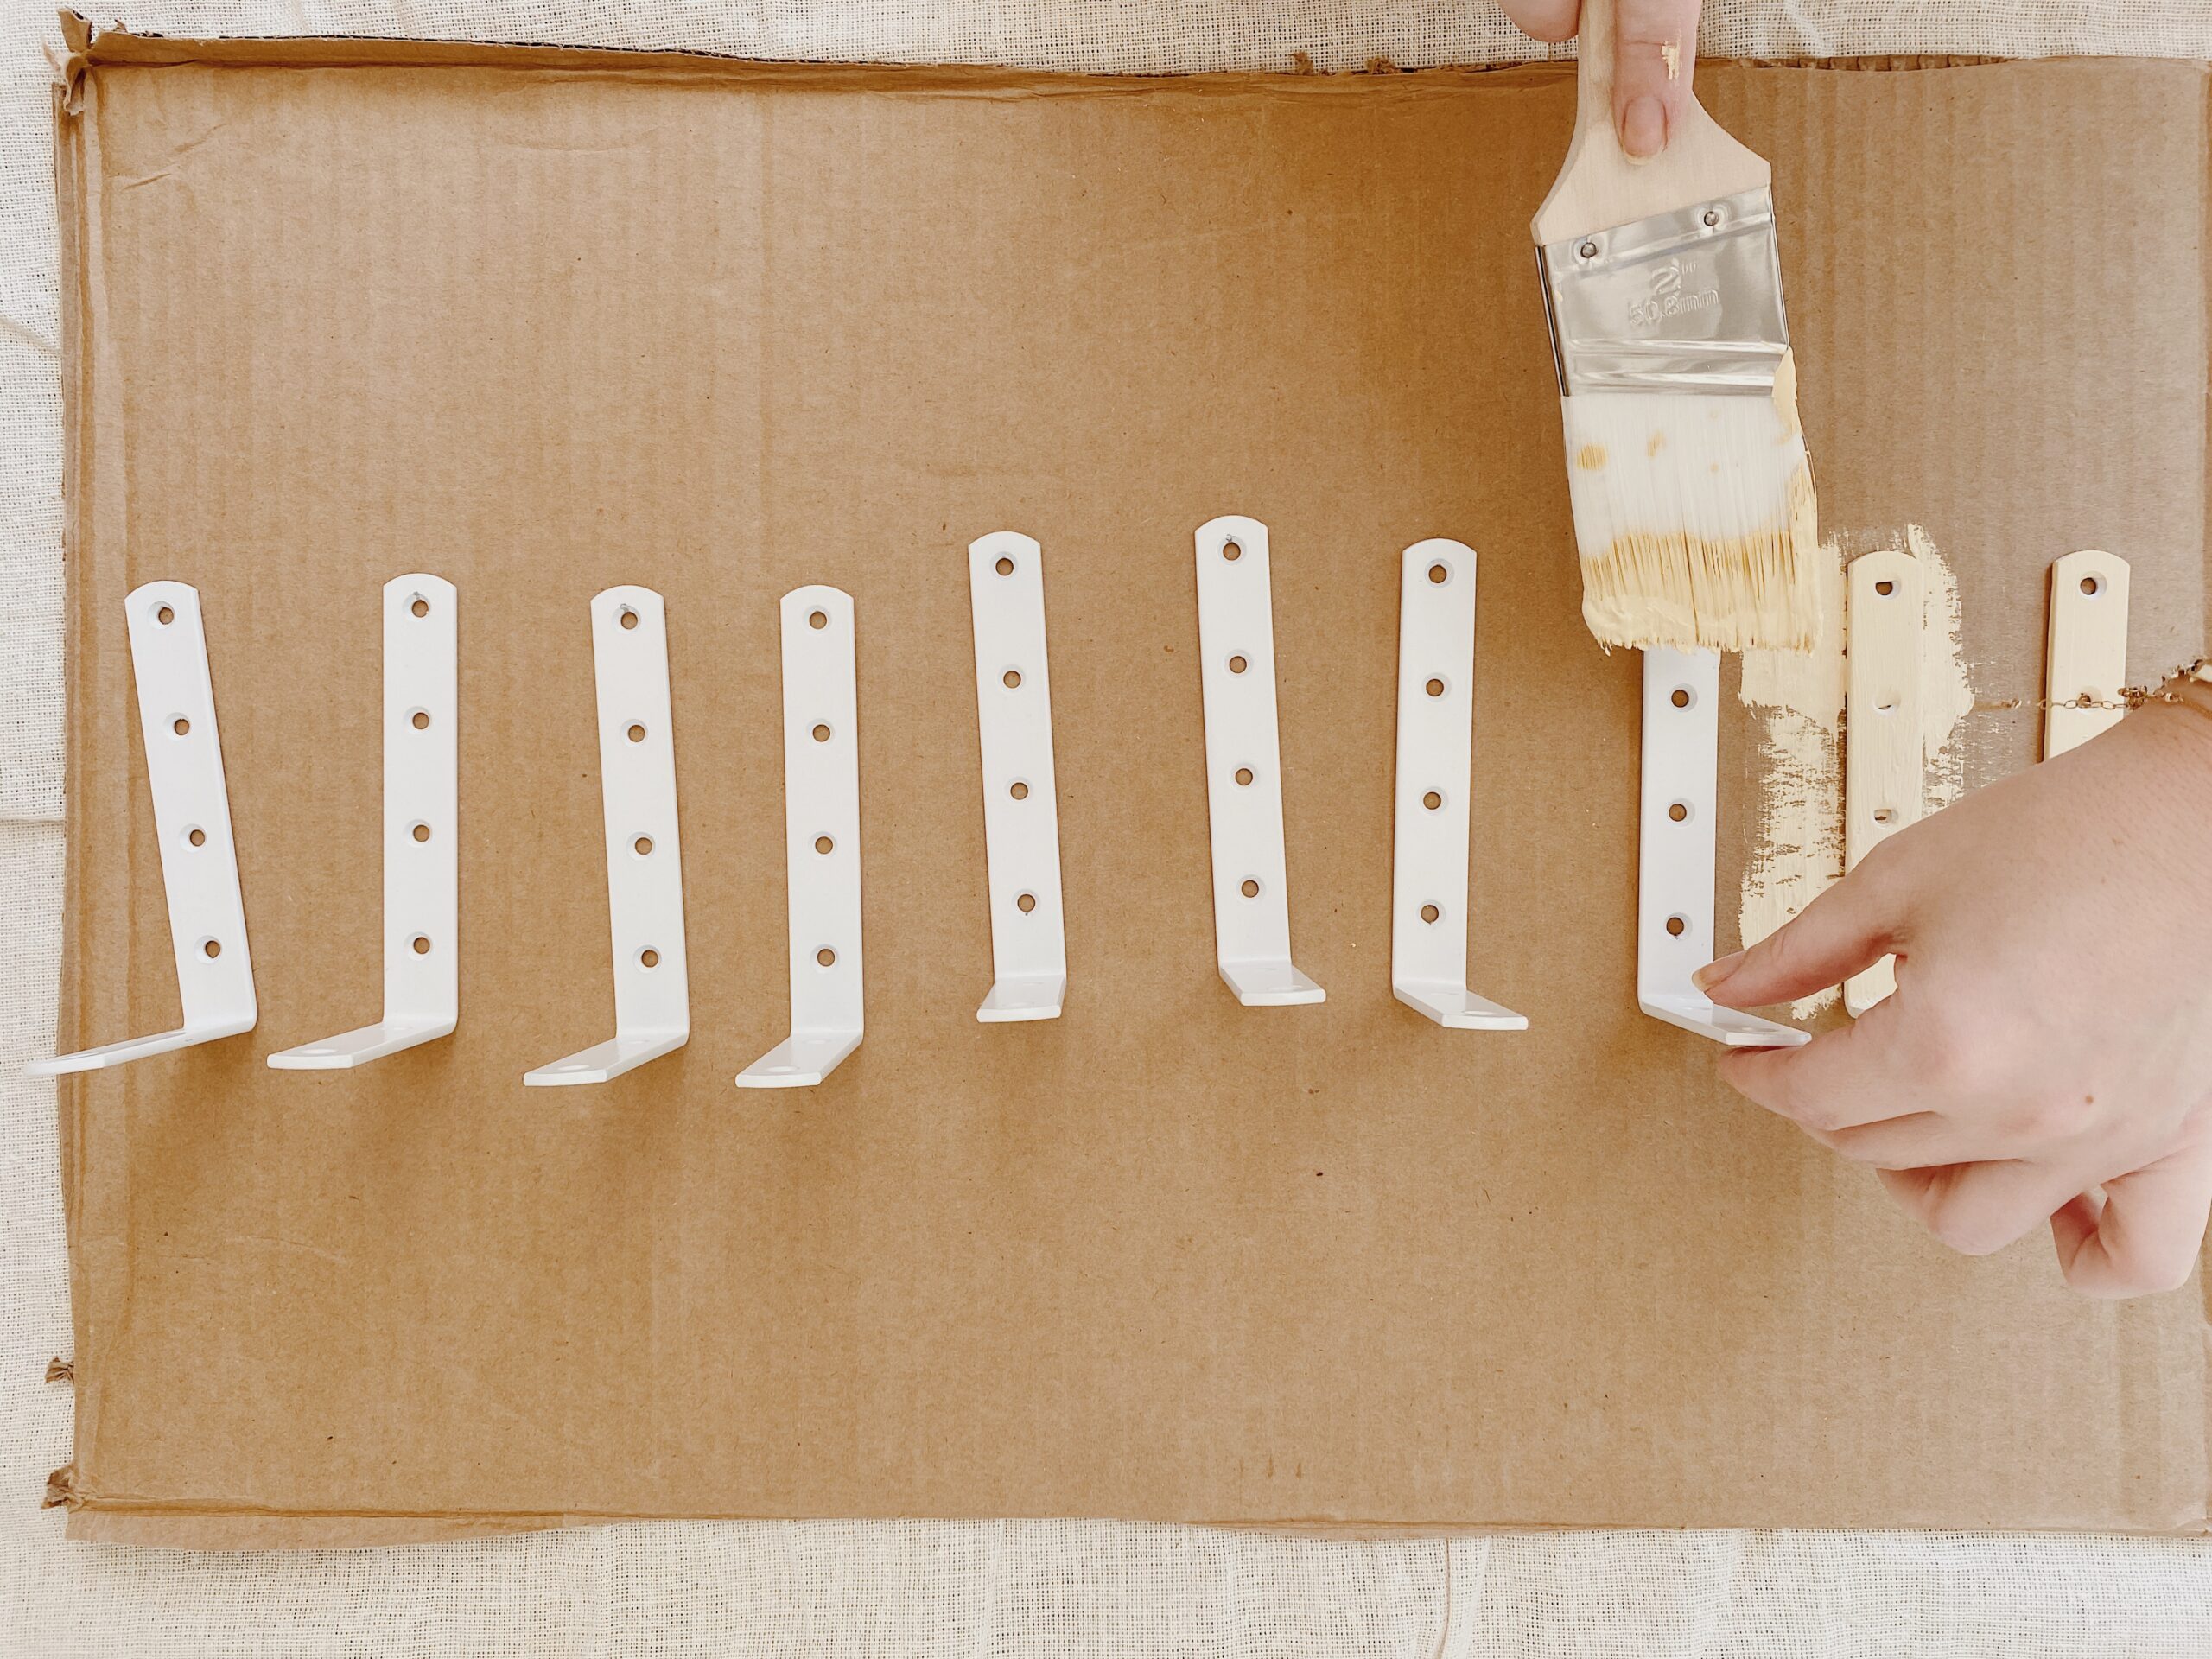
step four: paint your shelves and your hardware
use your roller to paint all your shelves, if your paint doesn’t have primer you may want to prime them first. once dry, flip and do the other side and then paint the edges.
for the brackets, i was worried about painting metal and the potential chipping, but figured since we don’t actually have much contact with the brackets they might hold up fine. so far so good! i also painted the screws once hung the second time we hung them. it really helps make it look even more seamless.
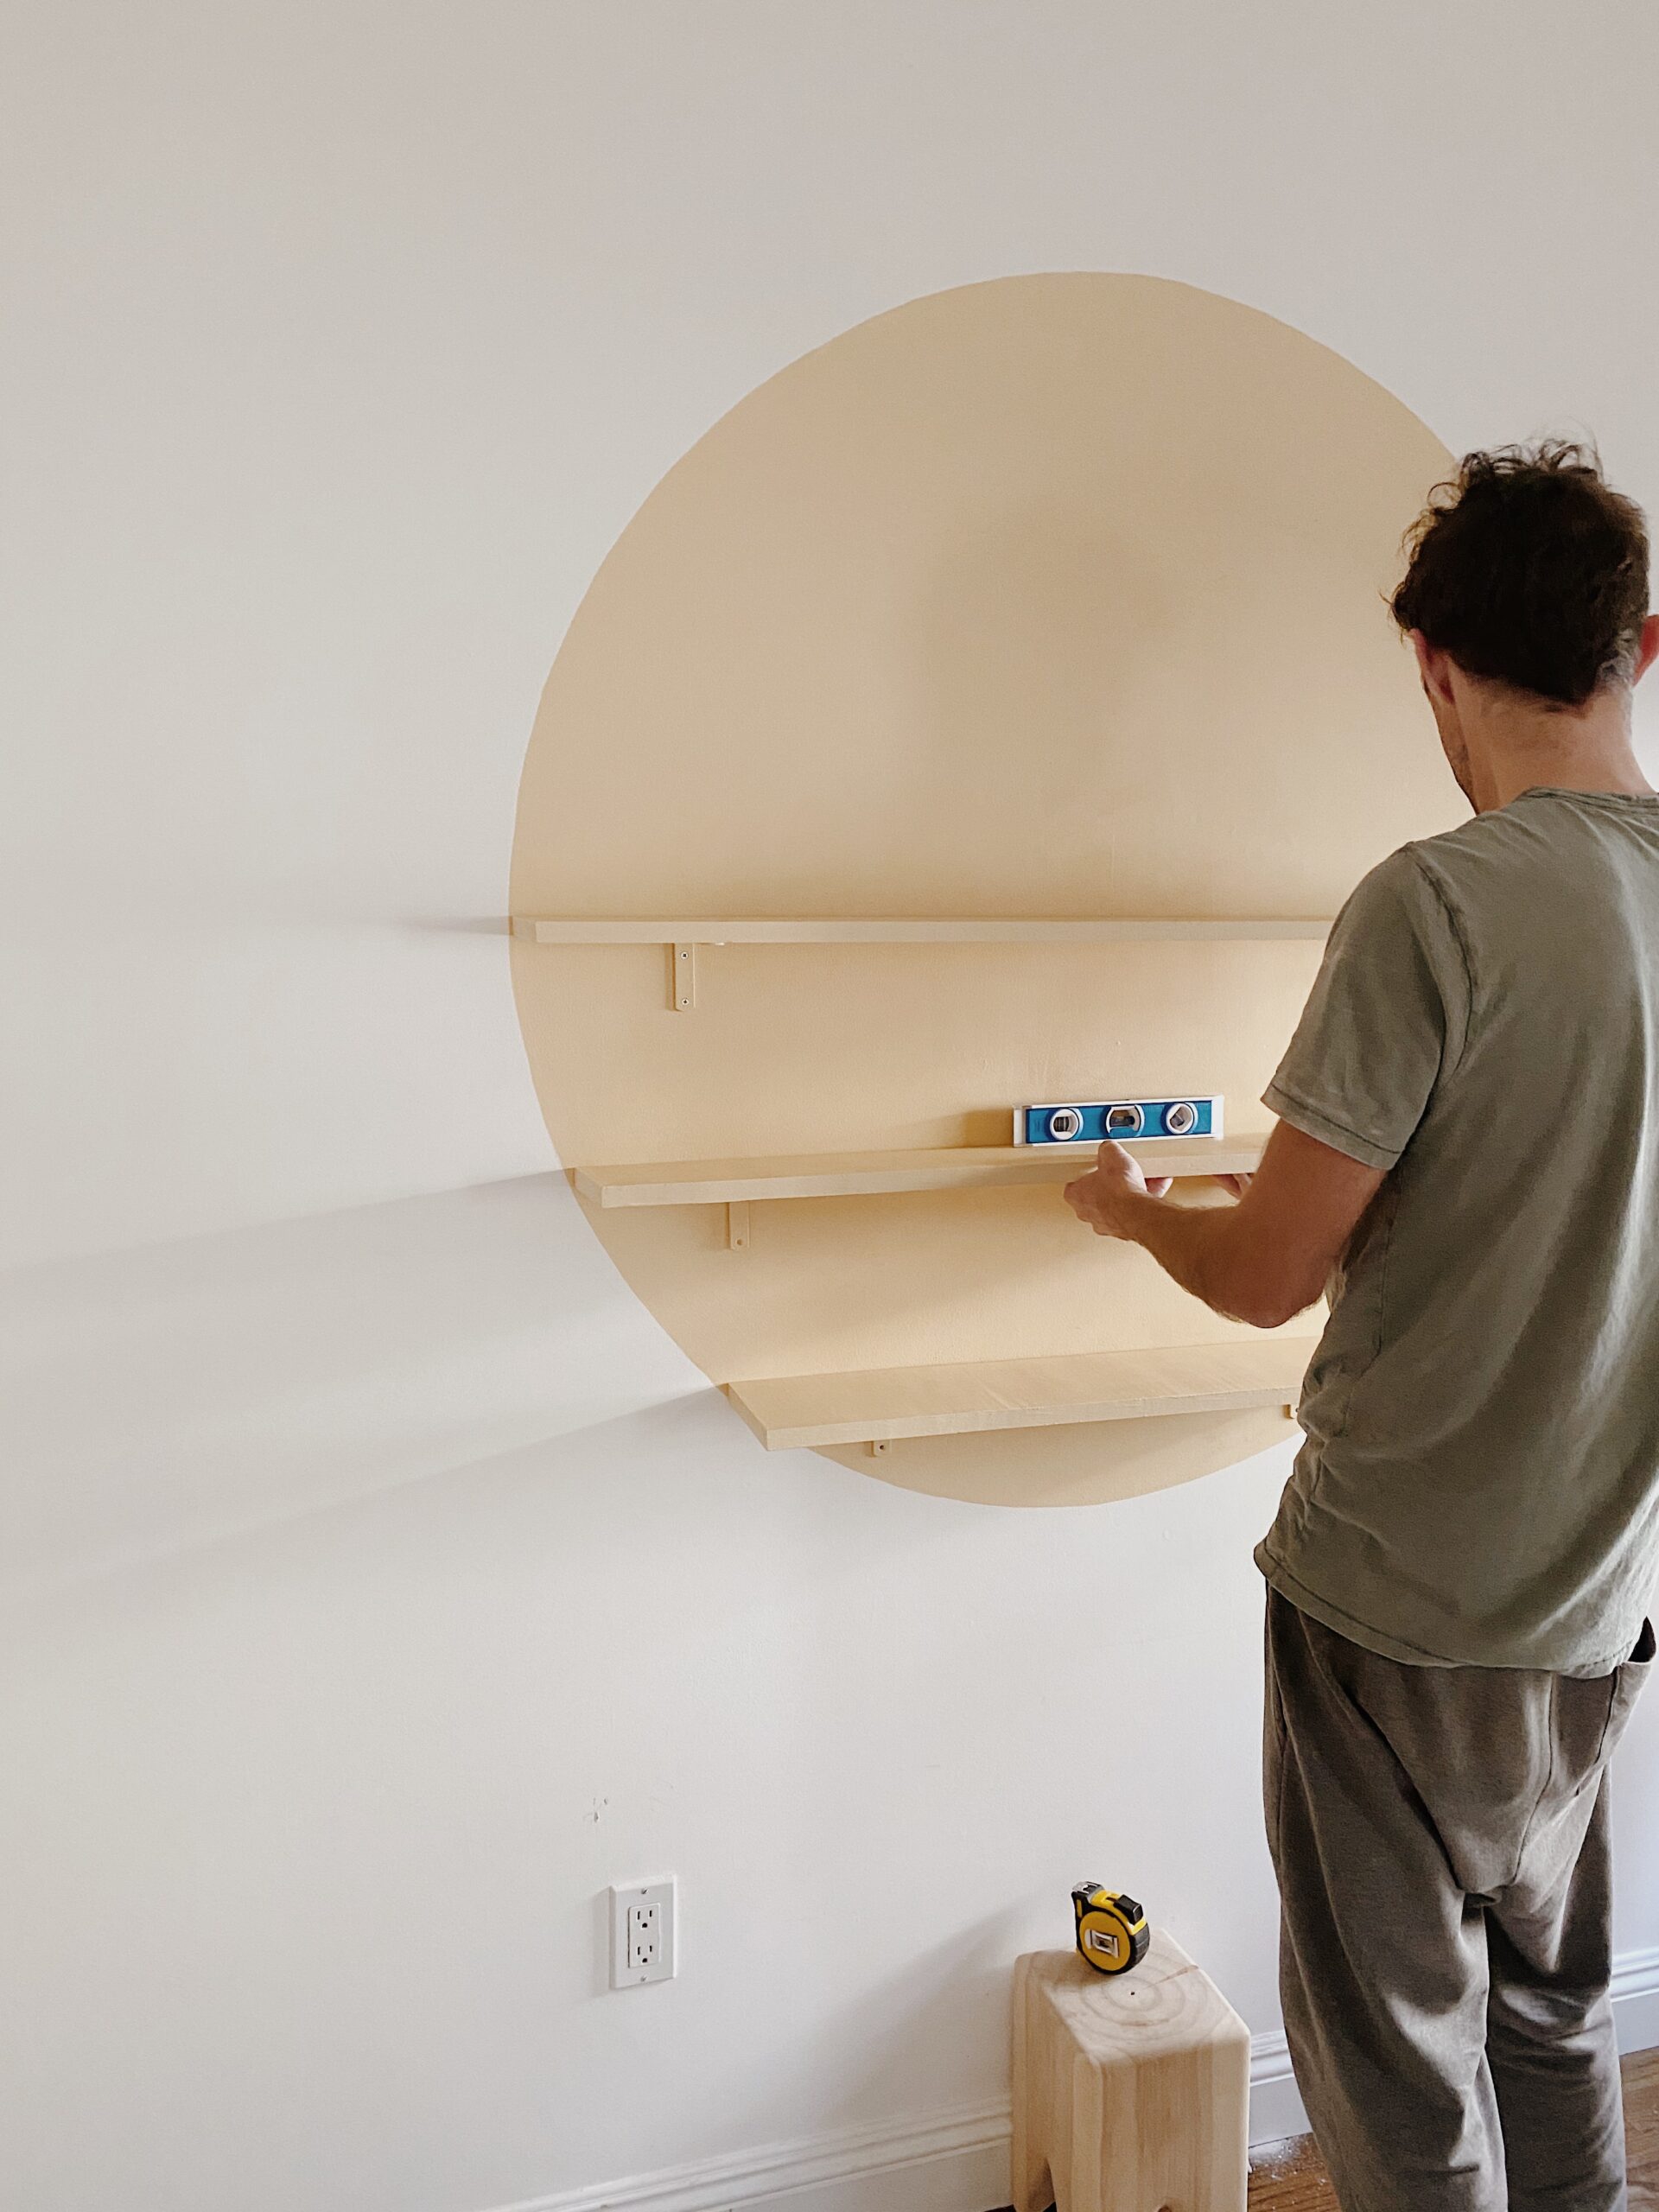
step five: hang your shelves (by gid)
attach the brackets to your shelves, paying attention to which side of the wood you want to show on top (or want to show on the bottom, if the shelf is higher than eye-height)
as you mark holes for your brackets, butt each shelf up against something perpendicular (like a floorboard or a book) as a stand-in for your wall. This will ensure your shelves will be flush against the wall when you hang them
mark the spots on each shelf where the brackets will attach while they are butted up against your perpendicular stand-in thing.
the space between the brackets is up to you, but you want them at least a few inches inside of the outer edge of the shelf. (you can do a bunch of math to make the brackets identical on each shelf, but that’s specific to your various shelf lengths)
since you measured and cut the shelves to fit a specific part of the circle, the easy part is figuring out where each shelf goes. just hold it up to the circle and see where the ends of the shelf line up. If your measurements were sound, the shelves should have the right amount of vertical space between them.
when installing a shelf, hold it up in its spot with a level on top, and get it all aligned. Then mark where your brackets holes meet the wall. put the shelf down and make holes for your anchors. i used two drywall anchors per shelf instead of 4 because it’s not supposed to hold anything super heavy and I work smart not hard.
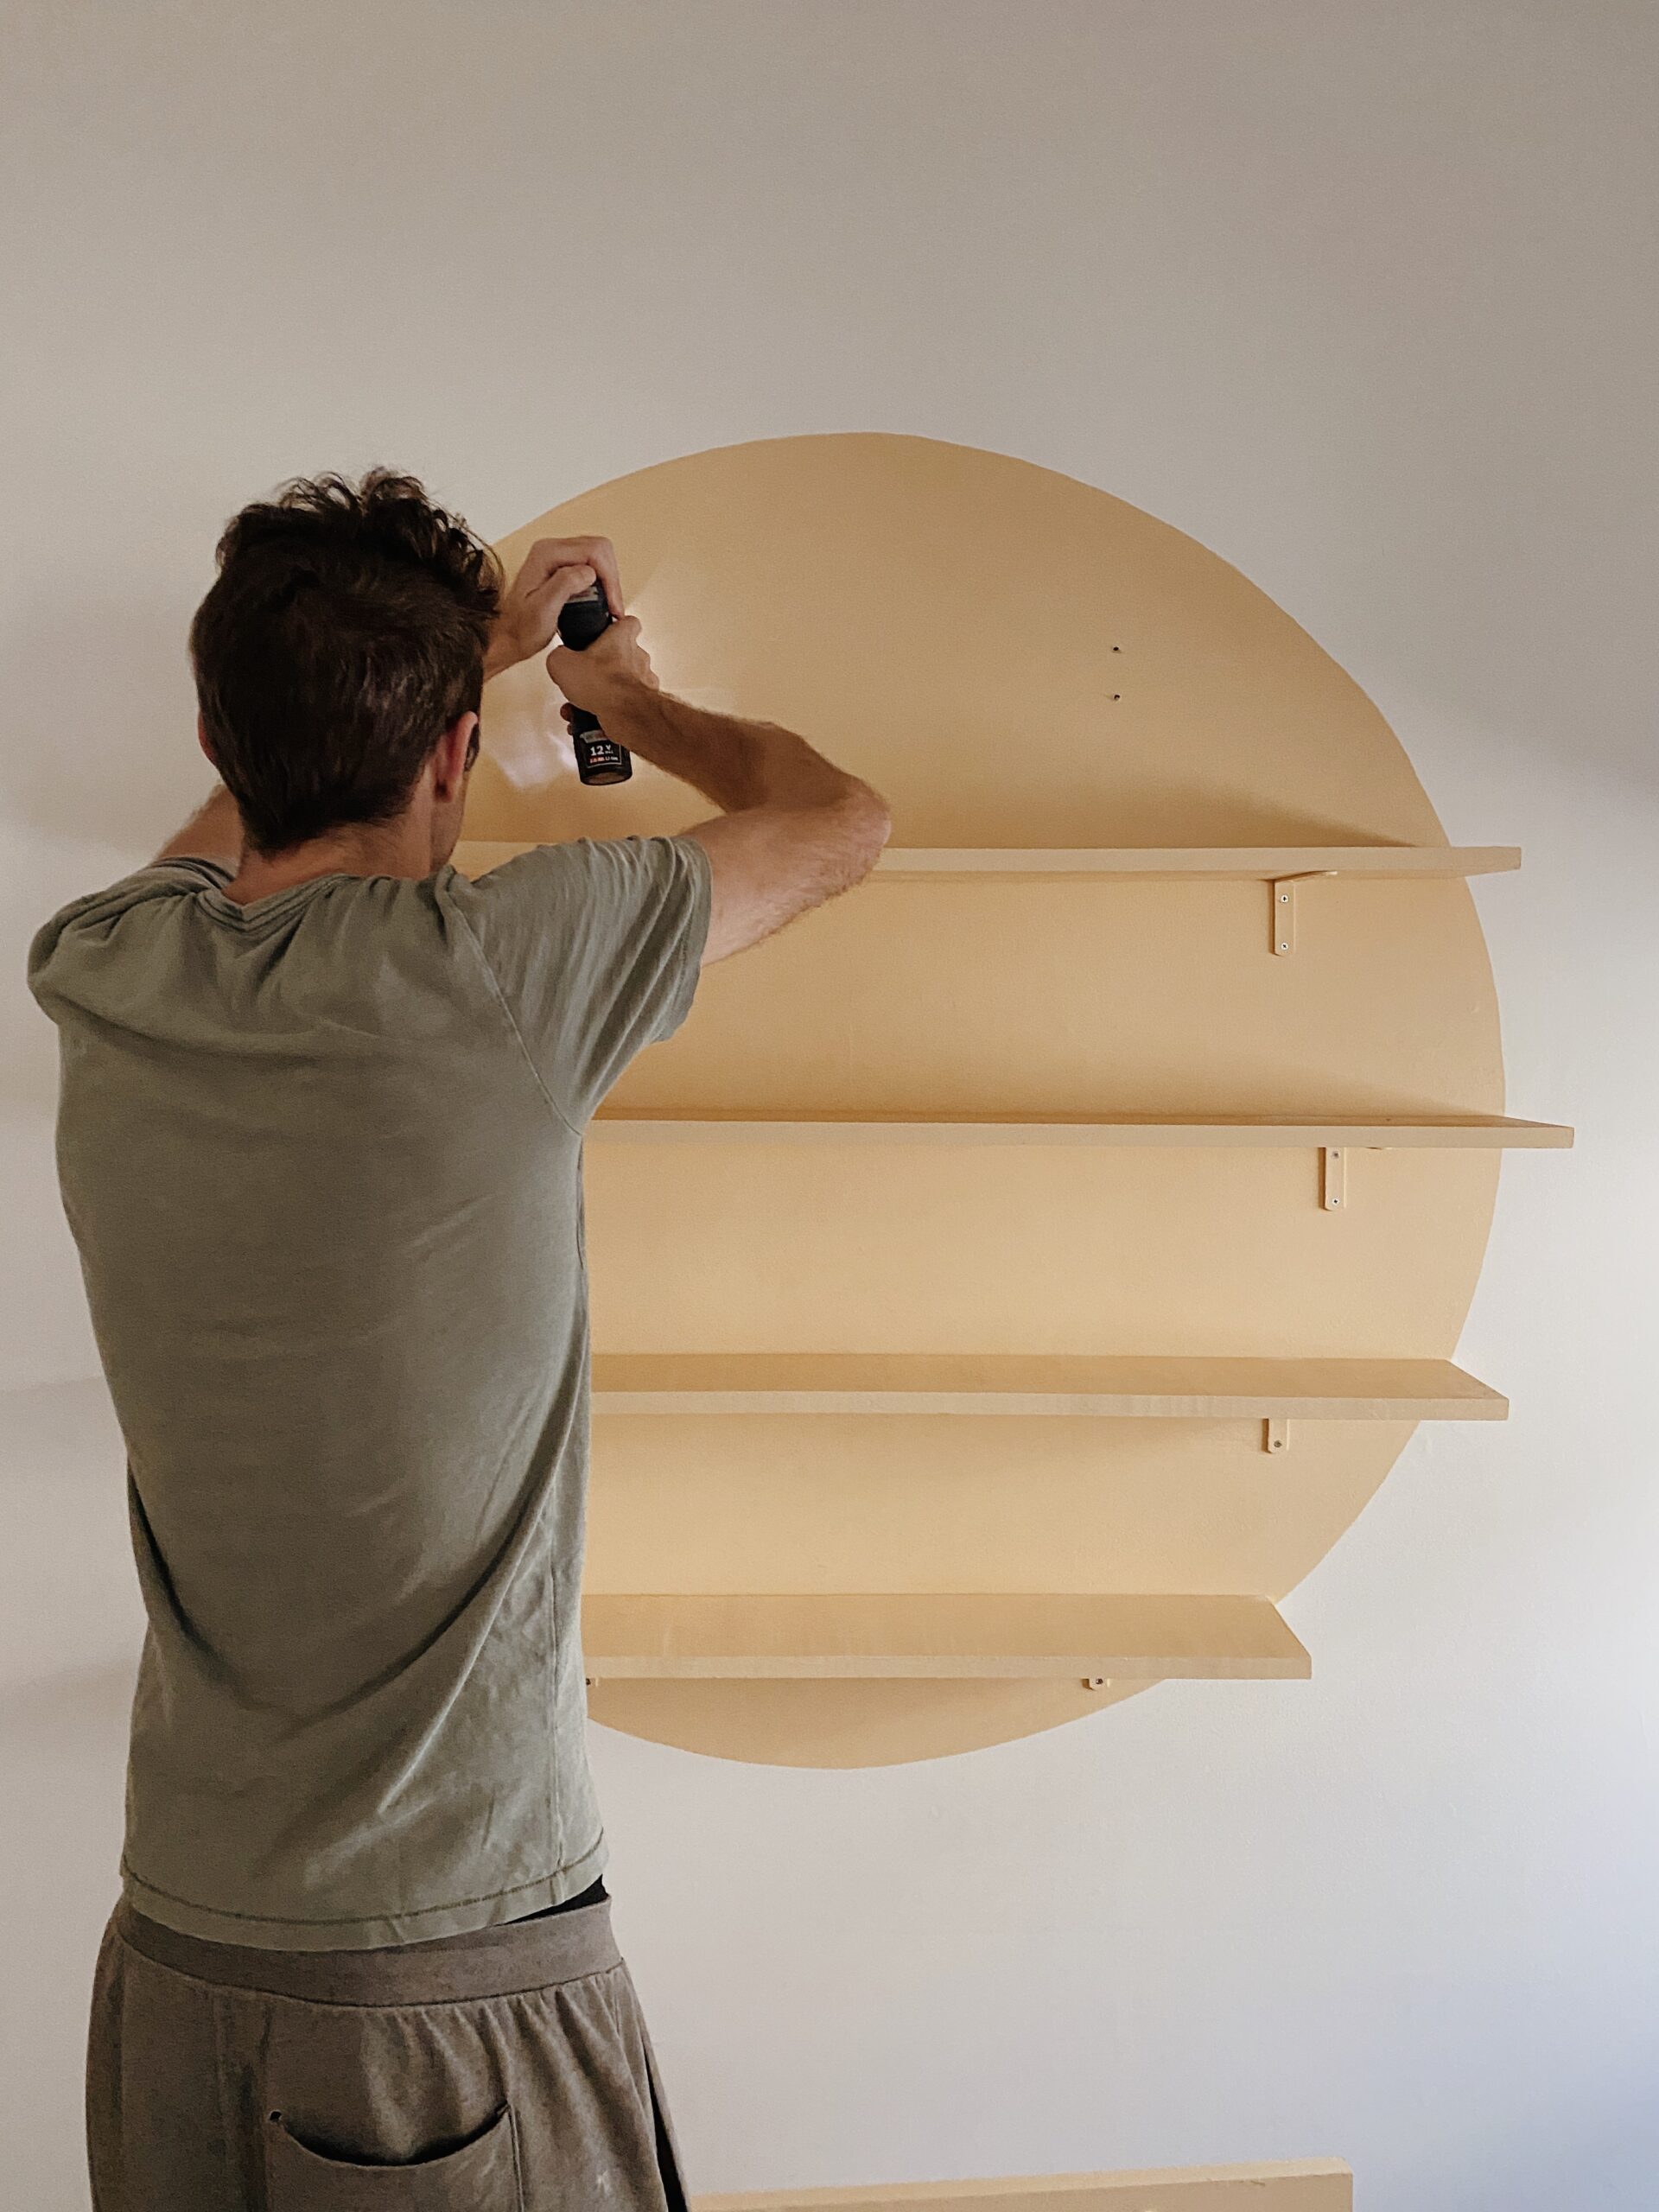
then hold the shelf back up in place and either hold it with one hand and screw in with the other, or find a nice person to marry and ask them to hold for you.
i used drywall screws and anchors.
sources
paint color : PPG spice is nice / shelf brackets / angled paint brush / besta cabinet
stump stool / wood connect four (similar) / driftwood mobile (similar)


Really want to do this! ?
Love! im going to do this! Where dod you get the white cabinets and stool?
Love this! What are the dimensions of the shelves; 1” x 6”?
love this. We’re gonna do this aswell. Could you share the shelve sizes?