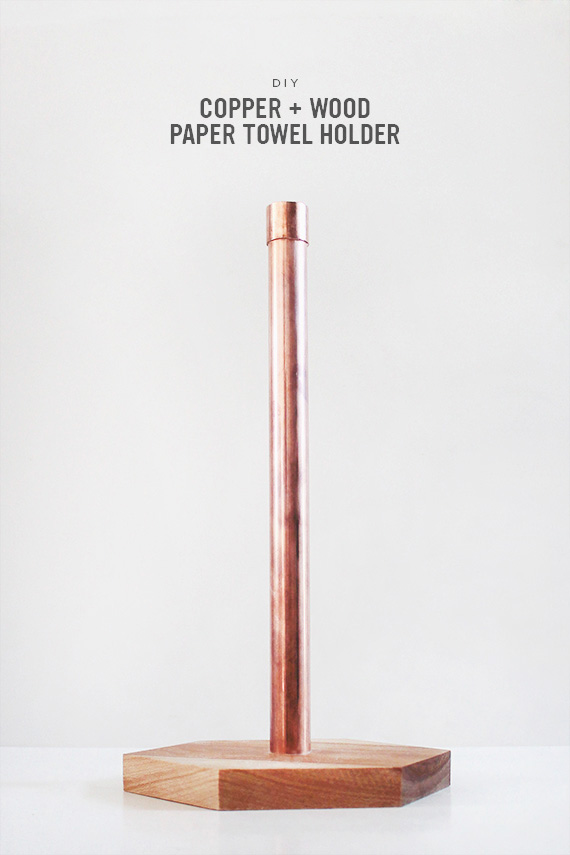
diy copper + wood paper towel holder
a paper towel holder is always an afterthought for me. case in point – i’ve been wanting to DIY one for a year now. but the other day when i deep cleaned the kitchen for the first time in months, i noticed how gross and rusty ours was – i headed out to the hardware store that day.
this project is SUPER easy to make, but you need some good tools and some arm strength or some boyfriend.
MATERIALS
a piece of wood (we got this birch in the precut section of the hardware store)
copper pipe
copper cap
industrial strength glue
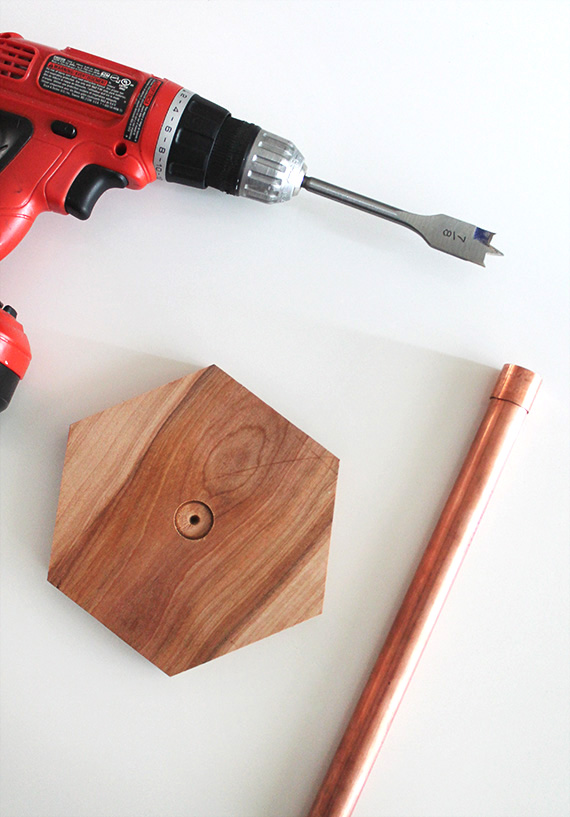
drill spade bit (we used 7/8″)
miter box
hacksaw
wood conditioner (optional)
DIRECTIONS
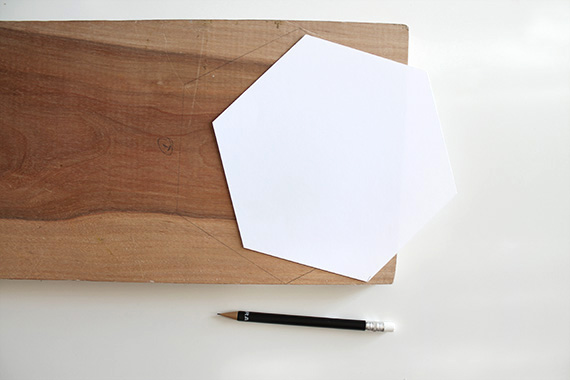
ONE // determine your shape and size. i simply used the hexagon shape tool in photoshop and printed it onto cardstock at around 7″ wide. you can also just draw it. carefully cut out your shape and trace it onto your wood with a pencil.
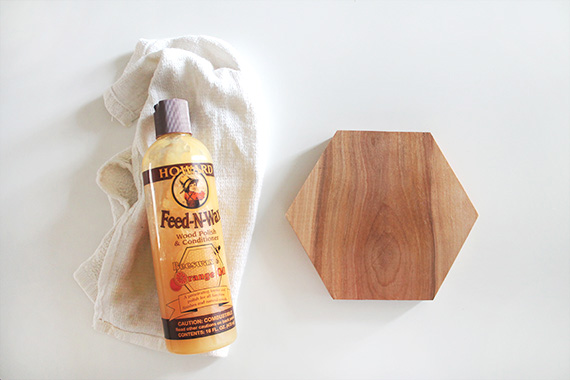
TWO // saw your shape, we used a miter box which helped a lot, and if you have some sort of jigsaw you’ll have a way easier time. once your base is cut, sand the edges without rounding them, and then if you’d like to, condition the wood. i used feed-n-wax which gave it a much richer color.
THREE // measure the exact center of your base. with your spade bit attached, drill a hole into the base. go as deep as you want to for how much of the pipe you want to show on top.
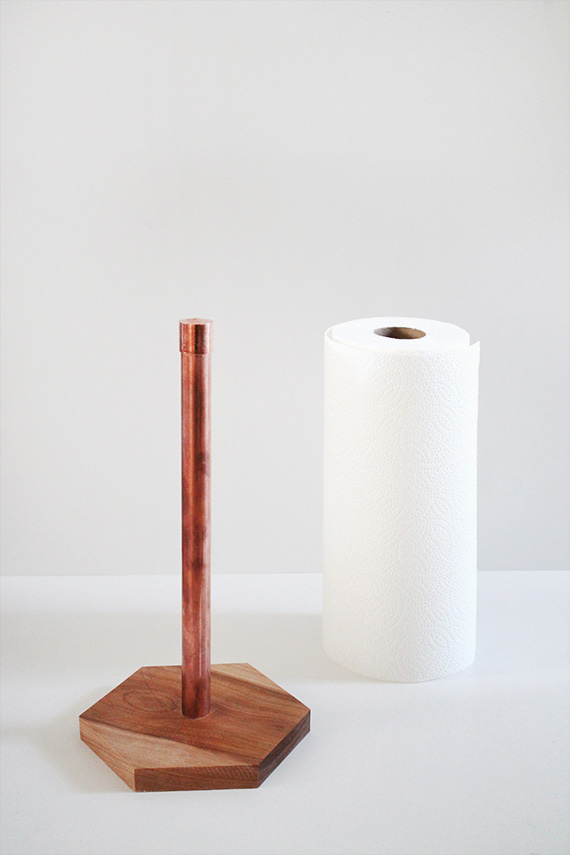
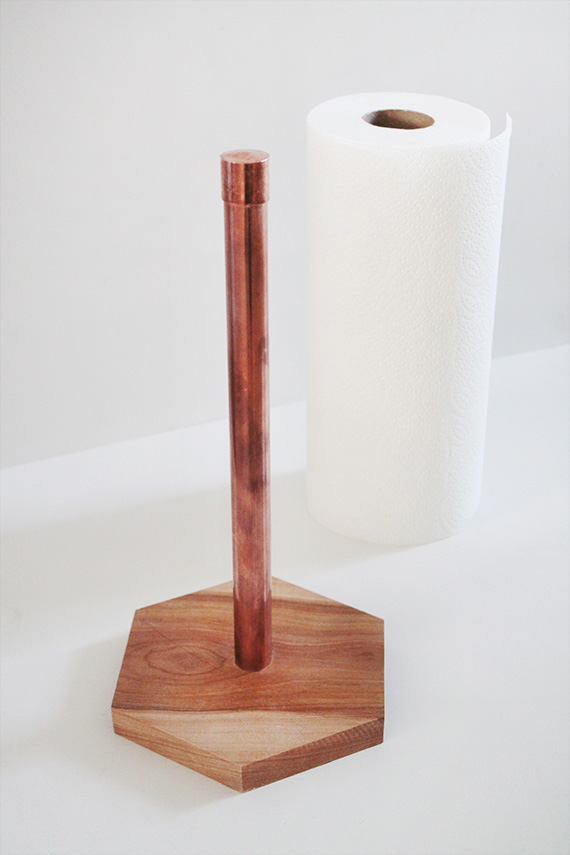
FOUR // using a paper towel roll as your measurement, cut down your copper pipe with your hacksaw. cap it off.
FIVE // make sure your copper pipe fits snugly in the hole, apply glue and let dry for a few hours!
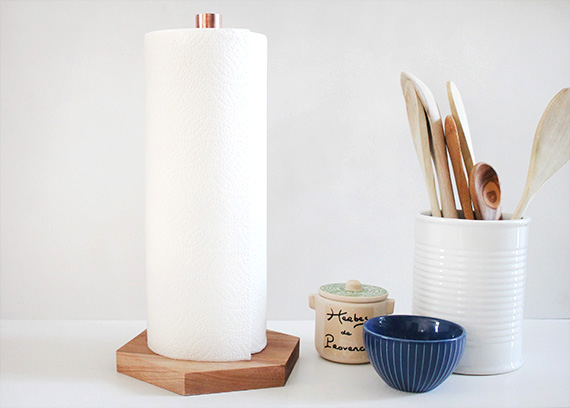
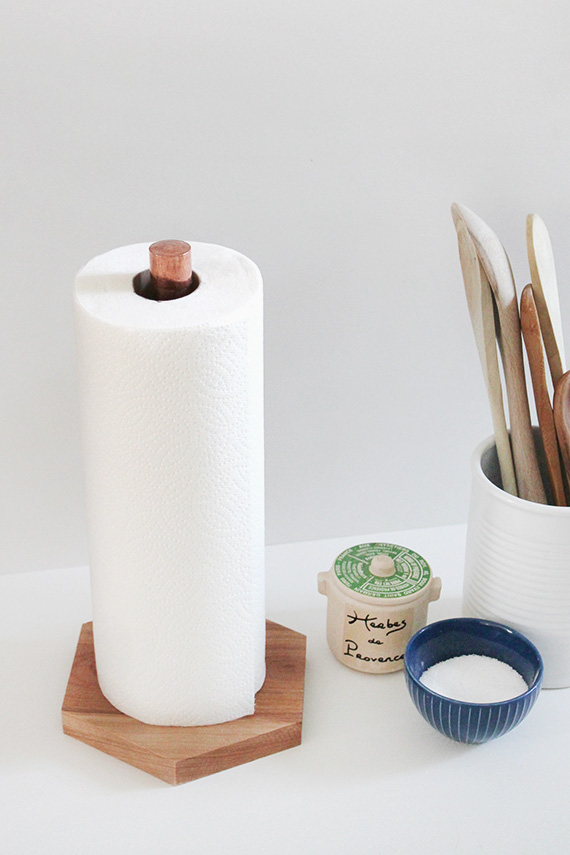
i am so so happy with the final result. and it makes such a difference when i am looking at our sink now!


I absolutely love this. Keep on making these awesome diy’s I love them!
This is so clever! I’d love it if you shared this over at the Makers Link Party going on at my blog right now. Hope to see you there!
-Katie
Ooh. I want to make this as a ribbon caddy for my desk.
this is amazing!
Molly, this is SO good! I have something similar from West Elm, and was thinking about how to recreate it. You solved that mystery for me 🙂
thanks rach! had no idea they had something similar. i’m sure this is way cheaper!
Awesome. As always – your DIYs are awesome. I need to get me some of those tools…..and try this one! Thanks for sharing! x
thank you so much!
Love this Molly!!
thanks ash!
You could make great business out of those – selling them as a product.
thank you! yknow i think that sometimes when i make certain projects. i should just be selling these not telling people how to make them! damn.
I don’t have any saws, so I would LOVE to buy one from you! (Found this via Apartment Therapy’s Facebook post)
Great DIY tutorial! I’m still in love with copper and need a paper towel holder… so I think I’ll be taking a trip to the hardware store soon! Thanks for sharing!
*or some boyfriend* Great tutorial and as always, great writing! I might have to DIY this for our new kitchen!
Hi Molly this looks great! Thanks for sharing. I was wondering what diameter pipe you used and if it’s a certain/specific type of pipe? I might want to do one in brass to go with some of the other brass-y themes in our apt. Thanks so much!
The raw copper pipe can be brought to a gorgeous luster using “Brasso” liquid metal polish. Over time the copper will tarnish again. Although it would add a little complexity to the initial construction, I would affix the copper pipe to the wooden base in such a fashion as to allow removal of the rod for polishing as needed, otherwise, the liquid metal polish and copper tarnish would likely stain the wooden base. To affix the copper pipe to the wooden base in a manner to allow future removal for polishing:
1. Cap both ends of the copper pipe. this will require substitution of the recommended 7/8″ drill spade bit with one which is the same diameter of the cap.
2. On the bottom side of the wooden base, determine exact center and using a 1.5″ drill spade bit, drill a hole which leaves the “shoulders” of the hole at a depth of 1/16″.
3. Locate a small sheet of 1/16″ thick aluminum, create a 1.5″ round “coin” which will fit into the round shelf you have created on the bottom side of the wood base.
4. From the top-side of the base, insert the copper pipe with “cap” attached
5. From the bottom-side of the base, insert your 1.5″ round coin.
6. Drill 4 countersink holes into the round coin, and on through into the copper cap previously inserted in the base from above.
7. Attach the coin to the copper cap using 4 flat head counter-sink “sheet metal screws”.
8. Attach the coin to the wood base using 4 flat head counter-sink “wood screws” around the outside area of the copper cap “landing” area.
Gorgeous!! awesome idea, looks fantastic and super easy to make!! 🙂 we´ve to do something like this soon!! 😉
Oh my god, it’s perfect! You’re perfect! Be my new best friend? x
I lovethis, but I am not good with DIY stuff. Can I order one from you? 🙂
What a great project. I am going to put this on my “to do” list. I love your aesthetic, anything geometric always catches my eye. Thanks for posting.
SB
Hi –
We saw this tutorial and loved it so we gave it a try on our own! Thanks for all the lovely things you make. Your website is so inspiring!
http://diy.dunnlumber.com/projects/copper-paper-towel-holder
(We linked back to your site.)
ya nasty
I know this is an old post but would you be able to recreate another one for sale?? i love it! I dont have the saw to cut the hexagon !!