-
registry : wanted
now that we’ve sent out our save the dates and i’m so so close to done with vendor booking – we’re starting to setup our registry! while we would love to just register for a house, i don’t think it’s very polite to ask for money. so instead, we’re gonna mostly go with stuff that can be placed in said future house.
uncommon goods is an online shop that sells a bunch of unique home decor and art prints, that i always look at when i’m holiday gift shopping, but since i’m in the registry market, they asked me to take a look at their stuff and see what i liked. well unfortunately there’s a ton. this teak root mirror immediately screamed out “buy me”. doesn’t it look just like the one in the ace hotel palm springs lobby?! also anything we can do to feel like we’re in new york is good with us, so i would love to get a couple of those porcelain coffee cups.
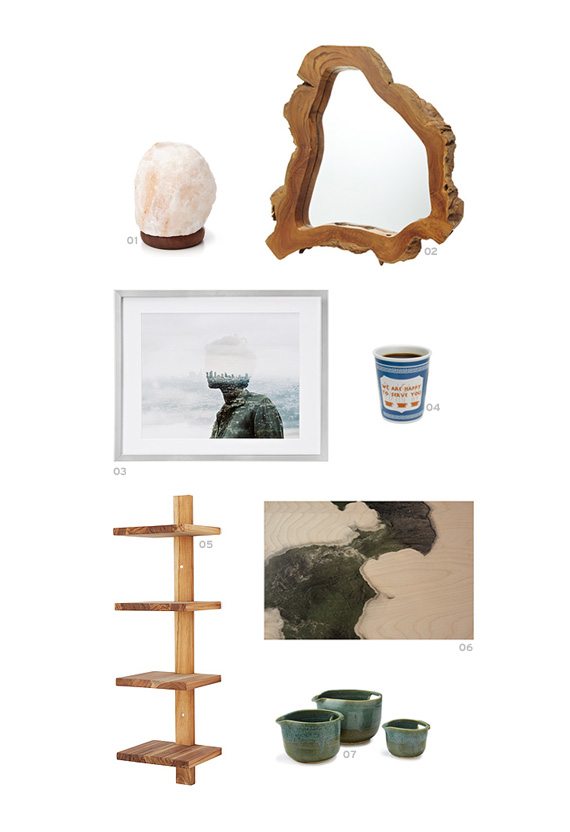
01 i’ve always wanted salt lamps, they give off super warm mellow light just like i like.
02 teak root mirror. gimme.
03 part of being a grown up is having real art. love this city of angels double exposure print.
04 i can handle no handle (PUN) with these greek mugs
05 this minimalist teak wall shelf is the perfect size for those weird unused corners
06 you know i like wood. so naturally (PUN) i love this photography transfer wood wall art.
07 the prettiest nesting mixing bowls i would ever own for sure.this post was sponsored by uncommon goods. all opinions are 100% my own.
-
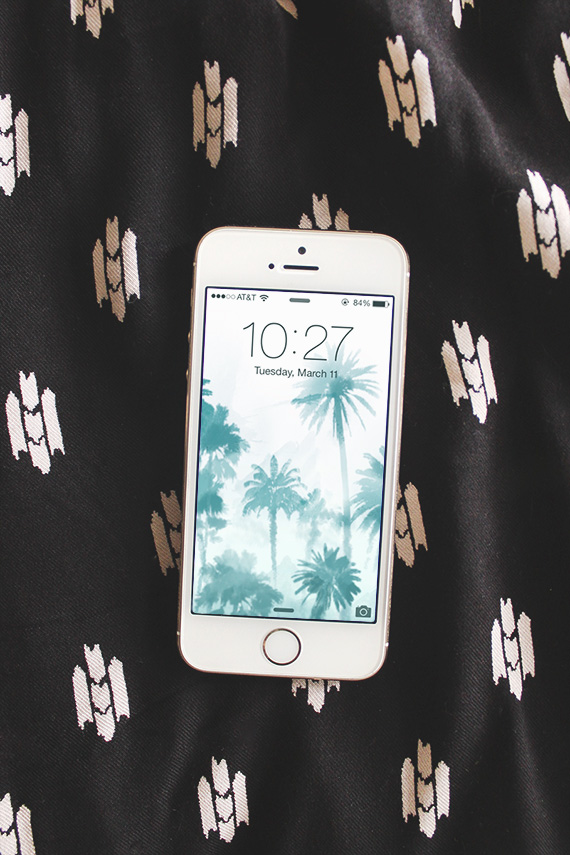
freeloader // 7
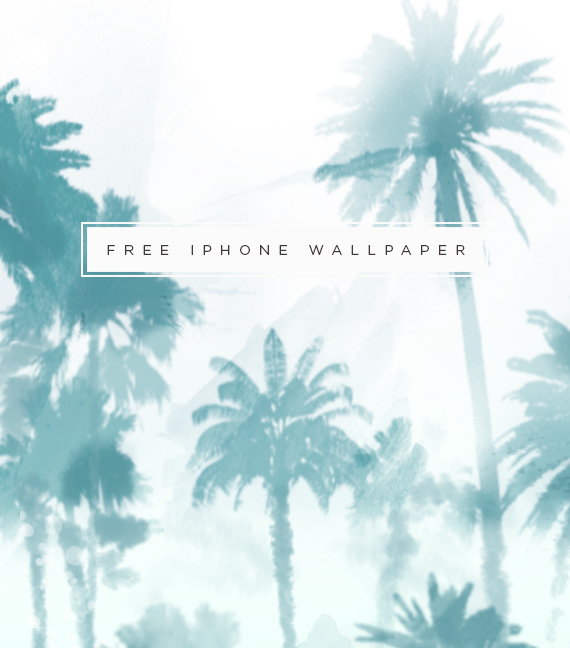
not only am i sharing a new iphone background today, i’m also giving you a sneak peak of the pattern we’re working on for our wedding suite! now that spring is about here — let’s celebrate with some palm trees!
this wallpaper is for personal use only, and NOT for re-distribution.
if you’d like to post a link sharing them, you may not directly post the downloadable files.
please credit and link back to this post for downloading the wallpaper.

-
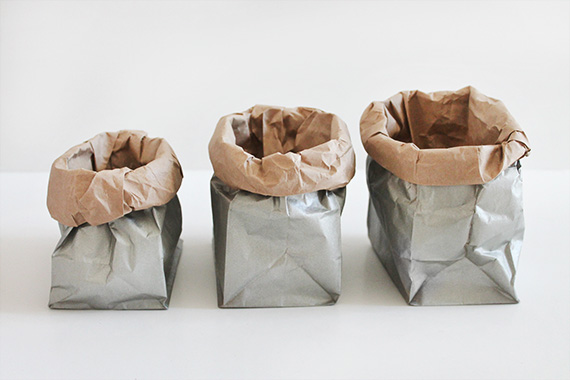
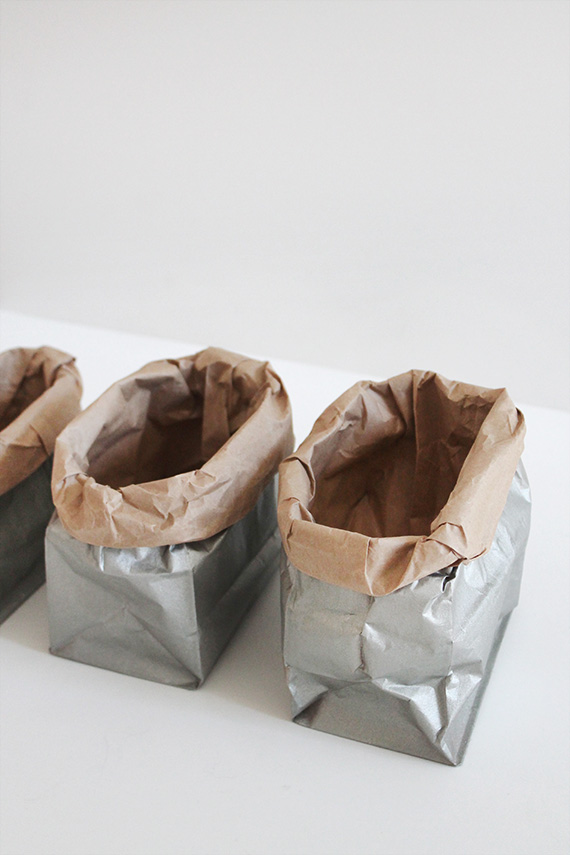
diy metallic sacks
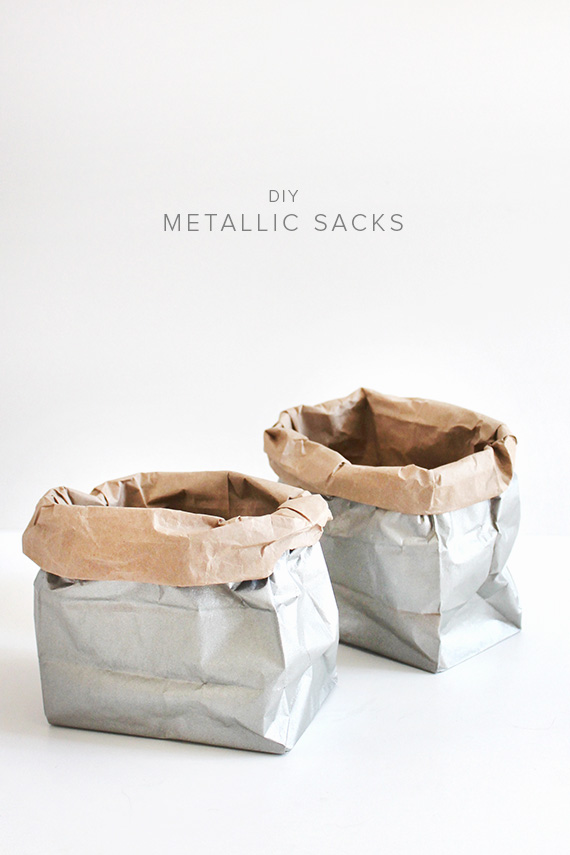
after doing those paper bag picnic printables, i had a whole ton of bags leftover. and after a year of seeing these foiled coated sacks, i thought to make them for easy office storage. now you could make these a lot more metallic and foil-y with silver leaf, but you can also do it the cheap and easy way which is this way.
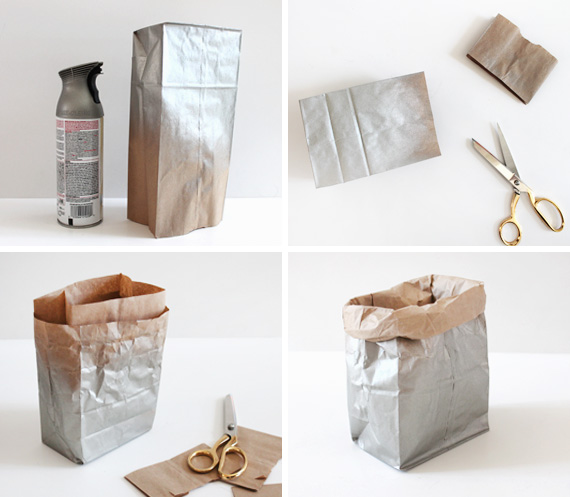
MATERIALS
paper bags (these are the lunch size from the grocery store, you can also buy big ones online)
silver spray paint
scissorsDIRECTIONS
01 SPRAY PAINT unfold your bags and take them outside to spray. i held each one up with a bottle puppeting inside. spray paint the bottom and sides. let dry
02 TRIM DOWN cut about 2 – 4 inches from the top of the bag once dry.
03 DOUBLE BAG IT for extra support and to have a cleaner inside, i double bagged all of them, place a clean bag inside and trim to about the same length
04 FOLD FOLD FOLD wrap the inside bag over the outside bag and roll down until you’re happy with the height. you can redo as much as you like, and go pretty rough. just make sure you’re not too rough or you’ll rip the hell out of it.
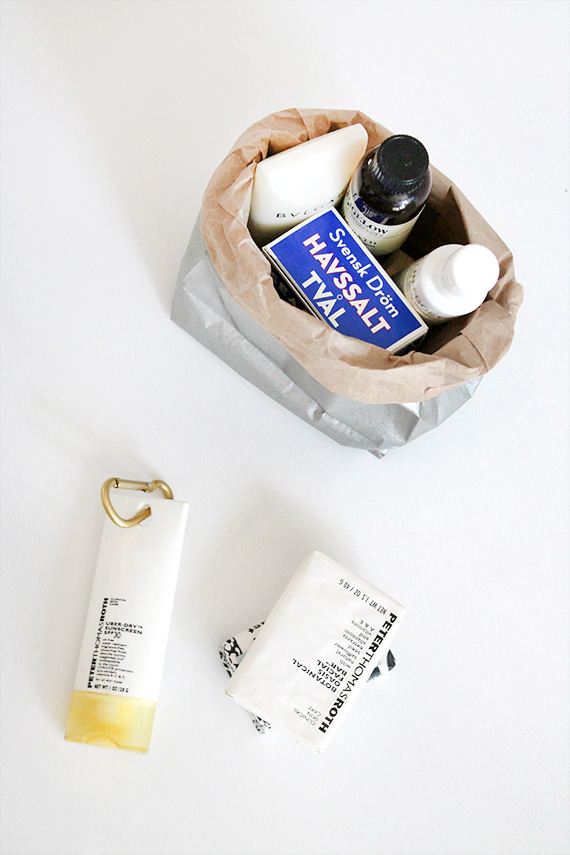
i have a fancy hotel shampoo hoarding problem. the problem is now solved. i’ll just throw them in this sack and display em all pretty in the bathroom!
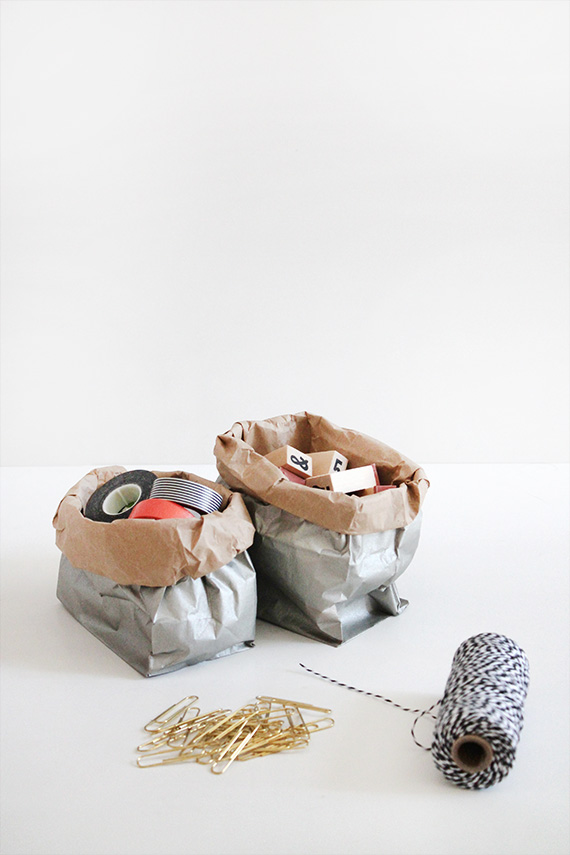
i also have craft supplies everywhere. like i mean everywhere. the kitchen, the dining room, the couch. another problem SOLVED.
-
six diy wedding favors

because i’m now a wedding monster — all i want to do is stop this boring planning stuff and move onto the fun stuff! the design and look of the thing. now that i have almost all of my vendors booked, i can start brainstorming. YAY. i’m definitely DIYing some sort of favors – and right now i’m thinking of custom tote bags full of goodies.
but my big question is : if the guests are getting tote bags in their hotel rooms, do they still need a small favor at the wedding itself? help!
-
payday wishlist
happy friday! today is an especially happy friday for me — because we’re driving out to the desert to see hall & oates perform! at a casino. my favorite type of concert because they’re always small and intimate and awkward and filled with old drunk people. i have seen h&o live maybe 6 times before — and i won’t stop. i love em so much.
hope you have a fun weekend too! if you aren’t, because you’re going through a breakup, here’s my favorite hall & oates breakup song. i’m always here to help.
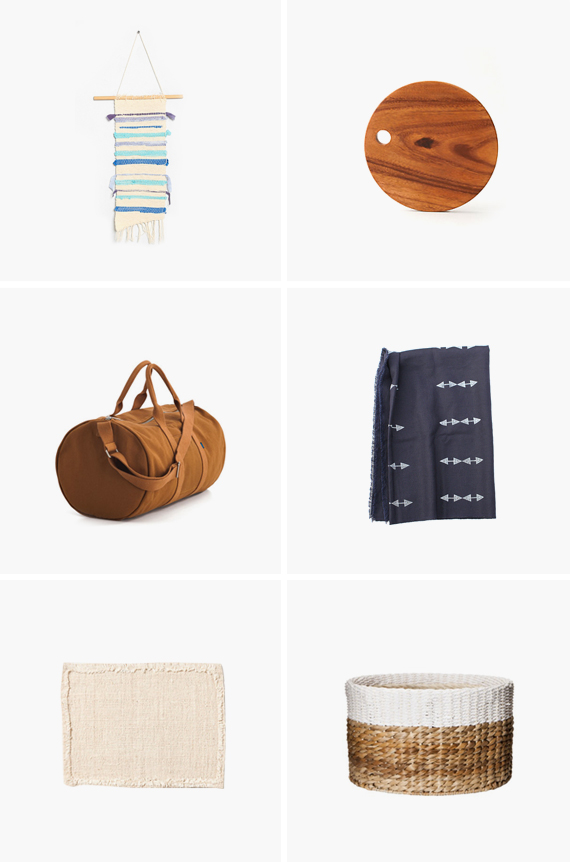
01. another woven tapestry from urban that i want?! ugh.
02. love this little round cutting board so much. shall i register for it?
03. always want a new weekender bag because i have a soft spot for cute weekenders.
04. a lovely throw i could wrap myself in all day when i refuse to get dressed.
05. i’m not into placemats, but these fringed ones are so far from rigid like most placements seem to me. placements = rigid?
06. as always, i want baskets i can throw junk into. it’s a real fetish of mine. -
diy faux gem wine stoppers
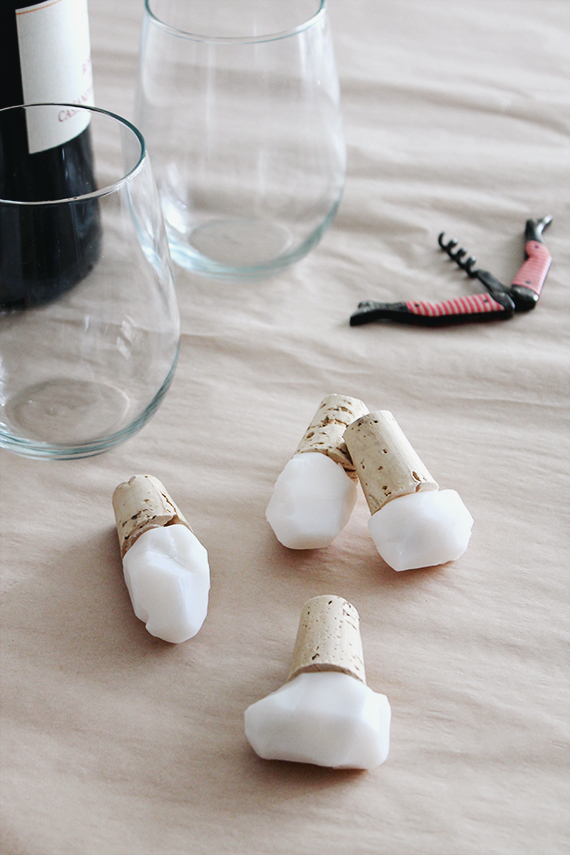
i love crystals and gemstones and all minerals really — but when i found this “translucent” clay, i was like HEY i can make crystals. well turns out the clay doesn’t look as translucent when it’s not a thin sheet. but it does have a nice gem like finish. they’re not crystal clear like i planned for, but i still like them.
i tried this project twice. i used fimo translucent clay which was supposed to be less translucent than premo, but the premo came out orange for some reason. so fimo is the one i recommend.
materials
fimo translucent clay (i used two packages cut into halves to make four wine stoppers)
a sharp blade
corks
glue (i used e6000 industrial glue)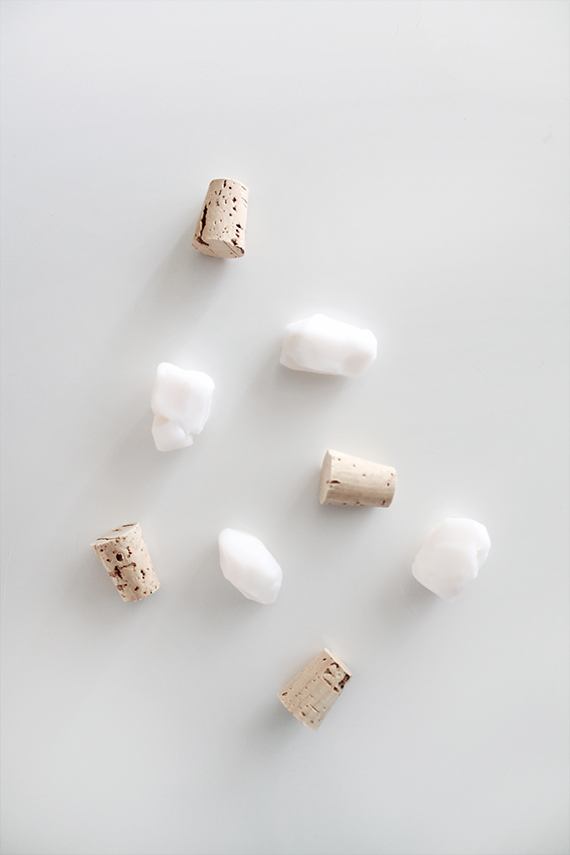
no brainer directions
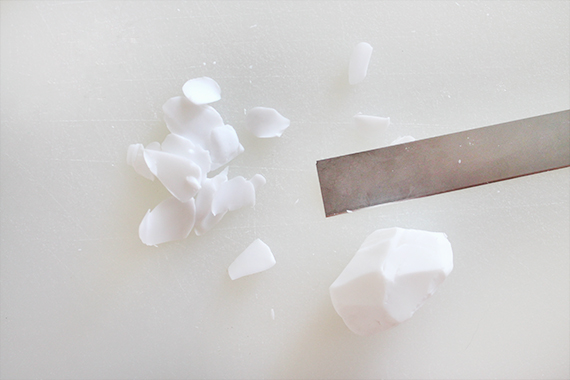
condition and soften your clay, but not to the point where it’s warm. make your shape and place it over your cork to make sure it fits the size properly.
start cutting edges, basically just create planes everywhere. trim off one side of the surface to create a flat bottom.
bake according to the directions on the package.
once dry, glue onto your corks. let dry.
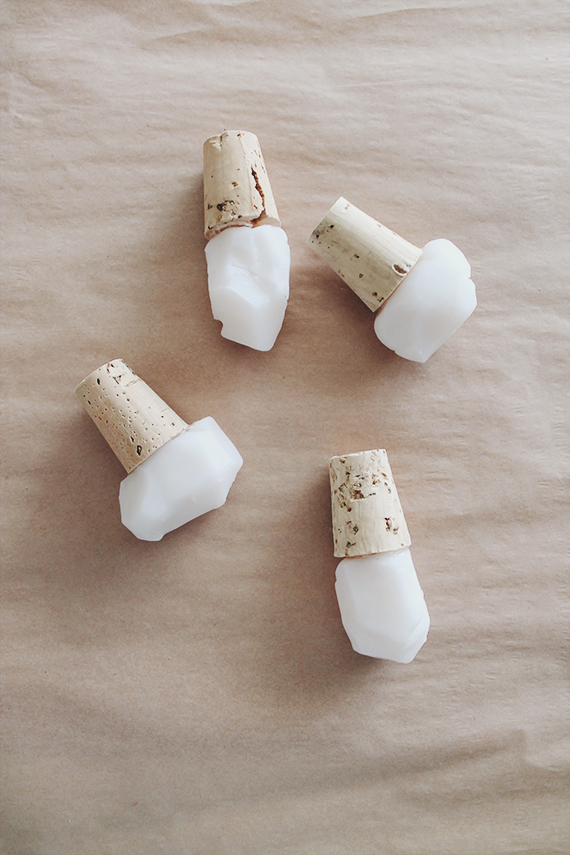
it’s of my personal opinion that these would make fantastic cheap, easy wedding favors or gifts.


-
i link you

the current trend is dressing like a middle aged tourist. are you norm core? i kinda feel like i am. uh oh. (via gawker / image via ny mag)
this recipe for a banh mi bowl looks… just PERFECT. (via molly yeh)
my favorite video of the week — reese witherspoon can teleport! (via youtube)
i’m really trying to eat healthier to look good in my wedding dress, but daaayum. chocolate swirl blondies? worth it. (via for me for you)
this metallic desk organizer by monsters circus is such a brilliant DIY to add so much to your office (via eclectic trends)
-
how to dress up a frozen burrito
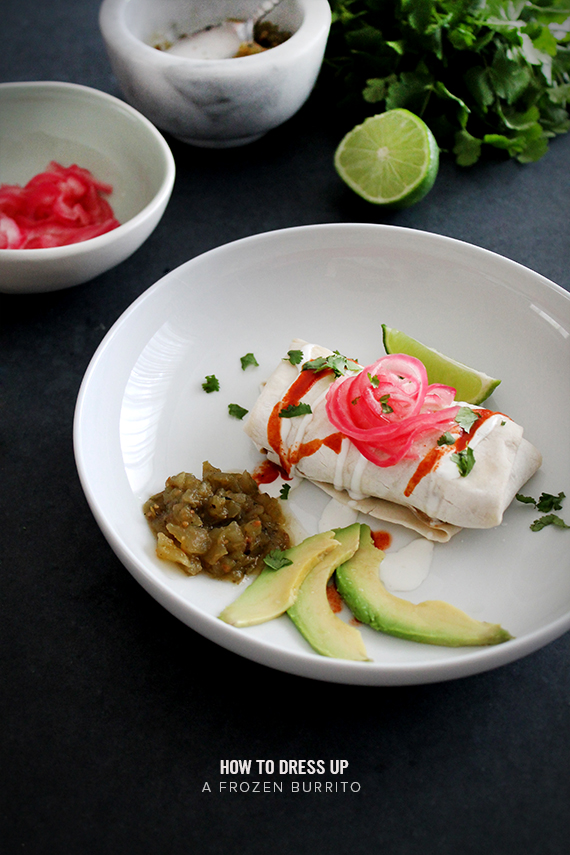
so right now you might be thinking – um wtf is this post? well… i know right?
gideon and i eat a lot of burritos, we live near our all time favorite burrito from tacos arizas (it’s custom and on the DL. i’ll share someday), and about a dozen other taco places. but we’re also not rich so we eat frozen food.
i’ve always had a soft spot frozen burritos, maybe it’s because i smoked a lot of pot in high school, maybe it’s because they’re actually pretty decent tasting. we buy them in their full boxes at the grocery store. tina’s beef & bean/green chili is my favorite (can you believe tina’s didn’t even sponsor this post?!)
now, i am ok with a frozen burrito on it’s own, but with the right accoutrement – frozen burritos rule. so here’s how we fancy our frozen burritos up!

ingredients
frozen burrito of your choice
crema (or sour cream)
tapatio
salsa verde
lime
avocado
cilantro
pickled onions (here’s a recipe that we’ve used)
tortilla chips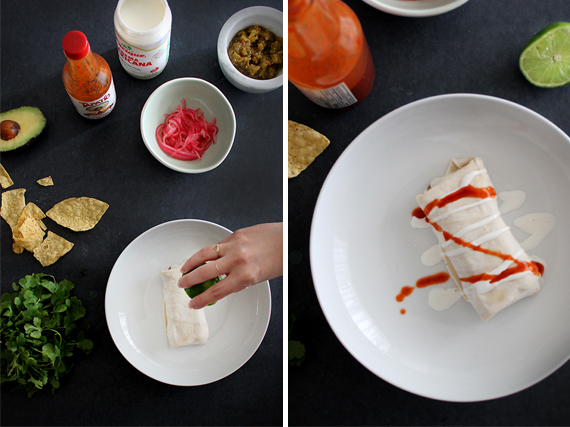
directions
step one : after your burrito comes out of the microwave, liberally squeeze lime all over it.
step two : spoon on your crema, drizzle on the tapatio.
step three : add your garnishes. salsa verde, a few slices of avocado, chopped cilantro, and a pile of pickled onions. i also always squeeze MORE lime on top and add in some tortilla chips to add crunch.
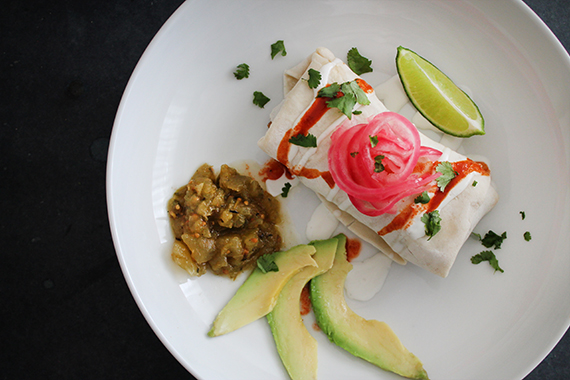

now go eat one and report back!
-
our save the dates
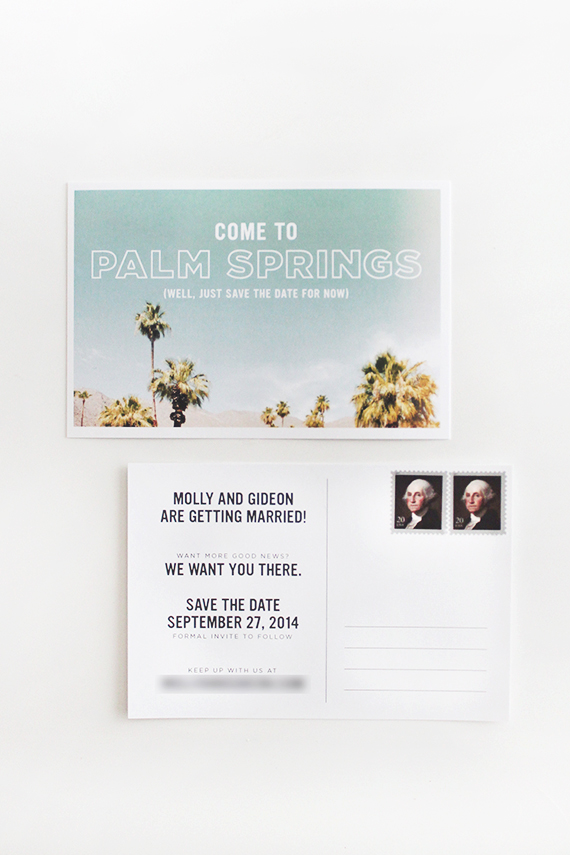
well here they are! our save the date postcards that have pretty much all been delivered. we wanted to do postcards to save on costs and make it really simple. but as soon as we had them printed, we found out that the postage rate for postcards had just gone up one cent a month earlier. this would be fine if the post offices actually sold .34 stamps. which they didn’t. so after multiple post offices and tons of internet researching, we decided to go with two .20 stamps (george washington was for some reason my favorite) and we only ended up spending $5 extra. i wanted to do vintage stamps but because our wedding is SOON — we had to get them out as soon as we could. and that’s my exciting stamp story. the end.

also — the border turned out totally uneven, but i’m trying not to be anal when it comes to the wedding so i have to just let it go (that’s what she said). overall, i’m really happy with them! we wanted to do a retro inspired postcard, but in a modern way. which i think they ended up as!

-
oscar party
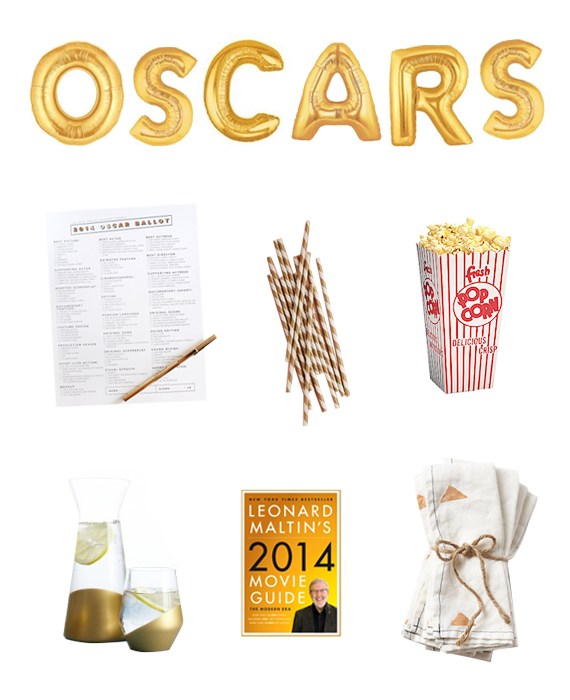
better late than two days prior. i’m just going to my moms house for the oscars this year (she totally has cable), but if i do throw an oscar party NEXT year (which i won’t because we refuse to pay for cable) here is what i’d host that shit with.
everyone loves alphabet balloons. they’re cheap and you can spell out anything. here are some examples : BEST PICTURE. BEST PARTY. CHIWITEL. (i just like his name)
don’t forget to print out the oscar ballots i shared last week! put money on it. or dares.
gold paper straws will make any drink look festive.
i’m all about the retro popcorn boxes — and they’re available at most restaurant supply stores.
you could use this DIY to gold dip all of your glasses, or if you’re not into that – how about paper cups?!
we love playing the leonard maltin game, and having the book around is the perfect commercial past time.
these gold block-printed napkins are oscars festive, but definitely cute enough to use all the time.


