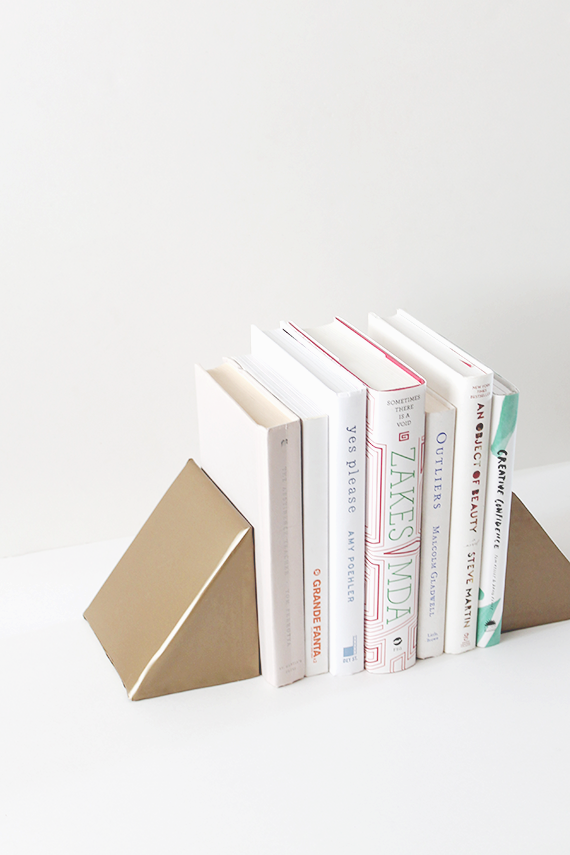
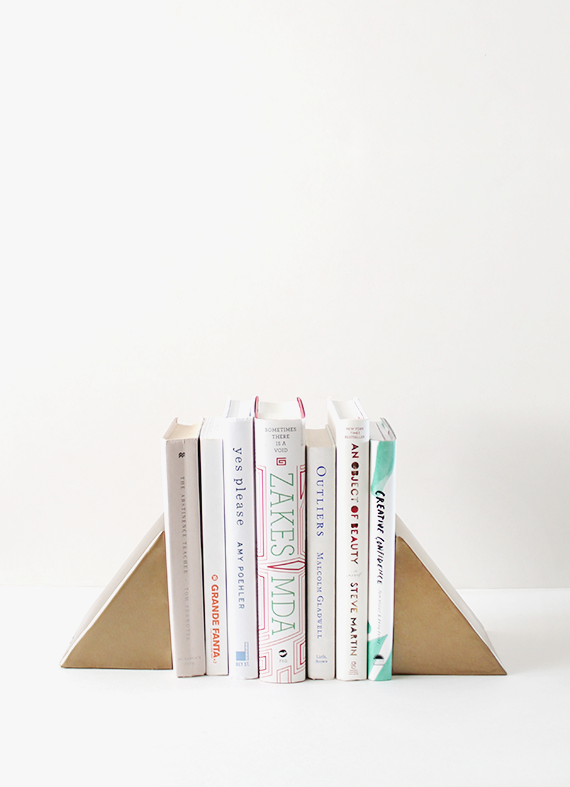
diy triangle bookends
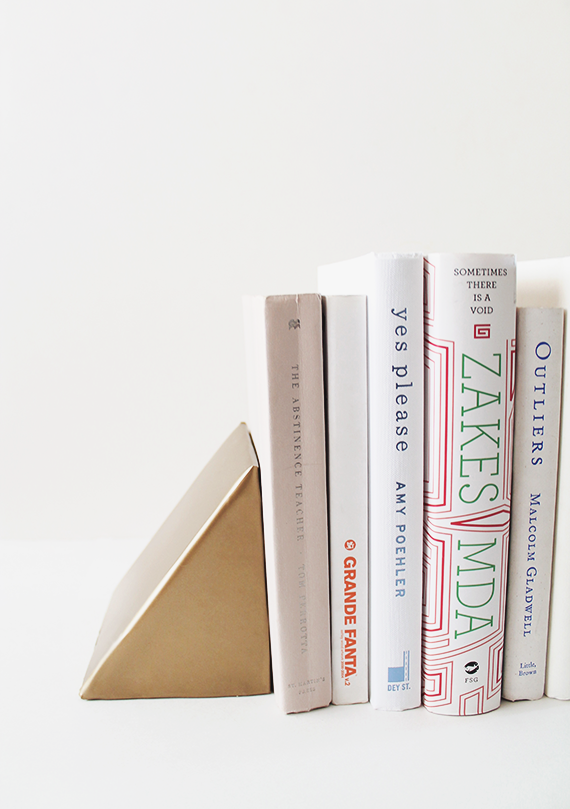

as you know, i love cardboard + contact paper DIYS. because you can make dope things and they don’t cost money.
this project requires a little patience and some cutting skills, but the cardboard is pretty forgiving, so you really can’t tell if the shapes are wonky.
materials
- contact paper
- cardboard
- scotch tape
- scissors / xacto
- ruler
- cardstock paper
- sand / rocks / something heavy to fill
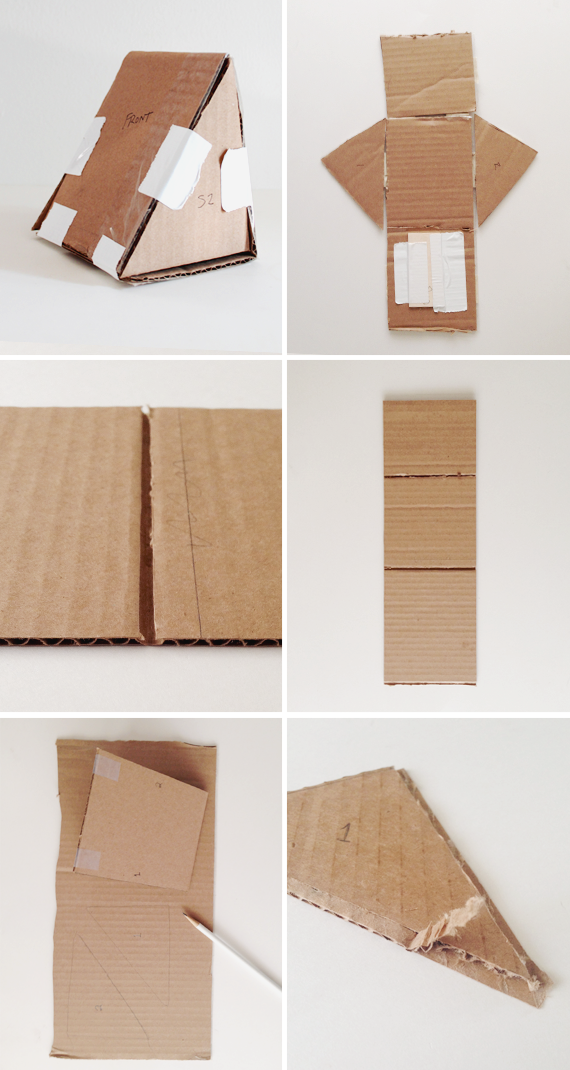
01. if you want to make a mockup, build one at an approximate size to see the wedge shape. then unfold it to measure the pieces. we decided to make the sides (triangles) separately, so they would fit snug and custom to each end.
OUR SIZE FOR THE MAIN PIECE : 5” x 15 1/4” (4” base, 6 1/4” back, 5” diagonal)
02. cut your main piece, and then mark lines at the 4” and 10 1/4” mark (see? 5” left? get it?) x-acto cut about 1/16th inch on either side of these marks. DON’T CUT ALL THE WAY THROUGH. just cut through top layer, and through the corrugation of the cardboard (the wavy middle piece).
03. once you’ve made two cuts on either side of the mark, you can use tweezers or your fingers to peel away the top layer along with the corrugation, leaving just the bottom layer and a blank space that lets you fold the cardboard in on itself. repeat this with the other mark on your main piece. and then again at the tip (bottom) of the main piece.

04. fold together and tape to make your wedge. use the lip you cut out of the bottom to line-up a flush edge. tape tape. yay yay.
05. mark each side of your wedge with a number or a symbol or a nickname or something, so you know which side is which later (when you’re cutting triangles)
06. use the wedge as a stencil on another piece of cardboard. hold in place and mark both the inside and the outside with a pencil. mark each triangle to its corresponding side.
07. cut out your triangles on the outer line. it’s better to go outside the line here than inside the line (because you can always cut more off)
08. now do what you did before with the folds. cut that outside edge, but just the top layer and the corrugation. peel that part away. you’ll now you have pieces that should “plug in” to your existing wedge. you can then turn it over and trim any excess. tape your edges.
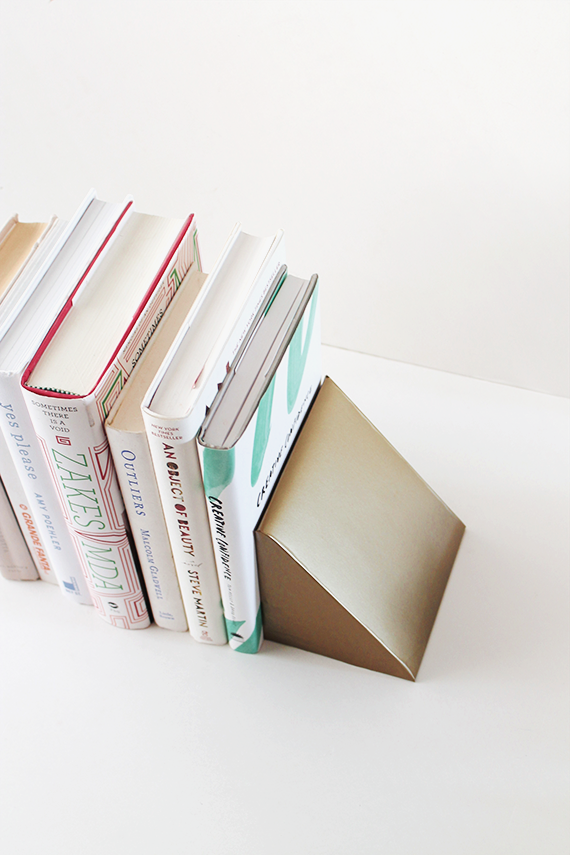
09. leave one end open for your weight. you can fill with sandwich bags full of sand (HA), rocks, dirt, dead batteries — anything that’s heavy. tape up the last end once it’s filled.
10. to give the bookends a cleaner texture, cover the wedge with cardstock (which i unfortunately forgot to take a pic of). just wrap your each bookend (focusing on the front vs the sides) and tape underneath. cover with the contact paper!


this is so clever! I’ve been in need of some bookends for my new shelf and have been stewing over making some myself but haven’t had the time really to conjure up some ideas. So this has definitely helped inspire me! Thanks for that! 🙂
Nice work! What is that scissors?!
So cute! I love these bookends!
WritingMonique
So clever! Can’t wait to try this!
I’m sorry, but i’m not getting the sizes. Are those cm? Or inches? I’m sorry, really sorry. Is just that i’m from México and here wey use cm, so i’m not really use to work with inches and it seams bigger than cm. Would you please answer this? Thanks.
Brilliant! If you’re dealing with really heavy books, you could add a thin metal ruler or something similar to the bottom and set the books on top of it (much like the bookstops found in libraries) rather than add even more weight. 🙂
Brilliant idea. I love anytime I get to use metallics in my DIY projects. These will definitely make my bookcase more interesting! I love the book choices as well, Amy Poehler is hilarious! Check out my blog chasingpostcards.blogspot.com
So sleek looking. Happy Reading.
Cant believe these are made of cardboard! They look amazing, love it!
ISOSCELLA | http://isoscella.blogspot.co.uk
How do you do the contact oaper
Wow beautiful, such a great idea thanks for sharing such a great idea about bookends
hope that you will also share such outstanding ideas wit us
It is so good & informative.
Thanks for sharing such as article!