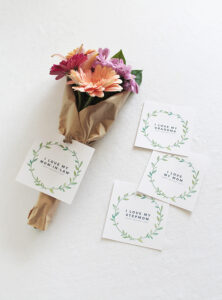
diy escort cards or seating chart or whatever you call it.
so my first DIY post in way too long is this really easy project we did for the wedding, that was by far our favorite. it looked exactly the way i had pictured it in my mind and i am so happy we spent the time and energy on it!
unfortunately, a LOT of the wedding DIYs we did i don’t have great photos of. we did all of our projects at my moms house without my camera and without almost any natural light, so i’ll post what i have and i’m going to make an attempt to demonstrate how we did all of the projects even if i don’t have a lot of photos. i failed.
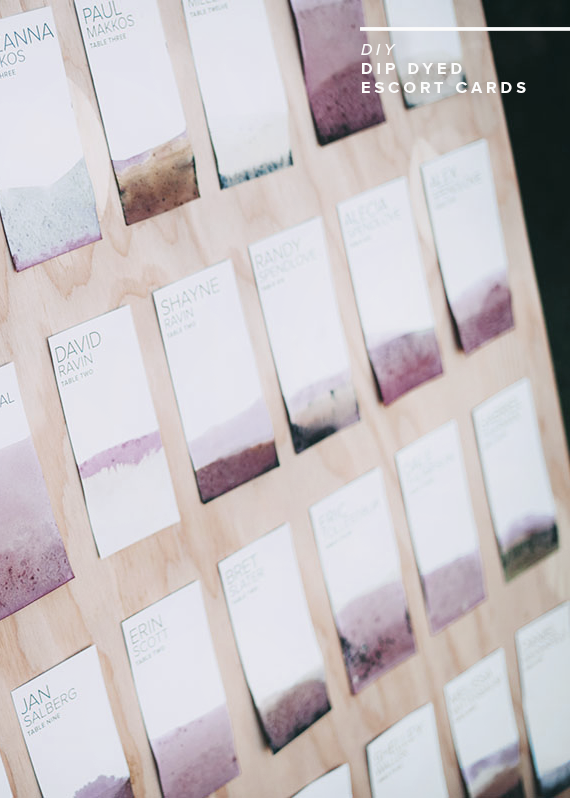
anyway! we decided to match the rest of our semi watercolor modern – boho wedding with dip dyed escort cards, which were mounted onto a huge piece of raw plywood (which we incorporated almost everywhere in the wedding). i’ll show you how after the jump.
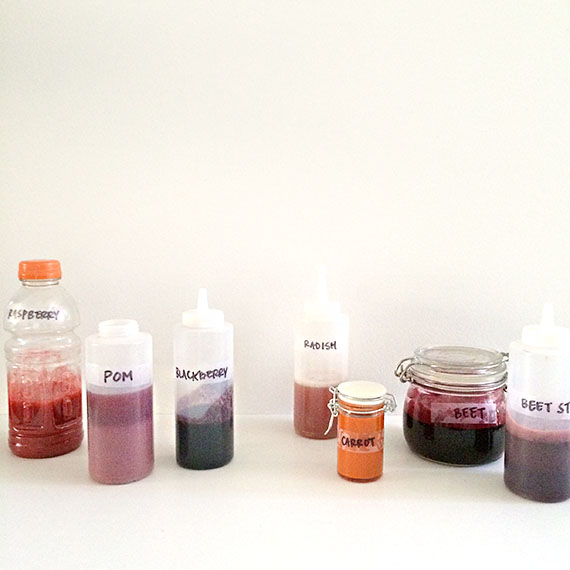
we decided to use vegetable juice because we have a juicer (I LOVE WEDDING GIFTS) and we thought it would be cheap. it turned out to be a little more expensive than we planned, and we didn’t have a great idea what would look good so we bought a big variety. but i’ve done that hard part so now i know what works and what doesn’t.
after A LOT of testing and variations, we felt comfortable with what we thought looked good and what didn’t.
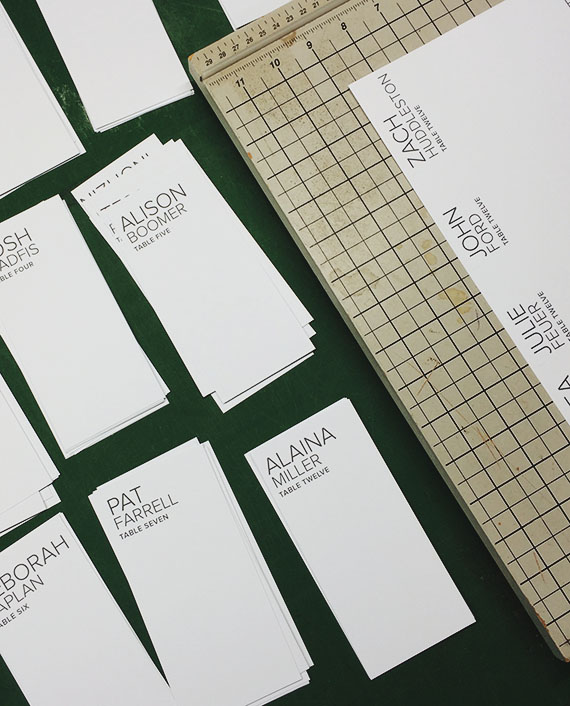
i spent a lot of hours printing the cards for each guest out… no like, a lot of hours. and then we cut each one out with a paper cutter, we didn’t worry about making them exact which made the process like 2% slightly less awfully tedious. and i didn’t even complain about DOING the seating chart, which everyone warns you will be hard, but it’s sooooo hard.
so here’s how you do this step by step.
01 | buy your produce. (read more below)
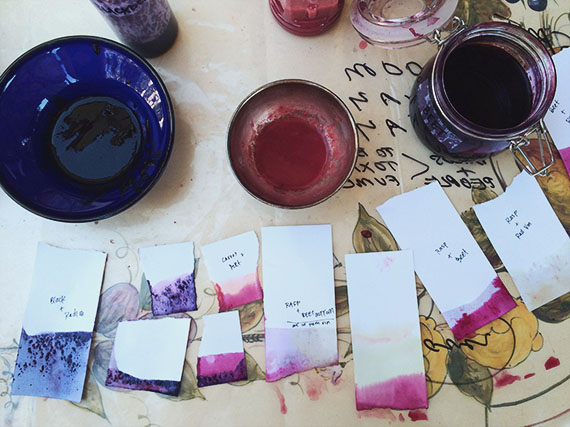
02 | get a lot of test paper and do a lot of tests, and write down what combos you like and what you don’t. because you’ll forget. if you have friends and family helping, make sure you are a good art director or very bossy, because you can’t let them get too creative or you’ll lose the cohesive design.
03 | once you have your escort cards printed and cut, dip them into bowls, varying heights and juice combinations. lay them out flat.
04 | let them dry for a few hours and then deal with keeping them flat. i read that you can actually bake them, but we ended up laying them out on my parents dining table on top of wax paper we taped down. we then put printer paper on top of all of the cards, and stacked with 3 stacks of heavy books. we let them sit there for two days.
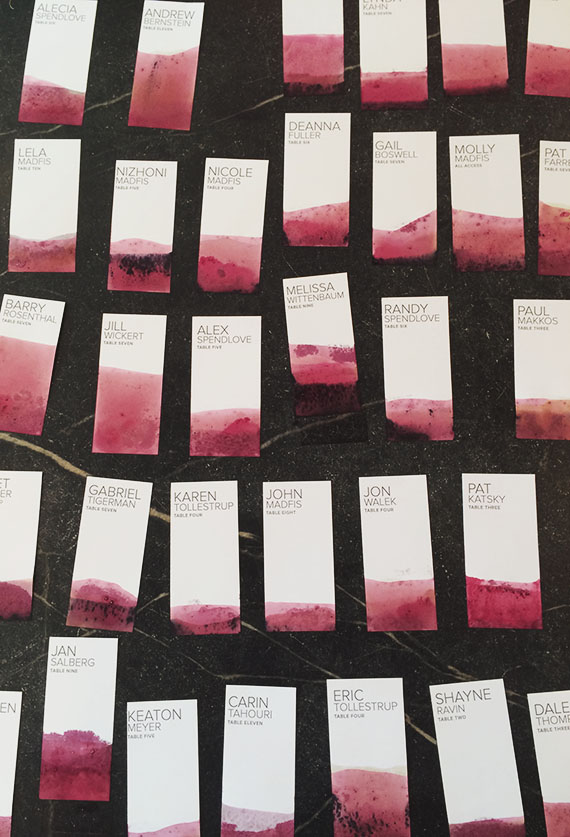
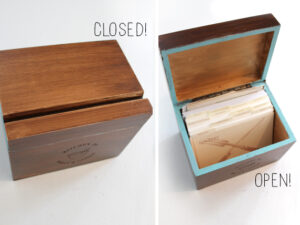
05 | after that, we laid them out on the plywood board (which we had cut at a specific size that gideon did the math for and i have no idea how to) before adding adhesive. i then noticed i didn’t like about 50% of them (read why below), so we re-dyed those ones and did the process all over again.
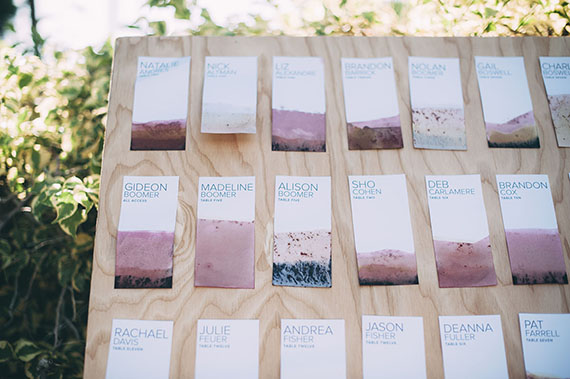
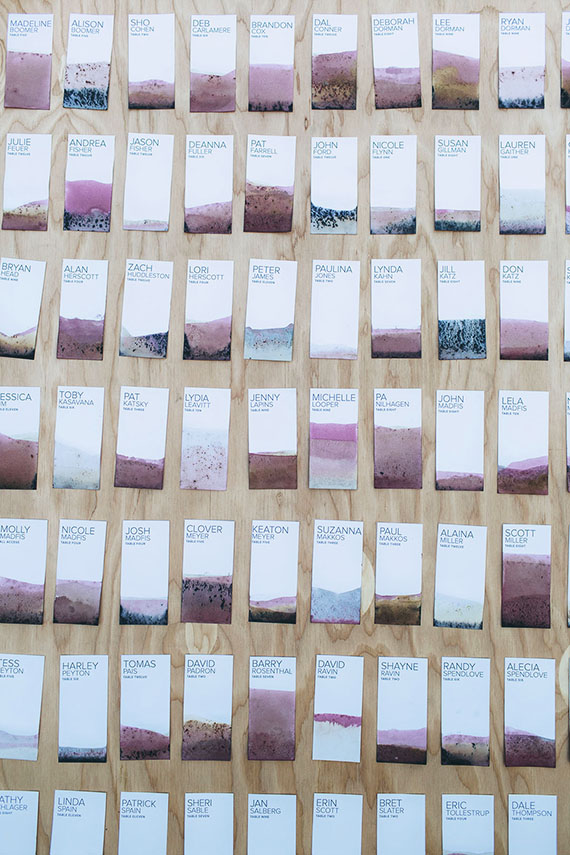
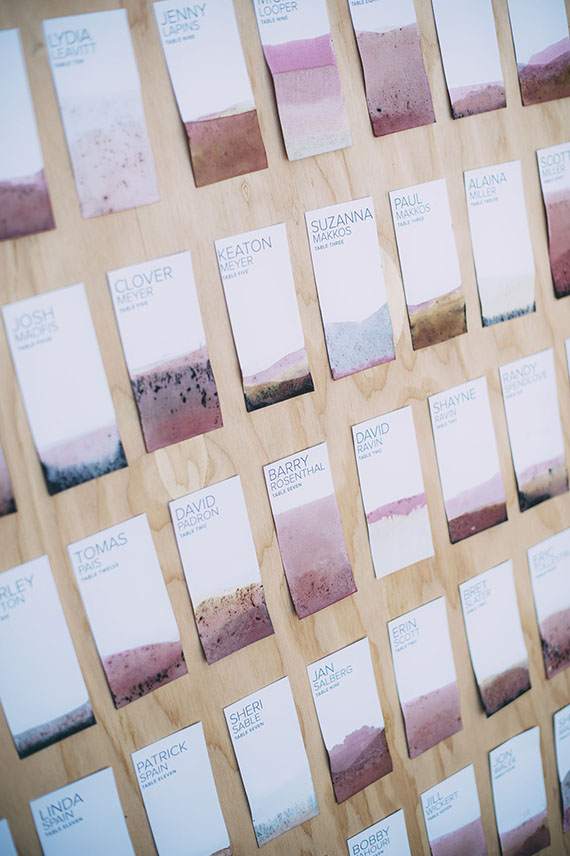
06 | we “loosely” alphabetized the cards while we laid them out, which made them easy for the guests to find and flexible enough for me to vary the heights and colors as much as i could. we used these adhesive dots which were easy, fast, and not permanent enough to mess up the seating cards when people removed them. which we hadn’t planned on people doing really, but most people took their cards and to keep them. they stuck well to the board, which we transported to palm springs after and they didn’t get messed up.
TIPS / MISTAKES WE MADE
we bought raspberries, pomegranates, radishes, carrots, beets, blackberries, and vinegar. we ended up not using the carrots whatsoever because they were really bright, but everything else we used. if you’re juicing your own vegetables, be prepared for how little juice will actually come out of a huge bundle of produce, so don’t spill any.
the vinegar was meant to dilute the saturation of the dyes, but ended up being used way too much. i didn’t know (they all look super red at first) this until we revealed the cards days after drying, but they added a sort of zombie skin tone to 50% of the cards. when you stood far away, it was really noticeable as an overall color, and i had planned on muted reds and pinks. so i told gideon i wanted to redo half of them. and he’s a VERY good husband, so at the last minute he went to buy some pressed beet juice next door and we re-dipped all of the zombie cards back into the beet juice. a couple days later, and the cards all had the same color tone and i was happy. you can still see a little green in some of the cards that gideon liked as is.
the blackberries were VERY saturated, and we really are happy with the masculine dark tones they added, but use sparingly. if you’re going for that sort of sediment like texture, definitely use the blackberries. the beet juice also has a frothy texture that ends up not drying like you plan.
my final tip is to get some friends or family to help. my cousin, brother, mom, sister-in-law, stepdad and of course gideon did a lot of the projects together, which made everything go by super fast and made it actually fun to dip 100 cards into juice.
WEDDING PHOTOS BY : COLOR ME RAD


I love how they look like mini-landscapes. 🙂
Congratulations to you both. I wish you a life filled with joy, happiness and much love. Brilliant and original idea xx
these turned out stunning! good job! i want to do some Christmas cards like this! thanks for the idea!!
It’s pretty incredible how much these look like a Palm Springs sunset.
Can you tell me what font you used? I love these!
thanks kate! i used proxima nova
This is super cool!
These are unbelievably gorgeous, they’re like miniature works of art! I love the combination of the interesting dye colors with the light wood background.
It looks great! We are thinking about doing the same for our wedding. Could you tell me how many times did you dip the cards? Did you let them dry before making a “new” dip – and did you do any thing, to prepare the color? Did you add water?
– Maja
These are beautiful! Did you use a specific kind of paper or will any work?
thank you! we just used thick cardstock, the thicker the better so it won’t warp! and make sure not to get textured.
Molly,
Did these mold at all??? How far in advance did you make them? I must know!
Thanks,
Janine
love how these turned out!
Did the cards mold at all? How far in advance did you make these?
Did you hinge this piece of wood or lean it on something? You don’t remember how big it was, do you? Thank you!!!
This was an amazing idea! We just used this tutorial for our May 23 wedding last month. People LOVED it. My husband did most of the dip-dying and devised an impressive drying system. However, our apartment did smell like decaying cabbage for quite some time… But it was worth it. We are from the Blue Ridge Mountains in VA and I think the escort cards and programs (we did both!) ended up looking a whole lot like scenes from the mountains there. Thank you so much for sharing your tricks! It was such a great concept!
Hi Molly! Lovely work.
I didn’t have a juicer so I used my blender and kind of made a fruit puree. It’s quite thick but resembles what you’re cards look like (still wet). I’m wondering if there’s any chance of it molding?
Thnks!
Hi Laurel,
Did these mold in the end? I want to experiment for business cards…
Love love LOVE this! What fonts did you use for the cards? Thanks!
Woah! At first I thought they were mountain sights but this is insane!!! What a great and easy idea.
Will these mold? My wedding is in October, and I want to get a head start on DIY projects. How far in advance did you do these?
Hi, I’m curious about the font too!
Why didn’t you use liquid watercolor (diluted for economy)? Between time spent and stress induced, you spent a lot of valuable moments in an effort to be “boho” or something. Ehhhh… a great way to start a marriage unhinged and tired!
That’s so funny! I was just thinking about how unhinged and tired you sound, leaving this inappropriately rude comment.
Shut up, Marla.
Marla, are you ok?
Basically your first make it or break it moment while making art and him following your inspiration with something you love! Fantastic job! Also super congratulations on 5 years of marriage!
Hard work paid off! I am in love. I don’t have a juicer but love how your shades came through. I wonder if I could recreate wall art using this method on a larger canvas. Way better than using watercolour because the colour payoff is gorgeous and unique. Everyone’s already done watercolour. I like this so much more!
Hiii!! Do you have the escort card template, or can you tell me the sizing of each card? Thanks so much!
Hi Lindsay, did you ever find out the size of the cards?