-
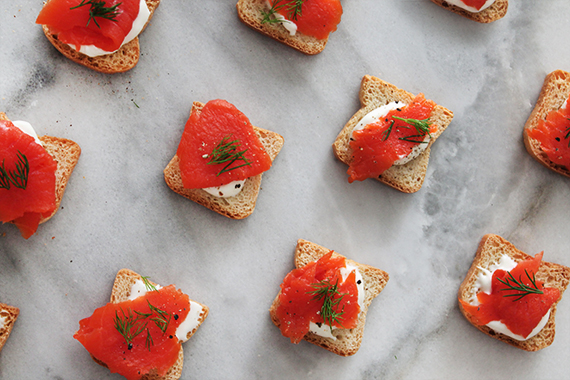
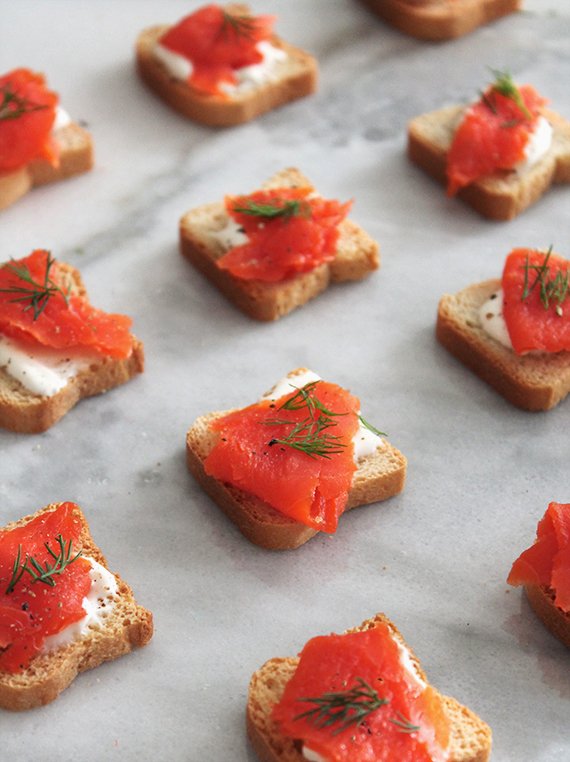
smoked salmon bites

we made these simple and delicious little hors d’oeuvres for our christmas party last year and while my boyfriend was persistent in using blinis like they usually would be served, i fought for them on my favorite toast crackers. i’m really into crunch. and the crackers give these the best crunch! CRUNCH.
also – i went with the crazy red smoked salmon because christmas. this is such an easy appetizer for your holiday — so hopefully anyone looking for a last minute idea can make these.

ingredients
petite toasts
smoked salmon
crème fraîche
fresh dill
fresh ground pepper
a lemondirections
it’s as easy as you think.top each cracker with a dollop of crème fraîche, add a piece of lox, a couple tiny sprigs of dill, grind some fresh pepper on top.
before serving, squeeze a bit of lemon juice on top.
-
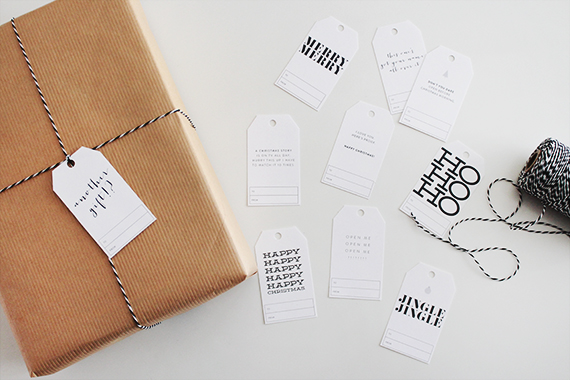
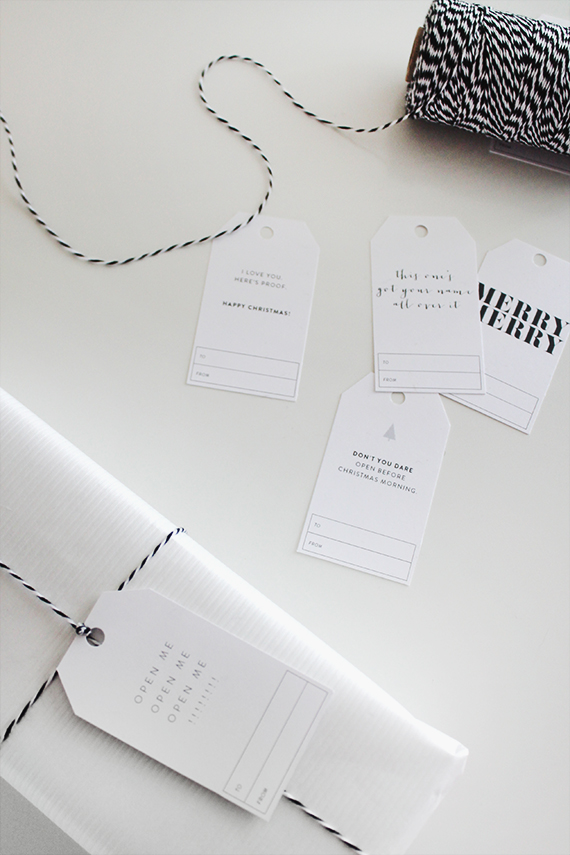
printable holiday gift tags

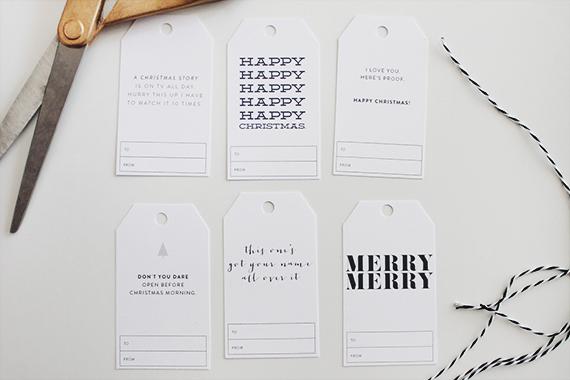
christmas is NEXT WEEK! december really flew by. i’m working this week so i’m not FULLY in christmas mode yet – but in a few days my dad and sister are coming to town and i can’t wait to veg and eat and drink and play games and eat more!
today i’m sharing some fun, simple, and i suppose snarky holiday gift tags with you! simply download the template, print horizontally onto cardstock and cut out with sharp scissors or an xacto. punch a hole on top and attach them to your gift!

-
diy simple triangular wreath

well, it’s pretty obvious… i’m into triangles right now! i’m part of a new blogger group called quarterly collab, every season we are going to each do a diy based on one theme : wreaths! click here to see the DIYs by the other ladies.
i’ve never made a wreath before – but as usual, i wanted it to be simple and modern! this wreath is so easy it’ll take you 10 minutes.
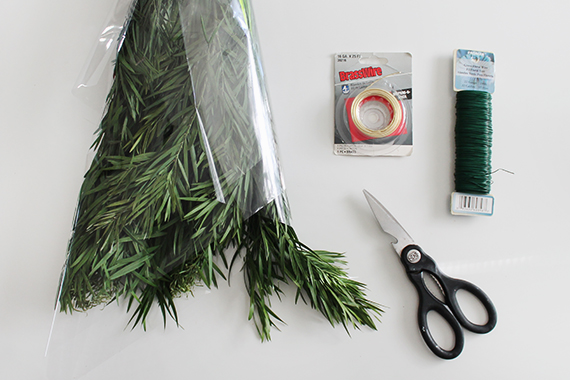
materials
simple greens (not exactly sure what these were and neither were the women at the floral store. they’re similar to olive branches)
thick wire (i only had brass, but use green if you have!)
thin wire
scissors or secateurs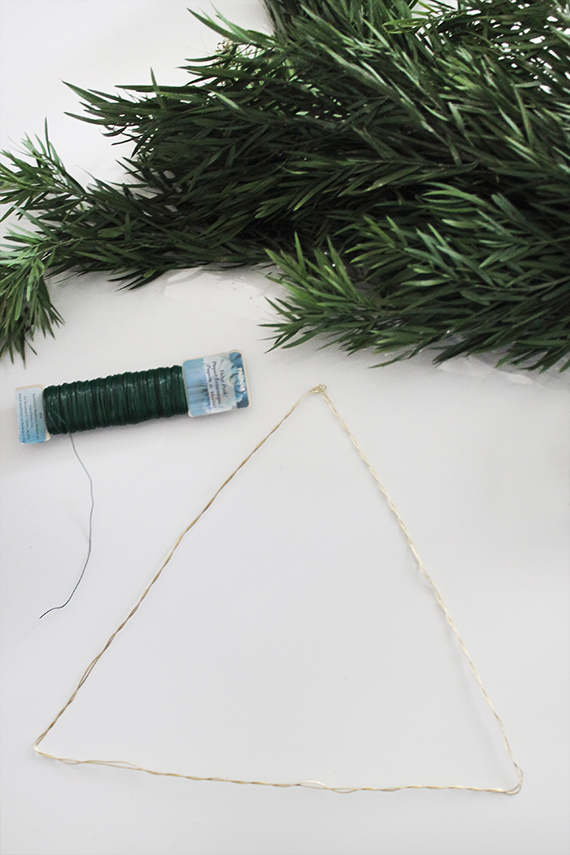
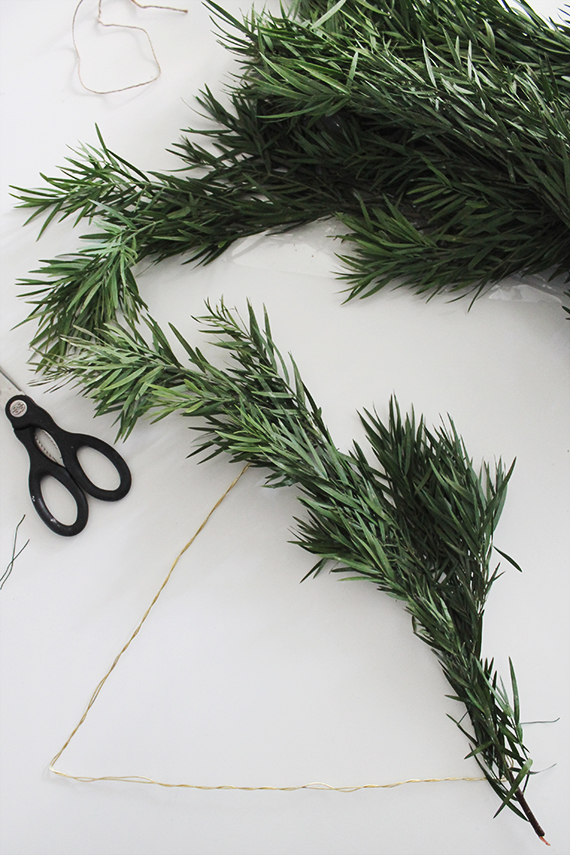
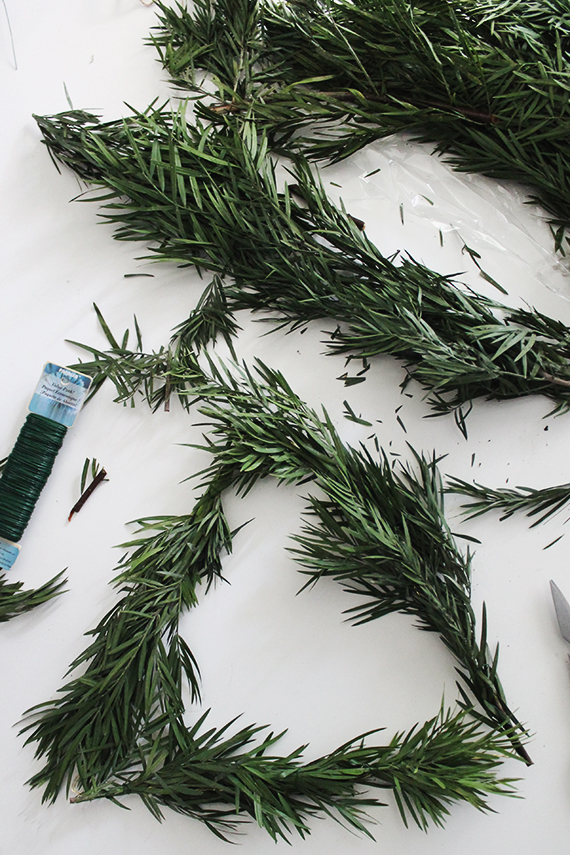
directions
01. double your thick wire and make a large triangular shape. to easily tighten your doubled wire, you can stick it into the chuck of a drill (that’s the part where the drill bit goes) and drill. it’ll tighten up real tight!
02. take one long branch and secure to one side of your triangle with the thin wire. if you want yours to look a little mohawk-y on the top like mine, do this piece first.
03. secure a long branch to the next side, and then to the next.
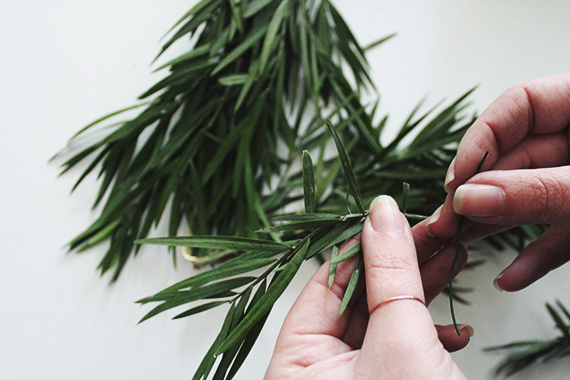
04. cover any visible thick wire with small pieces of your greens. then trim up any parts that look too bushy or stemmy.
05. if any thin wire is too visible, gently pull leaves from under the wire to disguise.

these are so easy and quick you could make a few for your hostess or guests at the same time!
-
i link you
hope your week is going well – i am completely flustered that there’s only one full week before xmas. i’m going to try to fill next week with a couple DIYs you can do before the holiday. also, i think i’m getting sick. ugh. i like winter and i hate winter.

these “dreamscapes” by korean artist jeeyoung lee are insanely beautiful and intricate (via this is colossal)
a fun gift for the holiday – homemade champagne simple syrups (via spoon fork bacon)
a simple diy christmas tree that would give my cats a full time job of trying to mess with (via hank and hunt)
love the modern look of this beaded extension cord diy (via remodelista)
i want to make this chicken thigh recipe reeeeeal bad… (via bon appetite)
i’d move into courtney kleins house and never have one complaint. seriously love every detail. (via ann street studio)
-
i link you
hope your week is going well – i am completely flustered that there’s only one full week before xmas. i’m going to try to fill next week with a couple DIYs you can do before the holiday. also, i think i’m getting sick. ugh. i like winter and i hate winter.
these “dreamscapes” by korean artist jeeyoung lee are insanely beautiful and intricate (via this is colossal)
a fun gift for the holiday – homemade champagne simple syrups (via spoon fork bacon)
a simple diy christmas tree that would give my cats a full time job of trying to mess with (via hank and hunt)
love the modern look of this beaded extension cord diy (via remodelista)
i want to make this chicken thigh recipe reeeeeal bad… (via bon appetite)
i’d move into courtney kleins house and never have one complaint. seriously love every detail. (via ann street studio)
-
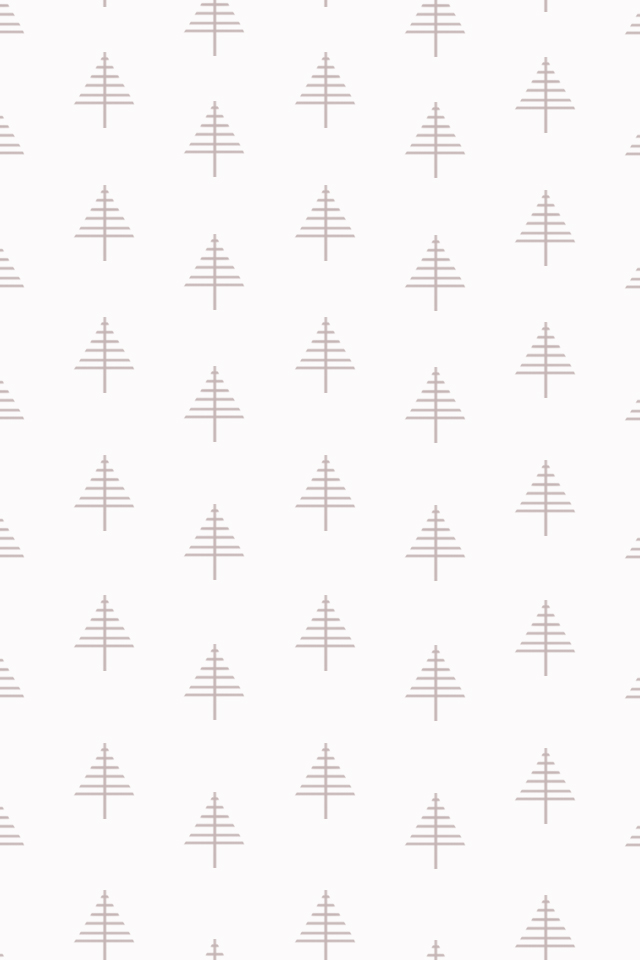
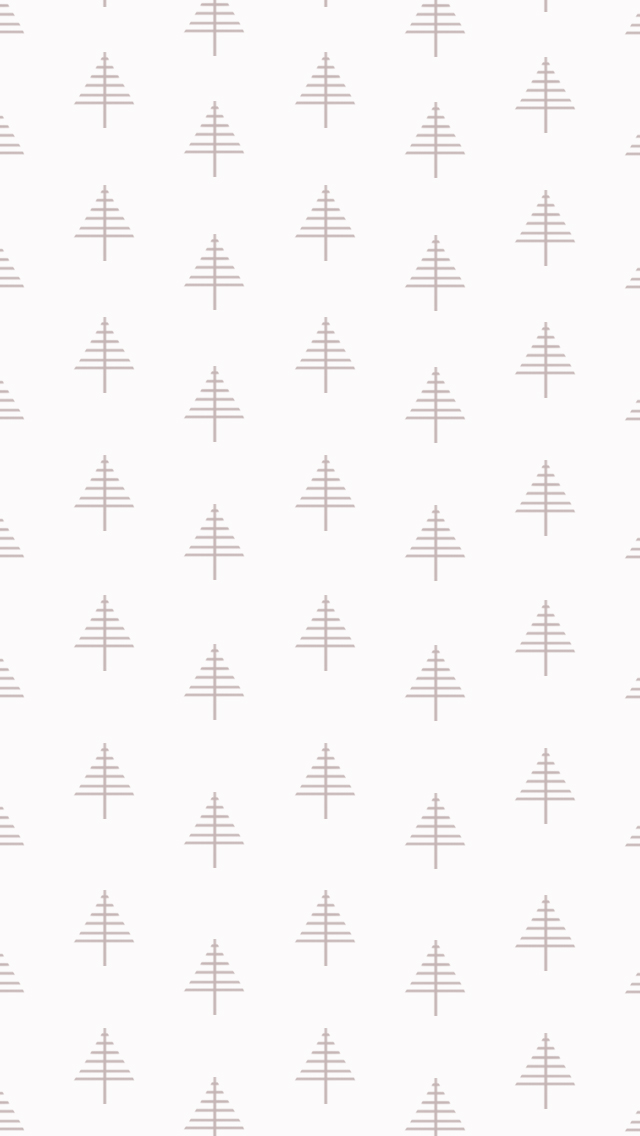
freeloader // 5

i don’t think i’ve been THIS into the christmas spirit in many years. maybe because we didn’t get a tree last year, but we have been going hard in our apartment. i’m talking holiday itunes radio on everyday. so why not share the holiday joy with you? here’s a minimal holiday background for yo phone!
#jewsforchristmas

this wallpaper is for personal use only, and NOT for re-distribution.
if you’d like to post a link sharing them, you may not directly post the downloadable files.
please credit and link back to this post for downloading the wallpaper.

-
holiday gift guide / for the boyfriends, husbands & brothers
i actually have the best time buying for my boyfriend and brother, because i get to buy stuff i’d want if i were to have a penis.
here are some fun and affordable gift ideas for the guys in your life!

01. a handsome walnut portable speaker that they take camping, to the beach, to the shower? i mean. no brainer
02. a fun & unique accessory for their bar, this snake bottle opener can make you both happy
03. for the hip sports fan, american needle makes all sorts of these rad patterned baseball caps
04. a perfect book for the foodie who loves trying new restaurants. (i have this and love it)
05. a q chord is a digital instrument that he can play like a guitar, keyboard, piano, etc. i got one for my boyfriend a few years ago and he still loves playing with it. highly recommend for the musician or music lover
06. a framed art print of his favorite movie or comic or band always goes well
07. any boy that cooks wants a new fancy chef knife. give him one with a cookbook and you’re getting a dinner cooked for you
08. a cute dopp kit is something no guy i know would buy for himself. fill it with goodies and he’ll be too happy
09. perfect to fill the dopp kit, some imperial gel pomade may also improve his hair for your benefit
10. my bf never wore cologne prior to me gifting him some. and happy to say he doesn’t leave the house without it.
11. what guy wouldn’t want a new fancy tie that you picked out so he knows it’s good
12. hands down – best gift for ANYONE that doesn’t own one and likes sparkling water. our sodastream is a part of the family now
13. get him a few fun records if he has a record player…
14. and if he doesn’t, get him a record player to go along with them! -
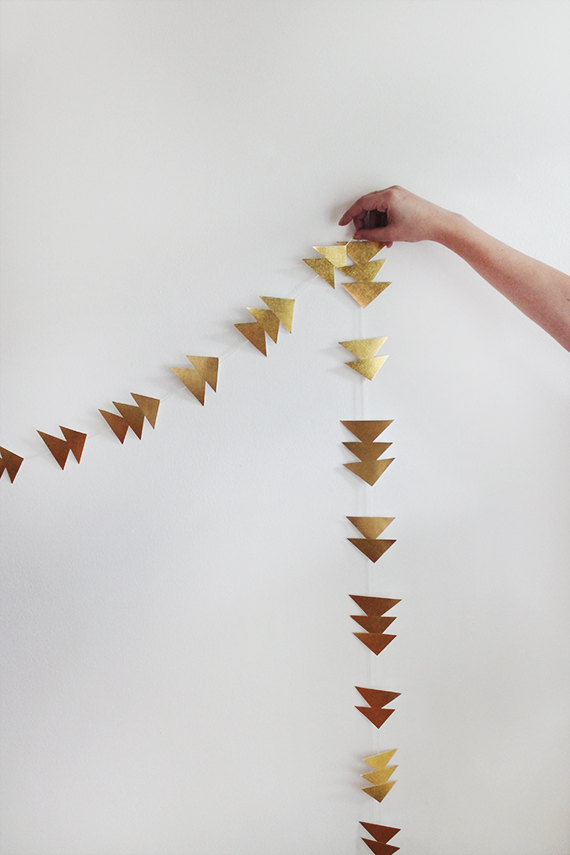
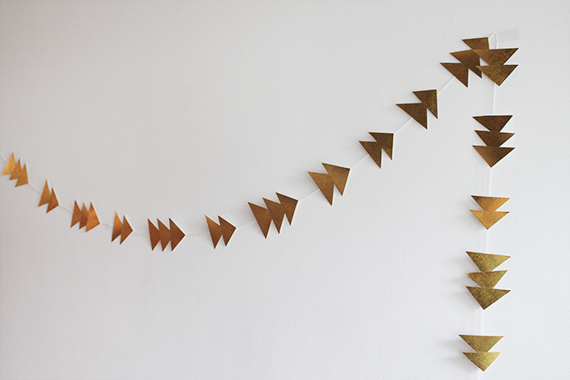
diy simple gold triangle garland
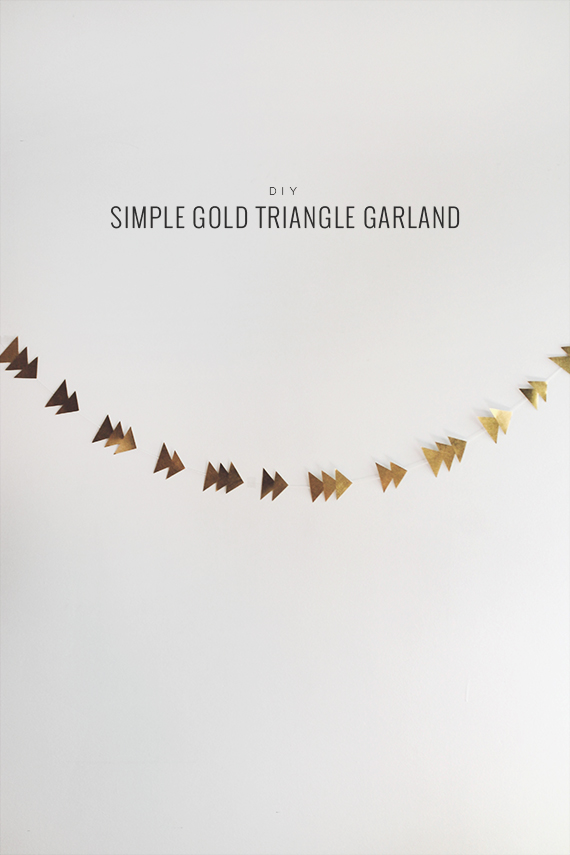
in my opinion, there’s a fine line between tacky and modern when it comes to christmas decorating. so i always err on the simple side. shocker. so here is a VERY simple and of course, very easy diy decoration you can make in a few minutes!
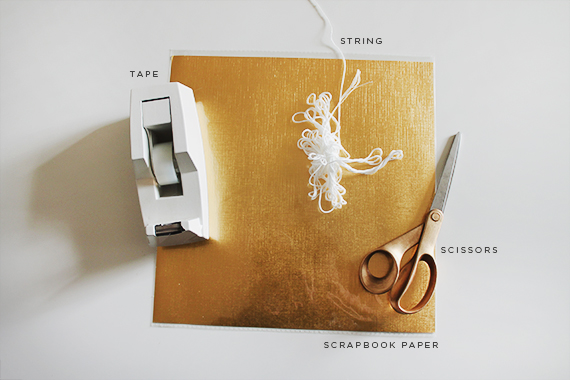
all you need is a large piece of gold scrapbook paper (or two depending on how long you’d like it). i attached the triangles with scotch tape, but you could glue also.
cut out a zillion triangles from your paper. this is the boring part, but i did it while i watched netflix.
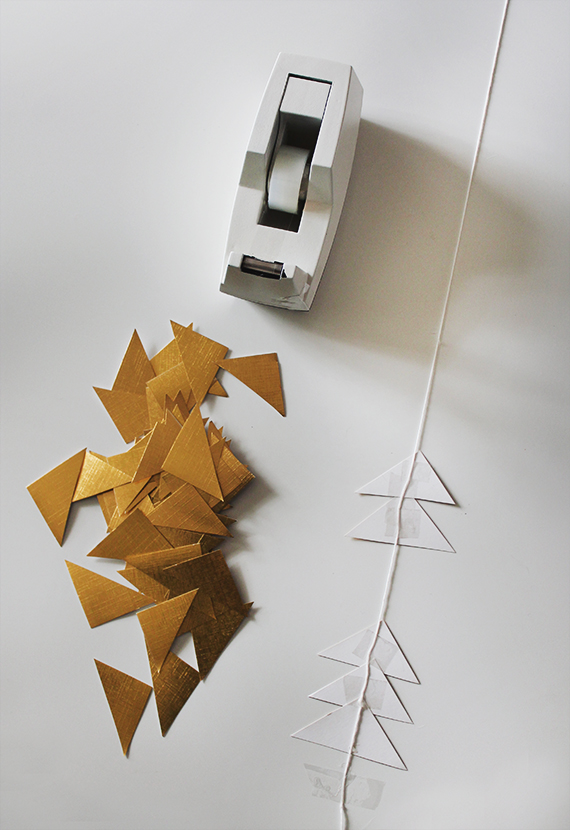
tape your piece of string on one side of a long table, tighten the string and tape the other side down. slide your triangles under the string and tape! i did it in a 2 x 3 pattern, but there are obviously a bunch of variating patterns you could try. they kind of look like modern little christmas trees right?!

and duh – that’s it! hang across your mantle, over a door frame or just along your wall for a little touch of festive decor.
-
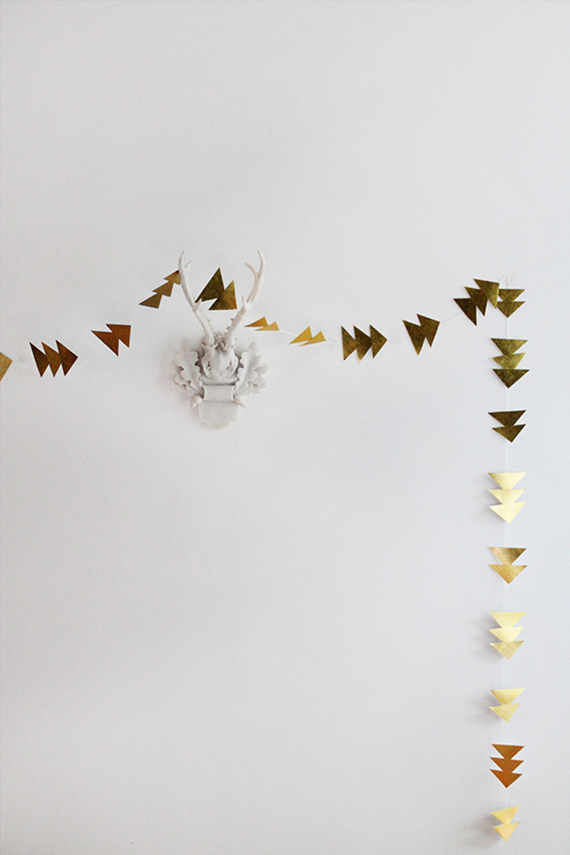
diy simple gold triangle garland
in my opinion, there’s a fine line between tacky and modern when it comes to christmas decorating. so i always err on the simple side. shocker. so here is a VERY simple and of course, very easy diy decoration you can make in a few minutes!
all you need is a large piece of gold scrapbook paper (or two depending on how long you’d like it). i attached the triangles with scotch tape, but you could glue also.
cut out a zillion triangles from your paper. this is the boring part, but i did it while i watched netflix.
tape your piece of string on one side of a long table, tighten the string and tape the other side down. slide your triangles under the string and tape! i did it in a 2 x 3 pattern, but there are obviously a bunch of variating patterns you could try. they kind of look like modern little christmas trees right?!
and duh – that’s it! hang across your mantle, over a door frame or just along your wall for a little touch of festive decor.
-
payday wishlist
friday came fast this week — i’ve been a little overwhelmed with all the holiday everything. while being consumed with blog ideas, i haven’t even had a chance to think about christmas shopping or getting OUR tree yet. it is driving me nuts seeing all the trees getting decorated on instagram! but hopefully, we’re getting one this afternoon! we’re also have a birthday dinner tonight for my brother at one of my favorite pasta joints. we’re also participating in a chili cook off. definitely my first.
we’ve been avoiding putting the heat on in our apartment for weeks now because our bill gets so high, but i did it yesterday and am proudly no longer shivering. probably for the best. hope you have a great weekend!

01. i am one of those people that buys playing cards every time i travel – you can’t have enough decks. how cute are these ones?! i’m a sucker for salmon colored anything.
02. they look like toms. but they’re leather. therefore i could wear them and feel like i dressed up. love.
03. i’m all about the huge drapey clothes – the more like a potato sack i look, the better. i want this jacket.
04. i love the shape and pattern on this narrow vase, how cute would it look with some simple roses?!
05. love this baggu drawstring bucket bag, it’s small but big enough to hoard too much in.
06. there’s something i love about lace tablecloths – it’s kinda … grandma chic? so i was so excited to see this.