diy guess who
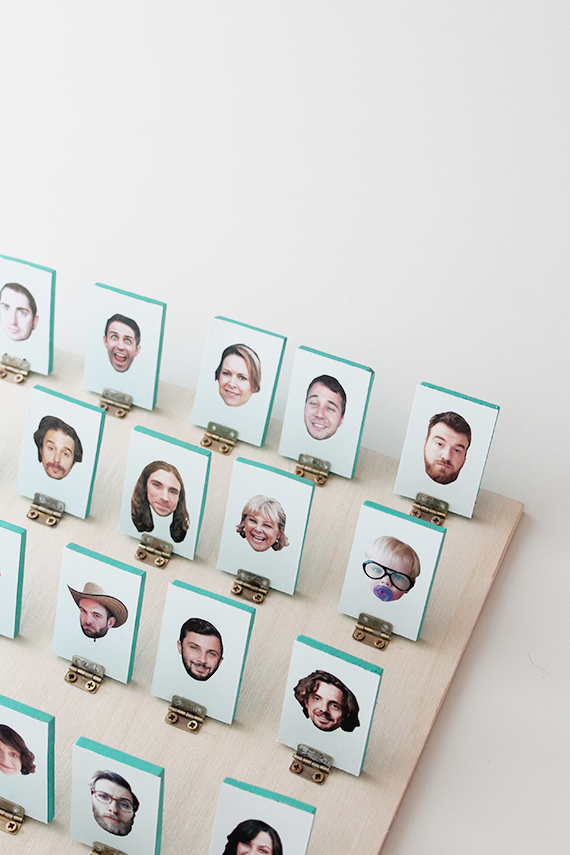
my brother and i have been into board games since we were little — and we still go hard with it. we do game night with friends and play games every chance we get. so i decided for his birthday last month we’d make him his own personalized guess who with all his friends and family and his longtime man crush sam rockwell.
there were A LOT of hiccups while making what seemed to be not so difficult. like one after another. but luckily, if you want to try doing it on your own, you can learn from our mistakes.
here’s how to make your own diy guess who board game!!
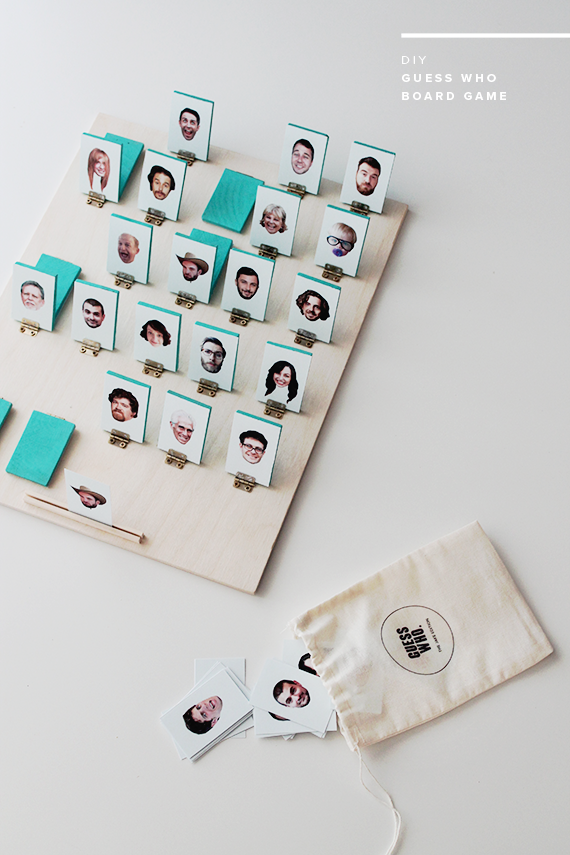
materials
- craft plywood for the bases
- wood rectangles for the pieces
- dollhouse hinges and screws
- permanent double stick tape
- super glue
- craft paint (optional)
- a thin wood dowel
- muslin bag
- thick cardstock
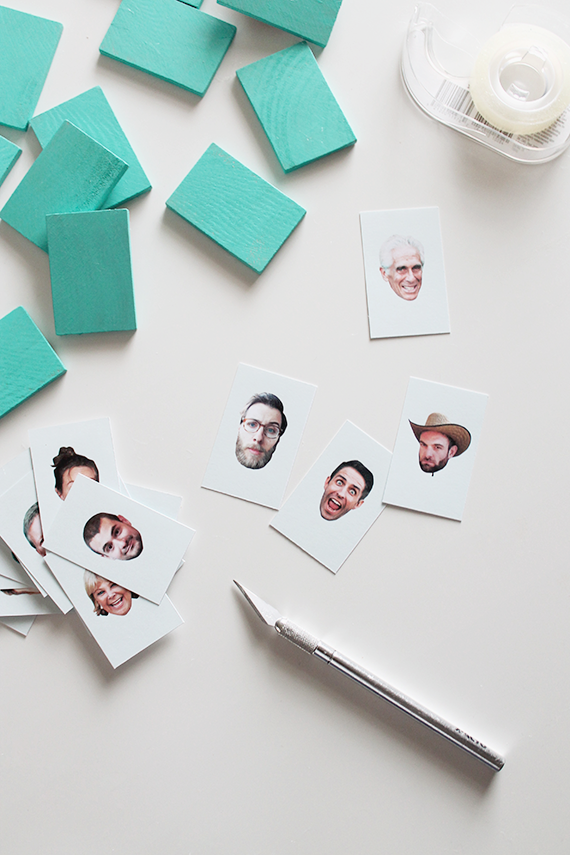
01. start out by choosing who you’ll include in the board. you’ll have to spend a couple hours tracking down decent photos of people from their facebook pages. in photoshop, cut out everyones heads and add a colored background if you like. make the photoshop file slightly larger than the pegs so that you can trim down once attached.
*i forgot to put the names on each card like in the actual game, because i admit i forgot to google what the game looked like until we had finished the whole project. oops. if you’d like to add the names, you probably should. we chose 25 people so there were 50 pieces altogether.
02. print out three copies of each face. the third is for the bag. trim down.
03. when the birch pieces showed up, i didn’t like the way they looked on the light board piece, so after trying a different couple stains, i decided to paint them all. i think it added a more fun look to the game — so if you agree, paint the back of 50 pieces.
04. attach the faces to the pegs, we were planning on using mod podge but didn’t want to risk messing up the print outs, so we used double stick tape instead. might not be the most permanent but it won’t be used everyday so i think it’s ok.
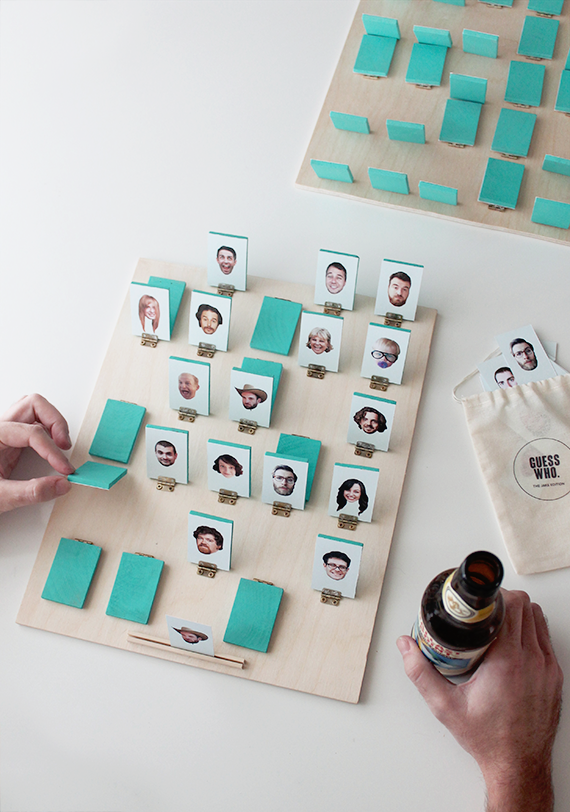
05. measure and line up all your pegs onto the board, and using an awl, make pilot holes where the hinges will go.
*speaking of hinges, the hinges proved to be the biggest pain in the ass of all. we didn’t have time to order them online because we came up with the idea so close to my brothers birthday, so we called about 25 stores to find them. we finally found them at my favorite craft store in studio city and bought everyone that they had in stock, but a bunch of them were wonky and stuck. i hate these hinges and hopefully will never use them again.
06. once we had screw a couple pieces in with their hinges, we noticed they didn’t line up well with the other rows, so we skipped screwing the hinges in on both sides and glued each hinge to the peg directly, then screwed each hinge into the board. it saved some time as well as our sanity.
07. cut your dowel down to four identical pieces. leaving a tiny bit of space between, glue two down to the front to hold your card.
08. once you’ve peeled the super glue off your fingers for way too long, you can personalize your muslin bag. i made a simple design that i printed on iron on transfer paper, and filled the bag with the remaining cards.
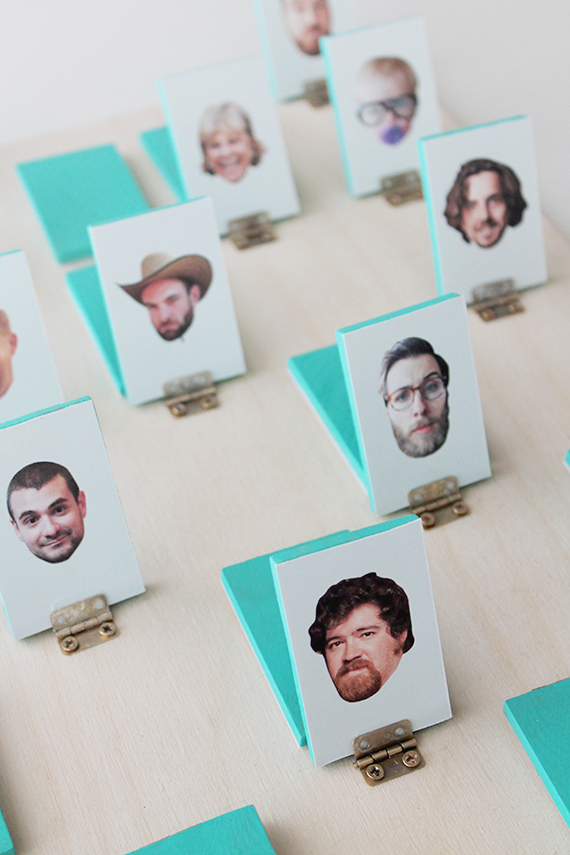
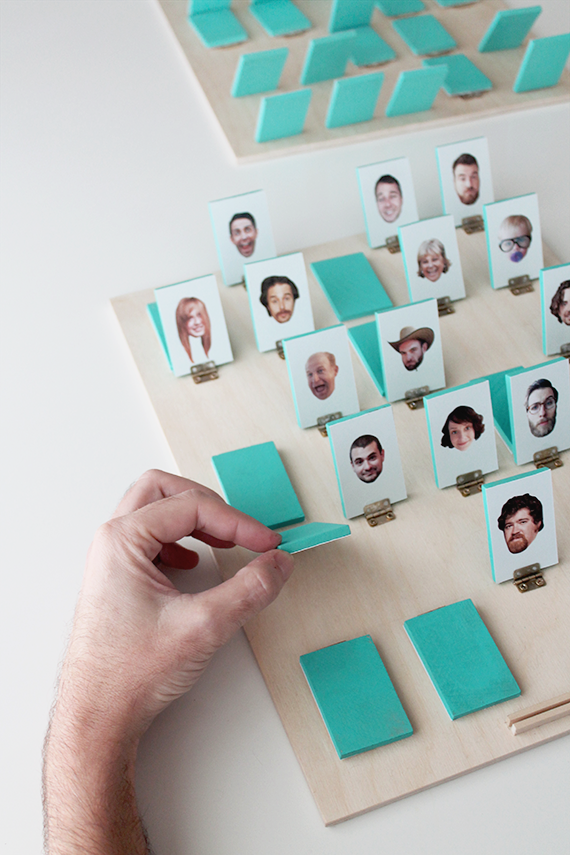
and now we never have to get my brother a nice gift again because we just trumped gift giving forever.
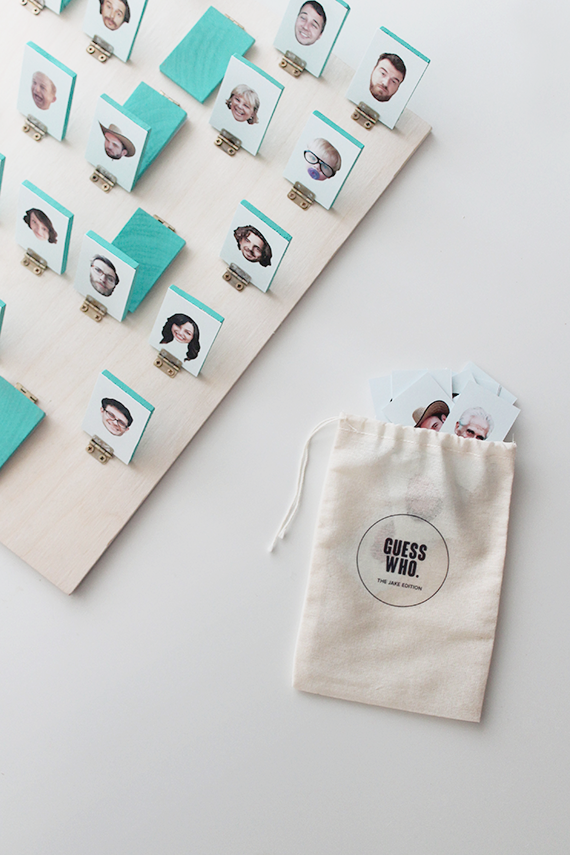



This is so incredibly cool. I want one.
Random tip from years of architecture school – use sandpaper to get super glue off your fingers without hurting your skin! Sounds crazy, but works like a charm.
I needed this advice a few months ago!
BTW, awesome idea. Better than the original game I had as a child for two major reasons: you can put in equal male and female so you aren’t discouraged in picking one or the other AND the pictures won’t keep falling out.
Shut the front door! I was just thinking of this game the other day. What a fun sophisticated version.
Goodness, that seems like a lot of work. Kudos to you for putting that all together for your brother. I love the photo of the baby in the sunglasses.
This is such an amazing gift. Well done!
Lol what terrible idea.
Just buy a copy of guess who and replace the images.
My neighbor and I loved to play this game when we were little! I love your handmade version!! So much fun!
Haha, I laughed so much at the last sentence!
I haven’t played Guess Who in forever, but have such fond memories of it. And now suddenly I want to have my own board to play it on all the time. This is such a great idea and fun project. Thanks for sharing your tips!
xx Kathryn
http://www.throughthethicket.ca
you’ve done it again. killer.
This is awesome!
I really want this!! I loved the game growing up.
I’m beyond excited about this! I used to love this game as a kid. Looking forward to making my own! http://www.InteriorsbyJacquin.blogspot.com
Um, I love this. Super cool.
I am OBSESSED! I will definitely be making one of these for someone next year.
This is, hands down, the best thing I have ever seen!
best. thing. ever.
my sister is a gamesy person too, and her birthday is around the corner…!!
thanks for sharing! xo
This is such a lovely idea!
Came across this via fb link on Rupert’s House page. This is genius!
Not everyone has Photoshop (or the skills to use it) so I would probably say it’s not necessary to do complicated cut-outs, but it sure makes it look great!
thank you! yeah it definitely works for a cleaner look, but totally not necessary.
You are a crafting genius! My family and I were just reminiscing about this game over the holidays. We figured it would be too easy to play again as adults, but this fixes that problem. Amazing!
Really cute idea c: I used to play this boardgame alot
when I was little! Xx http://icepandora.blogspot.com
Adorable and so beautiful crafted! Genius! I’m so happy to find you via the yahoo top 10 blogs to follow in 2015! I’ve already pinned this and think it will make a perfect Valentines Present. I look forward to perusing your site! Happy New Year.
thanks gina!! x
This is awesome! I could’t imagine something like this:)
Did you cut your plywood any smaller? I am making this and just bought the pieces and the plywood piece seems huge!
omg! totally forgot to add that as a step! yeah, we cut the plywood down to a little longer than a square – will add the step to the instructions, thank you and good luck! would love to see it when it’s done! x
I love this idea and also this game!
Lisa from http://www.fashiontamtam.com
Would you mind sharing the dimensions of the face pieces? I don’t have a Hobby Lobby & would like to get plywood pieces a little closer to the size you used than the full size, if I can! Thanks girl
hey kate — the pieces are 2 3/8″ long x 1 1/2″ wide x 3/16″ thick. x
Amazing… thanks so much for this inspiration. Can’t wait to make one for my little one and his cousin! Can’t wait to see the expressions of joy.
Amazing! The best idea I’ve seen in a while.
Completely amazing. This is so clever and stylish. I would never have thought of this. This might be a fun project I could make with my girls. We could put the whole family on there. Thanks for sharing.
I found your DIY over at someone’s blog and people were raving about it. I don’t blame them. This is quite amazing. I want one too!
http://www.annescribblesanddoodles.blogspot.com
Your blog is delicious, so beautifully our together. I’m living this idea, I’ve been slowly putting together a book of faces for my baby, but this would be an incredible family game for our huge extended family. What are your thoughts on the hinges, if you had to do it again would you have done the hinges differently? I do love the brass on wood on teal, but tiny screws…! Also, a totally lame idea for someone like me with all the desire but little time, I thought about swapping our the face tiles out of the actual game set, but your idea seems more sturdy than I remember the game being–the paper always slipping out of the plastic our the plastic doors slipping out of the base!
yeah, because we ended up gluing the hinges, i’d say either try to find a better hinge solution altogether, or just glue and skip the attempting to screw. the screws are SO tiny and it messed it up so quickly, that had we just skipped trying to make them work for an hour — we could have saved ourselves the headache!
we actually used the double sided tape on the faces for the purpose of being able to swap them out someday!
Never heard of this game, but I think it could be a wonderful activity for my Mother-in law with Alzheimers. I realize this is a craft project, but chasing around a 2yr old is easier & less sressfull than keeping after my 92 yr old toddler.Anyway I was wondering is there a way to get a board setup that only needs me to add the pictures? thanks. Gigi
wow that’s a really great idea. i would just purchase the game : http://bit.ly/1CCnWch
and swap out their cards with your own!
This is another level of awesome! Thanks for sharing, I really want to give it a try. Tia xx
This is just the coolest craft project!! Quick question – why does one need to print out extra copies of the faces for the bag? In case they fall off? 🙂
hey kate, thank you! that’s part of the game. each player has a card and the object is that the opponent is trying to guess your card.
This is SO amazing! What a fabulous idea! Guess Who is still a favorite of mine and this project is right up my alley! Thank you! 🙂
How do you play?
A gift made with love, very good idea that I keep in mind for somebody I care
Thanks to share 🙂
Yeah but what exactly is the object of the game, and how do you play it ?
Just love it!
What size did you make the pictures and the wood?
Hello, Great Idea!! how did you make the pictures have a white background and be only the face?
I love this idea of making the pictures of family and friends and also of being able to swap them around. I think this is perfect for my ESL classes both kids and adults. Thank you 🙂
What a great game for a grandparent who may be forgetting names and faces.
I don’t know if someone may have made this comment before, but this is a great idea for Alzheimer or stroke patients – to jog their cognitive memories – it is both visual & verbal & physical – Thank you!
This is also a good game to play with little ones – to help them identify relatives they don’t see all the time, but should know.
If you wanted to make it even lighter you could use foam board – oooh I just had a great spin-off idea – picture dominoes!
Crazy as this may seem, I am in my 60’s and have never seen this game in my life! I am always looking for something that would be a good present for the family for our grown kids, and their fast growning children. This would be it!! Amazing job! Thanks for the idea. I don’t think I can get my husband to go this far on that many rivets for as many kids as we have. But, but we will figure something out!!
I love this game idea but I decided to make my own with the same concept but for kids. We all remember the game “Memory” as kids so what I am going to do is find an old Dominos game and make my own. I will use the same concept as the Guess Who game by using family pictures and cutting these to fit onto the Dominos. I will paint the backs as the Guess Who game, too. I will make 2 sets for 2 sets of great nieces and nephews. I can’t wait. Thanks for the idea.
I did a simpler family version of a matching game instead of guess who. I bought a child’s matching game then modge podged family pictures (2 pics for each – it’s matching, of course) onto the pieces. We played it during Thanksgiving and no one had a clue it was going to be family pictures! Lots of fun and memories too.
What a phenomenal idea for family to meet other family members for reunions, etc.
I love, love, love this!
I don’t know how to play this game, but it looks like a great gift…
You produced some decent points there. I looked on the net to the problem and discovered many people goes together with along along with your web site. decgckkbkdbkffdc
Es difícil encontrar su web en el navegador, necesita backlinks con DA alta.
Sé lo que puede ayudarle. Escribe en google por:
Burol’s Tips Outsource The Work
Hi, looking at making this – I absolutely love it! Only problem I’m having is that the links to the materials and not working for me. Are you able to advise the dimensions etc. of each?
Thank you!
very good job ! I love it !
This is brilliant! I was trying to figure out how to DIY a version with 112 characters, to do the periodic table of elements for a fun way to learn them. I am wondering if a strip of fabric (ribbon?) could be glued on in place of a hinge? Thank you for sharing your project 🙂
Where are the instructions to the game? I am not familiar with how to play it.
Ahhh Kiko.. Roubou minha ideia e nem me deu créditos?! Achou que eu não fosse descobrir??? Hahahahahahahaha
Ficou muito bom!!! ?
Hiya, just wondering what the dimensions for the plywood base were? Tried looking in your instructions and in the comment section but have not come across them!
The link to the plywood base seems far bigger than you have, so I assume it was cut down?
Thanks so much!
How did you get the pictures to have no background and show only the faces?
Would you ever consider making the template and selling? I’m NOT crafty and don’t have the time, But LOVE, LOVE, LOVE It!
This is such an amazing idea!! I was wondering what the dimensions were for the cards and the board that you made.
Thanks 🙂
I’m having a rough time with finding a photoshop program to help me with the photos, in general I am not tech savvy, any suggestions?
I pinned this the very first time I saw it. It’s just an adorable, adorable idea and so brilliantly executed! I love it’s originality! What a lucky family!
Hi,
I really love the idea and the result looks great, well done!
Question, how did you know which attributes to put to each character in order for the game to work well and end up with only 1 person after all the questions? i.e: how many women, how many men? how many with glasses? how many with blonde hair? hats, etc?
Thanks a lot
Virginie
I’ve loved this DIY since I first saw it sometime last year and this Christmas I finally got around to making two (!) myself! Just posted about it on my blog: http://thelovelythings.com/2016/01/guess-game-diy/
Love your blog!
My kids loved this game.
What about the idea of making this a wall hanging. seems like it might be a fun and interesting way to display pix. thoughts anyone?
Did you have to cut the boards down to make them the right size? If so, how did you do that?? I ordered all the materials but the 24 inch board is HUGE! It can’t be what you’re using in the photos . . .
This sound very nice.
wow, i want to thank you for sharing this content,
This is absolutely phenomenal. I am going to try to see if we can make this for a student of mine who is Autistic and has difficulty consistently indicating who people are. This might be a truly engaging way to practice and have fun doing so. The school year is winding down, so I will see if this is doable for the Fall. I can include classmates, teachers, friends, family, and even his service dog. It will be a big project, but I will do my best to follow through as I simply love the idea. Beautiful job! Thank you.
Did this years ago just buy the game and replace the pictures with family members.
Nice one, Darling. Its very an amazin post. Thanks for sharing
I know what I’m doing this weekend!
This is the coolest thing!
Molly, I have a question, how did you just print the faces like that?
Thank you for sharing!
Super cool! Very funny!
I found the original games at thrift stores and replaced the pictures with family members for my Dad’s 90th birthday party. It was a huge hit!
I am trying to recreate this for a Christmas present but I don’t know what dimensions I should use for the base. What size did you use when making it?
The hinges are the worst part of the installation i wish i have never ever seen this post don’t want to do this beatiful creative game but here i am playing with it 🙂
Hi, want to do one for a goodbye gift for my wonderful host family ! Just wondering what sizes are the bases and the little rectangles for the faces ?
About the hinges, do you think we can glue them also to the base or is it better to screw them at least to the base ?
Thank you for this amazing diy, just a bit blocked right now concerning the sizes I need to buy/order.
i love you for making this. so good.
Fun and easy….Kids would love to make and play with family and friends. Learning letters would be fun for little ones.
OMG! THis is the coolest thing ever! We love the Guess Who game too. I still play it with my kids sometimes and they are 15 and 13. It will be so fun to make a DIY personalized Guess Who Game. Great idea!
What size base plywood would you recommend getting?
What size base polywood and small pieces would you recommend getting ?
Thank you so much this is awesome!
I’ve been always dreaming of making a personalized Guess Who, and well, you made my dream come true! After hours and hours of work I created…
So excited till now I saw. Thanks for your sharing!
This is amazing! Such a great idea.
I will definitely be making this for myself this winter!
Love this amazing reading. A great DIY activity, thank you for sharing it.
Wow this is an awesome game and it also looks so funny.. I hope it will be very useful for all readers.. and it is source of fun for family members.
Thank you for shearing this funny game to us..
Great game! Like this tutorial, I can’t wait to play this game… Great DIY event, thank you for sharing.
I am familiar with this game and I don’t understand how you play this the way you have it set up. If you’re playing with 2 people, wouldn’t you want the card that’s picked to guess hidden from view so that the person guessing doesn’t see it? I think you have it set up wrong, unless I’m missing something. Did you actually try to play it?
this was just setup for photos! in the real game you’d keep the card hidden and that’s why there is that slot in the front.