• a nursery by the brick house & animal print shop

    morgan satterfield of the brick house & sharon montrose of the animal print shop teamed up to create this gorgeous nursery that i would have no problem sleeping in a crib for.

    that is one lucky baby.

    check out the lovely details and item sources on the brick house.

  • , , ,

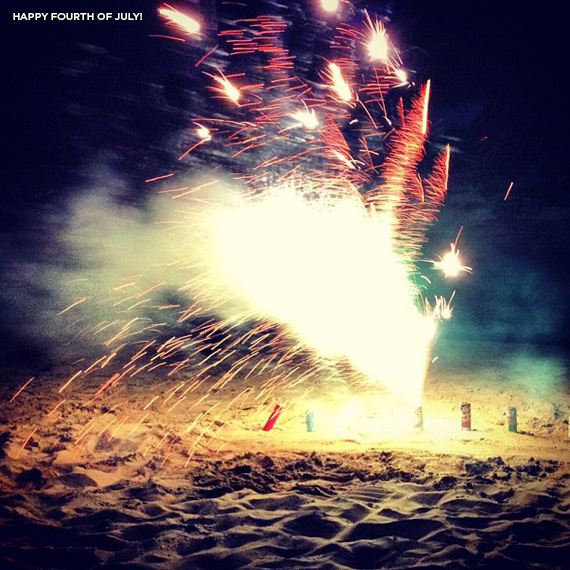
    diy fourth of july matchboxes + free printable

    who doesn’t want to light a few sparklers [and maybe a lot more if you’re lucky] on july 4th? so here is an easy and quick DIY to customize your sparkler lighting this year!

    all you need for supplies is a printer, glue stick, scissors, and some matchboxes in desperate need of a makeover – these were designed custom for diamond matchboxes specifically.

    i designed two sets. a fun stars and stripes pattern and a festive bomb pop. mix and match all you want!

    click above to download the free printable i’ve shared for personal use only. and you can just print it on standard 8.5″ x 11″ copy paper.

    just FYI – the diamond matches have a little bleed on both sides, so the templates are made to cover that if you just carefully glue and cover the edges.

    + now go light some sparklers and also HAVE A HAPPY 4TH OF JULY!

  • payday wishlist

    one chambray pocket tank (LOVE, although i think i look awful in racerback. do other people hate racerback like me?!)
    two american apparel luxury leather watch
    three container store black jute bins (i want 10)
    four golden eagle beach towel
    five faux tortoise shell bangles

  • want flaunt jaunt

    this blog is like sooo about me. so i thought i might mix it up a little!

    here is a new column where i’ll feature other bloggers i’m into to learn what they’re pining over, what their favorite possession is, and their dream destination.

    WANT i’m crazy pragmatic about everything i buy (minus the occasional item bought on a whim– hello floral palazzo pants!), so even my dream-ticket item is practical. i’d love to have a gorgeous philip lim pashli satchel. big enough to haul my life around, with enough hardware to keep things interesting, it’s my dream bag.

    FLAUNT one of my favorite DIYs was this crystal spike necklace. it’s so pretty, i wish i had more occasion to wear it.

    JAUNT current unrest aside, i’ve been dying to get to turkey. it seems like an absolute feast for the senses, and i’m especially enchanted by the country’s textile traditions. (image via)

    ~

    erin’s blog thanks, i made it is full of gorgeous jewelry DIYs that are awe inspiring while feeling accessible. i don’t wear a ton of jewelry, she has a perfect balance of glam and simple. some of my favorites are this knotted rope bracelet, this rope and chain braided necklace, this DIY fiona paxton necklace, and these no-sew business card holders. go check them out!

    + erin’s blogtwitter / facebook / instagram

    thanks erin!

  • ,

    bangs. bangs! baaaaangs.

    i’ve spent the last year growing out my side swept bangs that i had for probably the last 8 years. and now that they’re finally grown out, i feel very naked and styleless. so i think it’s time to get a new style going up on my head. ( much to the dismay of my boyfriend who does not approve of this decision )

    i have pretty wavy hair so i’m thinking bangs would shape out my little face well. let’s hope. OH GOD I HOPE I WON’T REGRET THIS. anyway – here are some pretty bangs!

    “i wish i went to my high school reunion, but i was growing out my bangs.
    i’m always growing out my bangs. don’t get bangs.”
    – 
    anna faris in what’s your number

    + did you see what’s your number? i loved that movie more than most people. and yes i just quoted what’s your number. and yes, i’m a huge dork.

    anyway – trying to get these bangs going asap. PLEASE TELL ME IF THIS IS A BAD IDEA!

    (images 1 / 2 / 3 / 4 / 5 / 6 )

  • diy constellation coasters

    if you read this blog, you’ll notice it’s been a while since i’ve done any DIY crafts. well SORRY i’ve been super busy and i moved and gimme a break! now that i’m a lot more settled in the apartment, i’ll be doing more DIYs again I PROMISE.

    i feel like no matter how many coasters are in the room, there will still be one too many drinks. is this a problem for everyone? so i decided we needed a set JUST for our office.

    this is a really easy DIY that just requires some patience and a steady hand. and if you have a decent printer at home, all you need to do is find a cute image you want to use and print it out!

    i added the gold edges so the coasters would look less like tiles and more store-bought. i think it did the trick!

    DIY CONSTELLATION COASTERS

    print outs of your choice of design (i found this vintage celestial print and just used it all four times in different areas)
    white ceramic tiles
    felt stickers for the bottom
    mod podge
    spray shellac
    an xacto blade
    pencil
    foam brush
    gold leaf pen or paint pen (optional)

    [not pictured] a ruler and an acrylic roller or credit card in case of air bubbles

    STEP ONE turn your tile over and with a pencil and blade, cut the shapes out from the print out.

    STEP TWO [if you want to] use a marker to color the edges, and do a small border on the top so that the white won’t be visible at all on the top.

    STEP THREE do an even coat of mod podge over the whole tile

    STEP FOUR quickly and delicately, place your cut out on one end of the tile, lining up the edges. to prevent air bubbles, slowly press down from that end to the other, smoothing the surface as you go.

    STEP FIVE go over the surface gently with a credit card or an acrylic roller to ensure the air bubbles are gone.

    STEP SIX go over the whole thing with another coat of mod podge. work from the center out and go gently with your brush.

    STEP SEVEN take the coasters outside and spray shellac them, 4 times in 30 minute intervals. leave outside for about 24 hours until dry. the more you protect them, the less affected by water damage the coasters will ever be.
    STEP EIGHT once they’re dry to the touch and no longer sticky, stick four felt stickers on each corner and essentially turn the coaster into air hockey pucks. you’ll see what i mean when you put the stickers on. it’s fun!

    i did another version as a gift with vintage san francisco maps. this coasters would look great with any sort of cool graphic design, and in my opinion you can hardly tell i used the same design four times. right?

  • diy constellation coasters

    if you read this blog, you’ll notice it’s been a while since i’ve done any DIY crafts. well SORRY i’ve been super busy and i moved and gimme a break! now that i’m a lot more settled in the apartment, i’ll be doing more DIYs again I PROMISE.

    i feel like no matter how many coasters are in the room, there will still be one too many drinks. is this a problem for everyone? so i decided we needed a set JUST for our office.

    this is a really easy DIY that just requires some patience and a steady hand. and if you have a decent printer at home, all you need to do is find a cute image you want to use and print it out!

    i added the gold edges so the coasters would look less like tiles and more store-bought. i think it did the trick!

    DIY CONSTELLATION COASTERS

    print outs of your choice of design (i found this vintage celestial print and just used it all four times in different areas)
    white ceramic tiles
    felt stickers for the bottom
    mod podge
    spray shellac
    an xacto blade
    pencil
    foam brush
    gold leaf pen or paint pen (optional)

    [not pictured] a ruler and an acrylic roller or credit card in case of air bubbles

    STEP ONE turn your tile over and with a pencil and blade, cut the shapes out from the print out.

    STEP TWO [if you want to] use a marker to color the edges, and do a small border on the top so that the white won’t be visible at all on the top.

    STEP THREE do an even coat of mod podge over the whole tile

    STEP FOUR quickly and delicately, place your cut out on one end of the tile, lining up the edges. to prevent air bubbles, slowly press down from that end to the other, smoothing the surface as you go.

    STEP FIVE go over the surface gently with a credit card or an acrylic roller to ensure the air bubbles are gone.

    STEP SIX go over the whole thing with another coat of mod podge. work from the center out and go gently with your brush.

    STEP SEVEN take the coasters outside and spray shellac them, 4 times in 30 minute intervals. leave outside for about 24 hours until dry. the more you protect them, the less affected by water damage the coasters will ever be.
    STEP EIGHT once they’re dry to the touch and no longer sticky, stick four felt stickers on each corner and essentially turn the coaster into air hockey pucks. you’ll see what i mean when you put the stickers on. it’s fun!

    i did another version as a gift with vintage san francisco maps. this coasters would look great with any sort of cool graphic design, and in my opinion you can hardly tell i used the same design four times. right?

  • grandmas + what they cook

    italian photographer gabriele galimberti set out around the world photographing grandmothers and their signature dishes for his photo series delicatessen with love. 

    i love this. my grandmother wasn’t the cooking type, but when my mom is a grandma, oh man she’ll do a good job cooking, baking, cooing, and being all grandma-y.

    (photos by gabriele galimberti via demilked)