-
an office update
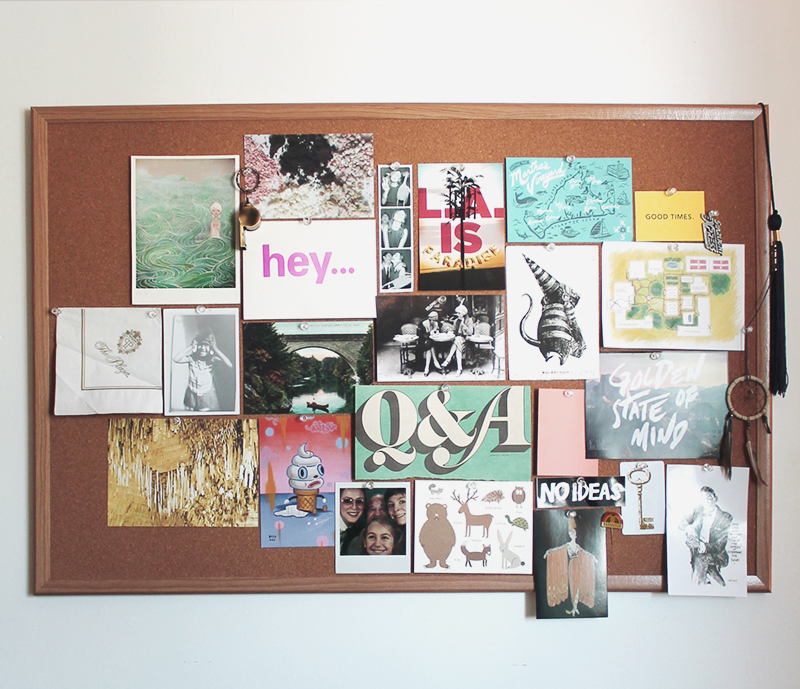
like i was saying last week – i’ve spent almost zero time fixing up or organizing the office since we moved in. but last weekend, i bought a bulletin board from target and it already makes a huge difference.
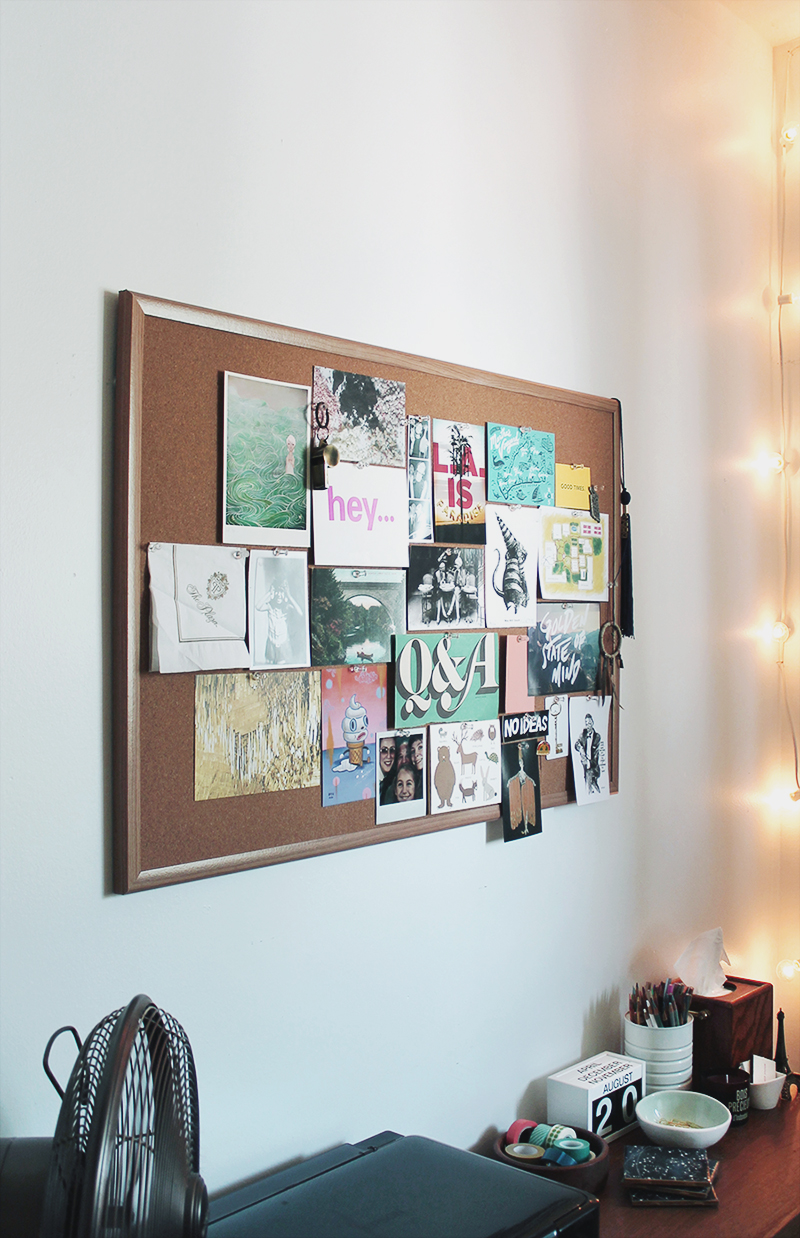
i’ve been having so much fun pinning up memories and inspiration. like too much fun.
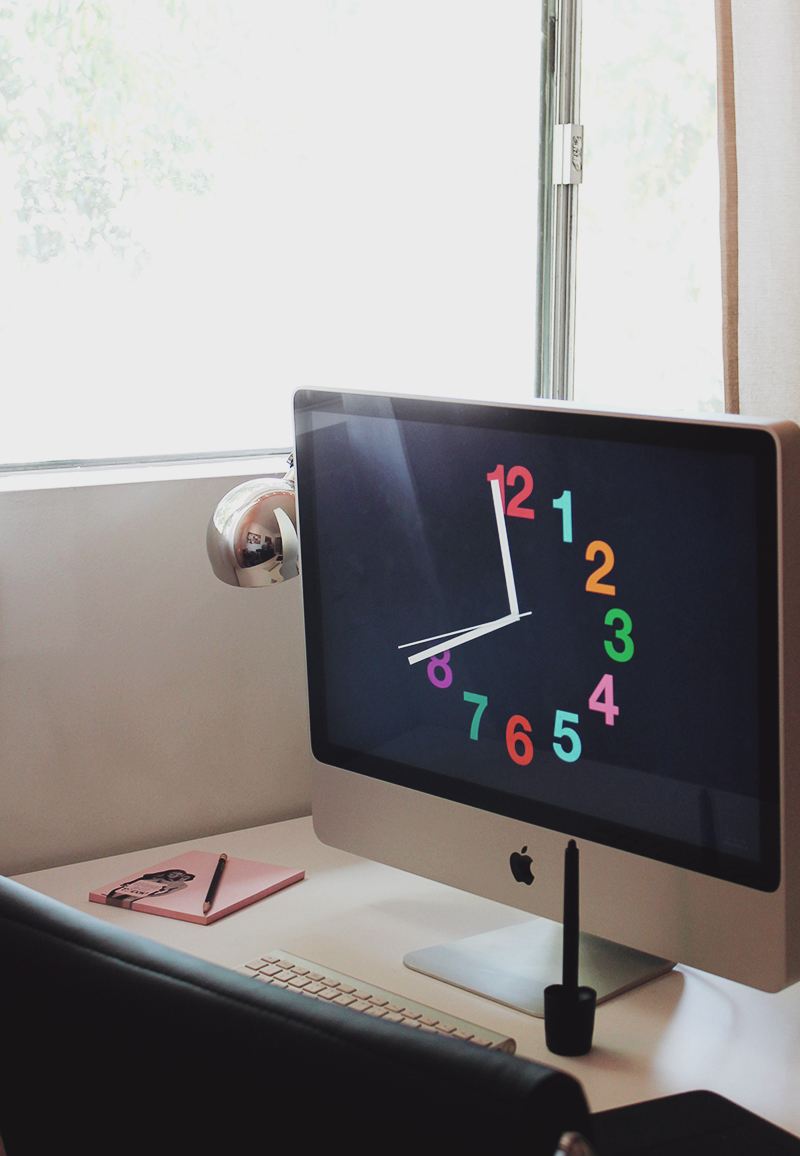
and speaking of too much, you know you’re a huge dork when you are ecstatic about your new screensaver. OMG. i love my new screensaver you guys.
-
taking criticism with lots of grains of salt
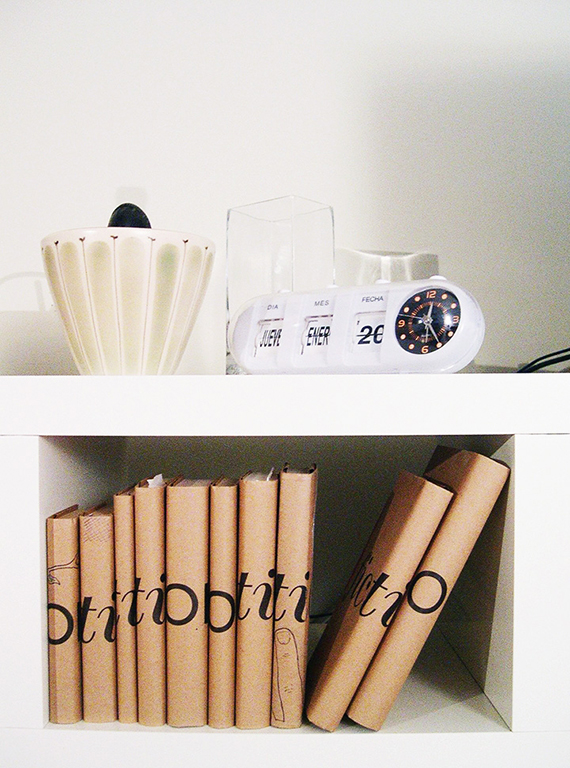
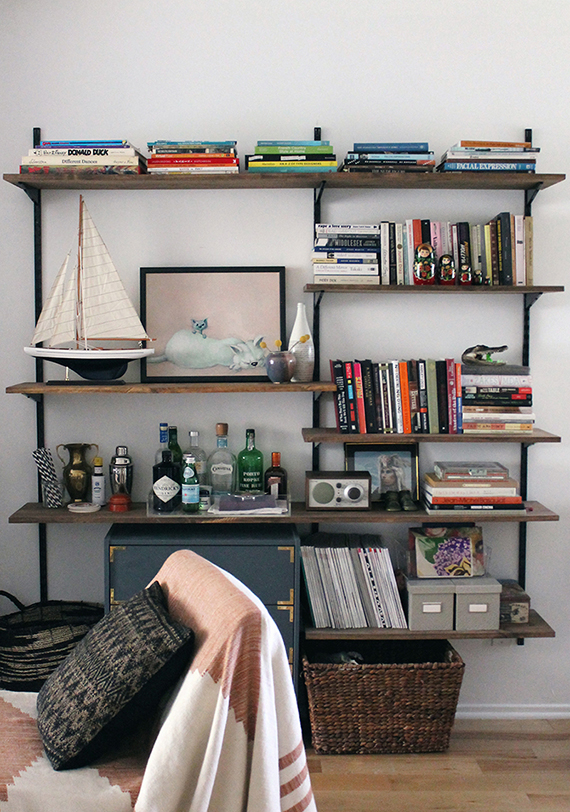
you might remember we built these shelves for our apartment. we lack storage and have a thousand books, so we thought it was a good idea for us. well last week apartment therapy posted the shelves! oh yay!
NOT SO FAST. i noticed they’d posted and was excited for about 10 seconds until i scrolled down and read the comments. the nasty un-constructive comments saying how they’re ugly and cluttered and styled oh so badly. and then i got super upset…

here’s my personal favorite:
tishinottawa wrote :
“Personal opinion, you ruined a beautiful clean look. Some gorgeous black and white photography on the wall would have framed that fireplace, and then perhaps some wicker baskets and interesting old boxes and trunks along the floor for odds and ends. And find somewhere else for the books.
But since you’ve gone to the effort, at least style the bookcases better. The books should be grouped by size, colour.”
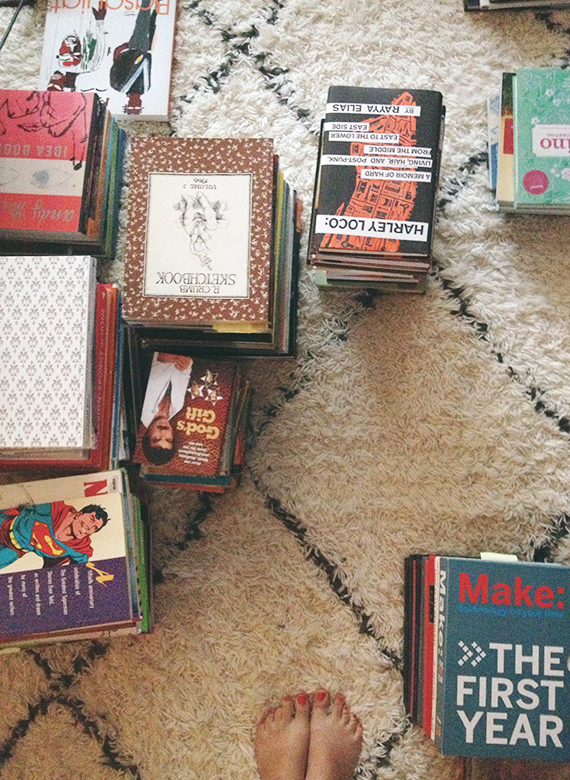
… barf. i think these haters are the people who do this :

shudder. oh and how about this…
oh hell no.
now why was i so upset? i never said i was a decorator or a stylist. i certainly don’t want to style the shelves like i’m living in country home but i also didn’t know they were styled hideously. they hold all the books in our apartment. you know, like the definition of a bookshelf : a shelf on which books can be stored. my biggest challenge with decorating is always worrying that things look decorated. maybe not apartment therapy commenters. so anyway i read these comments and was like “wtf fuck those fucks” and then i did this. OOPS.
shit. i made our apartment a disaster for the next three days because of some stupid comments. i even considered moving the shelves into the office and getting some simple white cabinets for the living room instead. but i didn’t – thank god. i reorganized the shelves a little and took the next few days to try to not give a shit about what people think. even though that’s basically impossible, i obviously need to get more used to criticism because people on the internet say mean things all the time and i need to thicken my skin.

if rebecca black can handle it i can handle it.
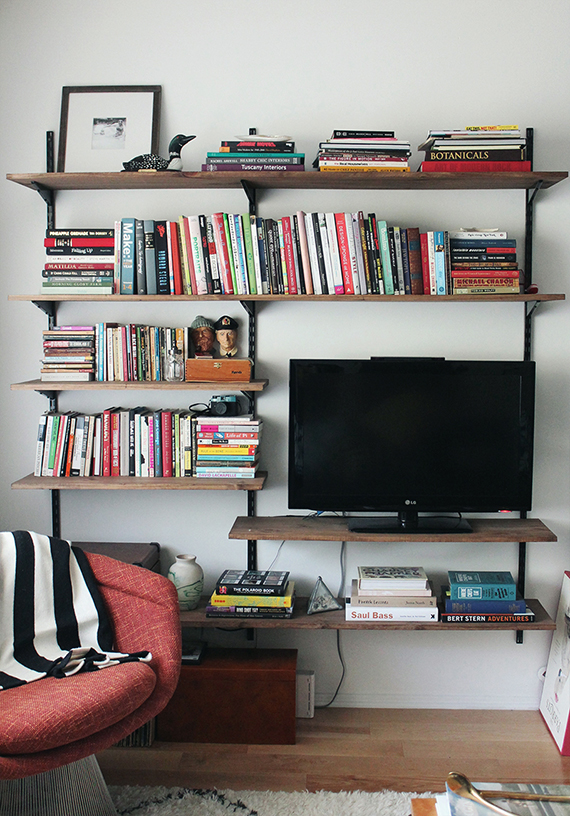
ignore all those cords. we setup the wii. i’m really not sure if the shelves look any better or any different, but it was actually kind of rewarding taking everything down and having it be cleaner once i finished.
the moral of the story is that people are as mean on the internet because they can be. and from now on – i’ll try not to read comments.
+ how do you deal with criticism?
images : colored coded books / kraft paper books
*** this has been reposted due to technical difficulties. the original comments are MIA. but thanks for them and i wish i could see them again so i could write you big thank yous.
-
ugh.
if you’ve visited the blog this week, you might be wondering wtf is happening to it.
well – i’ve been having some serious tech problems over here. basically, the blog has been up and down and like many of you have noticed, monday’s blog post disappeared, but i will be reposting it asap.
i’ve spent the week on the phone with tech guys and crying and stressing and it has SUCKED. but the blog is now working properly. you may also notice it looks like crap but will be getting a facelift asap! so good will come of this nightmare.
please bear with me. and thank you for your amazing comments on the shelving post. i never realized how much i like blogging until i wasn’t able to. i like it so much! and i like you.
-
payday wishlist
i can’t believe urban is selling bullet planters now. this is cray. now if only i could convince my boyfriend to stop thinking they’re hideous.
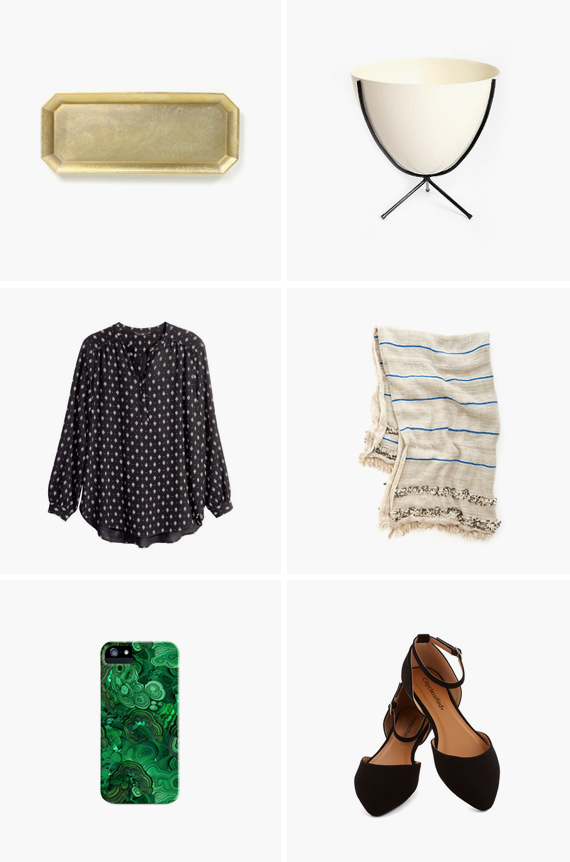
one . brass tray
two . bullet planter
three . blouse
four . blanket
five . malachite iphone case
six . flatswell it’s been a kind of a tough week over here! hopefully you weren’t affected but the blog had all sorts of problems yesterday and i spent the day stressed and on the phone with my hosting company. that and i haven’t slept. i go through these partial insomnia phases you could say, where for about a week i’ll get less and less sleep every night. i’ve been up since 3am today! it’s usually due to way too much in my mind. this weekend i am going to take it super easy and maybe try to drink a lot before bedtime. hope you have a great weekend!
-
room reality
if you saw the last room reality post i did – you’ve probably been wondering where the hell is another one? i did say it was a new feature. well it turns out it’s REALLY hard to find rooms to do. most of the room photos i love have like four items in them. blah blah here’s another one!


one . we actually have these replica wishbone chairs and i LOVE them. they were cheap and i’m really happy with the quality. $183 / chair
two . there are not many affordable versions of the PH5 pendant lamp, this one looks the best and is the cheapest. $269
three . i’ve been loving this dhurrie rug from shades of light for a while now. $299 for 5×8
four . shell chairs always look perfect at the end of a long dining table. $180 for two.
five . this modern clip lamp from land of nod would look really cute on a sideboard. $49 on sale
six . this hudson 78″ wood table is on sale big time for $565 from $945 ![ room via ]
-
room reality
if you saw the last room reality post i did – you’ve probably been wondering where the hell is another one? i did say it was a new feature. well it turns out it’s REALLY hard to find rooms to do. most of the room photos i love have like four items in them. blah blah here’s another one!
one . we actually have these replica wishbone chairs and i LOVE them. they were cheap and i’m really happy with the quality. $183 / chair
two . there are not many affordable versions of the PH5 pendant lamp, this one looks the best and is the cheapest. $269
three . i’ve been loving this dhurrie rug from shades of light for a while now. $299 for 5×8
four . shell chairs always look perfect at the end of a long dining table. $180 for two.
five . this modern clip lamp from land of nod would look really cute on a sideboard. $49 on sale
six . this hudson 78″ wood table is on sale big time for $565 from $945 ![ room via ]
-
our office sucks.
for some reason, i am always unhappy with the state of my workspace. ALWAYS. because i am a packrat. and i have crap everywhere. and the room never looks filled with plants and cute desk accessories ever. it’s full of cat hair and opened envelopes and amazon boxes.
did i mention i am really getting over the vintage shop? i was so into it when i started it up that i overlooked how much space it would take up – there is inventory everywhere and boxes and popcorn and tape and i hate it. now that i’m done with summer trips, i am going to focus on getting the room that i’m too embarrassed to even show you into better shape. starting with … getting rid of the etsy shop. i’m going to do some sort of sale to try to clear everything out and if you live in LA and would be interested in purchasing vintage home decor, let me know and i’ll plan this for real.
until then – here are some perfect workspaces.


and if money were no object, i’d buy all of these items right now and be super happy.

one . the chair i will never buy but always lust after
two . these collapsable trash bins are space saving and so pretty
three . a leather hanging plant holder? so in
four . it always helps to organize in pretty containers
five . this simple white file cabinet is nice enough to not hide in the closet
six . lovely headphones for when gideon doesn’t want to listen to the dirty dancing soundtrack with me
seven . an exit sign at the door would help remind me i can leave
eight . it gets crazy hot in our apartment and we’re always fighting over the oscillation on our little fan
nine . cords are everywhere in the office. i wish they made usb versions of these. -
our office sucks.
for some reason, i am always unhappy with the state of my workspace. ALWAYS. because i am a packrat. and i have crap everywhere. and the room never looks filled with plants and cute desk accessories ever. it’s full of cat hair and opened envelopes and amazon boxes.
did i mention i am really getting over the vintage shop? i was so into it when i started it up that i overlooked how much space it would take up – there is inventory everywhere and boxes and popcorn and tape and i hate it. now that i’m done with summer trips, i am going to focus on getting the room that i’m too embarrassed to even show you into better shape. starting with … getting rid of the etsy shop. i’m going to do some sort of sale to try to clear everything out and if you live in LA and would be interested in purchasing vintage home decor, let me know and i’ll plan this for real.
until then – here are some perfect workspaces.
and if money were no object, i’d buy all of these items right now and be super happy.
one . the chair i will never buy but always lust after
two . these collapsable trash bins are space saving and so pretty
three . a leather hanging plant holder? so in
four . it always helps to organize in pretty containers
five . this simple white file cabinet is nice enough to not hide in the closet
six . lovely headphones for when gideon doesn’t want to listen to the dirty dancing soundtrack with me
seven . an exit sign at the door would help remind me i can leave
eight . it gets crazy hot in our apartment and we’re always fighting over the oscillation on our little fan
nine . cords are everywhere in the office. i wish they made usb versions of these. -
chart art
i’m really into charts lately. REALLY into them. after i bought this knot chart art and am obsessing over this gemz print, i realized i am a chart art enthusiast! here are some faves.

-
payday wishlist


