-
payday wishlist

one love this preppy sweater for fall from dorothy perkins (if it ever gets cold in la again) / two someday i will spend the money to buy a pouf. maybe. this new kew dhurrie pouf from west elm is super pretty / three really cute “over the moon card” from rifle paper co. (oh my is that a cat?) / four the transport tote in snakeprint from madewell / five stacked chevron earrings from sosie / six dwellstudio throw blanket yes yes please / seven i really want to trade in my current crosley record player for this slightly slimmer and much bluer version
-
payday wishlist
one love this preppy sweater for fall from dorothy perkins (if it ever gets cold in la again) / two someday i will spend the money to buy a pouf. maybe. this new kew dhurrie pouf from west elm is super pretty / three really cute “over the moon card” from rifle paper co. (oh my is that a cat?) / four the transport tote in snakeprint from madewell / five stacked chevron earrings from sosie / six dwellstudio throw blanket yes yes please / seven i really want to trade in my current crosley record player for this slightly slimmer and much bluer version
-
bloody mini pumpkins
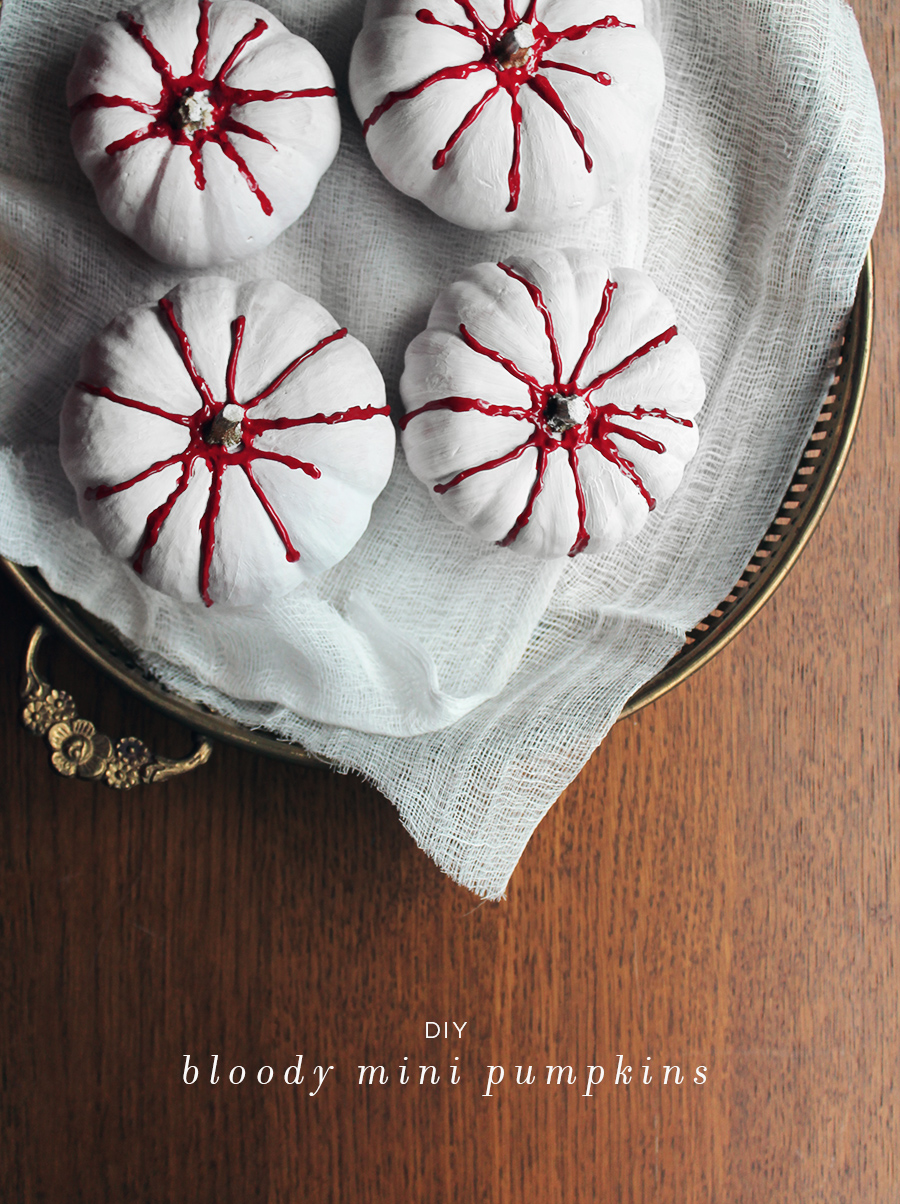
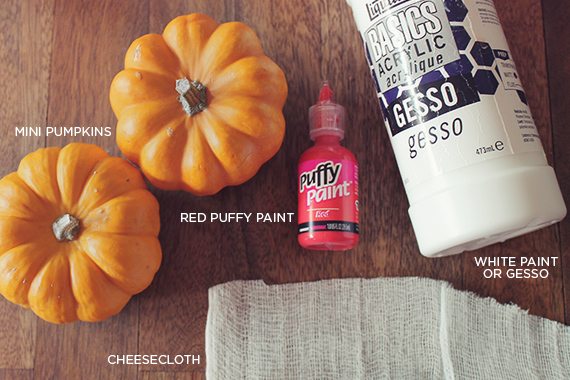
i was racking my brain trying to come up with a halloween craft that I hadn’t already seen. there are only so many things you can do with cheesecloth and paint. i bought a bunch of miniature pumpkins and figured i’d wing it. then, in the back of a drawer, I found my puffy paint. my original idea was to paint weird scary limp bizkit faces with the puffy paint but soon realized blood was the easiest and prettiest (in a violent creepy way) to go.
i loooove horror movies. but when I was too young to see it, I watched hellraiser 3 and there was this scene at a nightclub where pinhead killed everyone but there was this statue on the wall of a woman’s arm squeezing a heart and blood comes out. that scene messed me up. anyway, painting these totally reminded me of that scene!

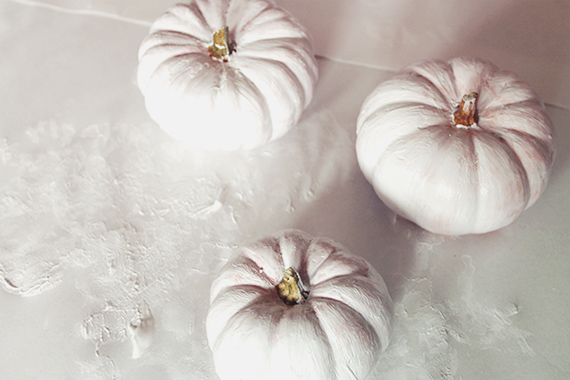
step one . paint them white! (unless you buy white pumpkins and save yourself a step.) they don’t have to be perfect and i seriously didn’t bother trying too hard. i did end up doing two light coats on each.
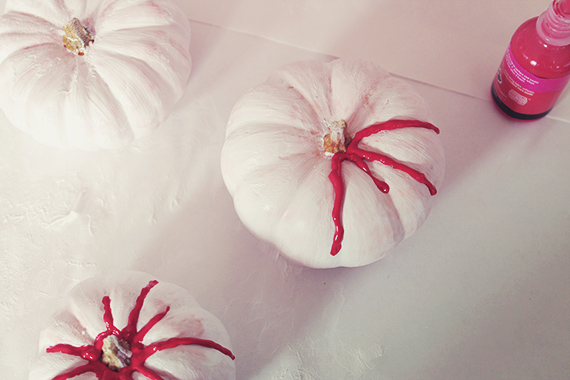
step two . the paint from the top down each crease. vary the lengths and you can round out the ends by going back up a tad with your bottle once you’ve reached the point where you want the drip to stop. let dry for four hours. and you’re done!!!
they make a really fun weird centerpiece. definitely a conversation piece. you’ll have conversations such as “why are your mini pumpkins bleeding?”
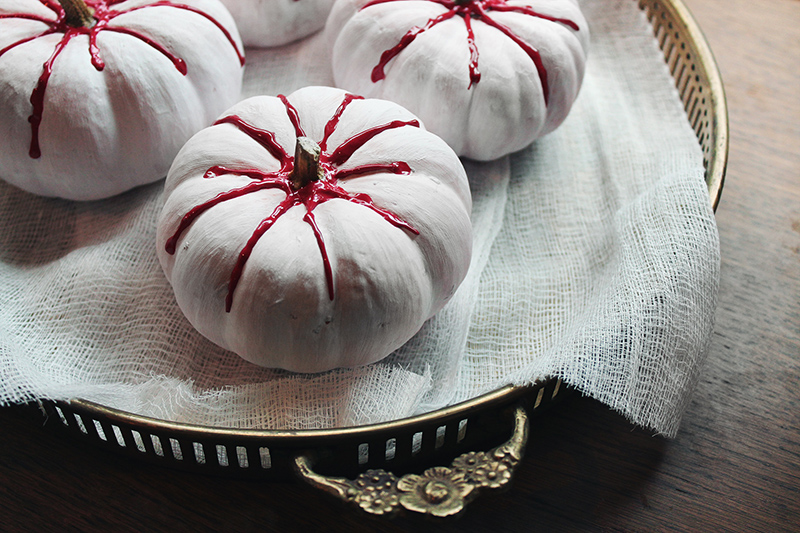
another pro of this DIY? the cats have not been interested in going near them. hell yeah. you got cats? make these.
-
i know what i want for christmas (in october)

In a deep internet hole, I found these hand stitched needlepoint mules by Paige Andrews the other day and immediately bookmarked them. I want way too many pairs. How cute are these?!
-
payday wishlist

zara home is now open! i love this silk throw pillow / this faux leather magazine holder from target looks much fancier than it should (at least in the photo) / calf hair chelsea boot from madewell / i know how to cook by ginette mathiot – yet another pretty cookbook i want for my collection / zig zag clutch / very cute kendra scott stud earrings / west elm’s gold flatware. love love love.
-
payday wishlist
zara home is now open! i love this silk throw pillow / this faux leather magazine holder from target looks much fancier than it should (at least in the photo) / calf hair chelsea boot from madewell / i know how to cook by ginette mathiot – yet another pretty cookbook i want for my collection / zig zag clutch / very cute kendra scott stud earrings / west elm’s gold flatware. love love love.
-
egg salmon and avocado toast

Having been inspired and in love with this pin, I really wanted to eat this for breakfast this weekend. But unfortunately couldn’t find the source/recipe of it. So I just made it my way, the easy way. (i know i know it’s not as pretty)

Egg, Salmon, and Avocado Toast
fresh eggs
one avocado
one package of smoked salmon
good bread
kosher salt and fresh ground pepperNow, I went with old eggs and regular grocery store lox. If I was doing this the right way, I’d go pick up a dozen fresh eggs and some salmon belly lox from Canter’s. And my guests would be like “hey – you fancy.” But instead I went with a package of smoked salmon and my eggs were too old. The whites kept separating.
Toast, broil, or grill a piece of bread. Liberally spread a ripe avocado all over it. Sprinkle with kosher salt. Top with lox. GENTLY place a poached egg on top (or you could always just scramble some eggs and top with another piece of bread for a delish sandwich). Grind pepper on top. Devour. Get back in bed.

-
egg salmon and avocado toast
Having been inspired and in love with this pin, I really wanted to eat this for breakfast this weekend. But unfortunately couldn’t find the source/recipe of it. So I just made it my way, the easy way. (i know i know it’s not as pretty)
Egg, Salmon, and Avocado Toast
fresh eggs
one avocado
one package of smoked salmon
good bread
kosher salt and fresh ground pepperNow, I went with old eggs and regular grocery store lox. If I was doing this the right way, I’d go pick up a dozen fresh eggs and some salmon belly lox from Canter’s. And my guests would be like “hey – you fancy.” But instead I went with a package of smoked salmon and my eggs were too old. The whites kept separating.
Toast, broil, or grill a piece of bread. Liberally spread a ripe avocado all over it. Sprinkle with kosher salt. Top with lox. GENTLY place a poached egg on top (or you could always just scramble some eggs and top with another piece of bread for a delish sandwich). Grind pepper on top. Devour. Get back in bed.
-
payday wishlist

color blocked clock / ella necklace / glass refillable water bottle / long handled tasting spoons /
obsessive compulsive lip tar / watercolor iphone casei’m so weary of refilling water bottles – that glass bottle would make me feel way more comfortable.
-
(almost) fifty shades of my entry table

As is our life, we’ve been still trying to figure out what to do about our living room and that damn door. I got really sick of the huge painting being right above our couch so I decided on a new plan… can you tell what that is? I’ll reveal it soon. To go with the new look of the room and to embrace my new love of colors, the entry table needed to pop a little more.
And then my weekend of painting the entry table three times to completion began.

I started with this crazy idea that I would paint it this totally not-me color, a purple-y pink color. (it’s behr raspberry pudding) What the hell was I thinking?! The second I dropped the paintbrush I knew it wasn’t right. And I wasted $15 and two hours for nothing. GUH.

Then I decided on a coral color. (behr wet coral, the same paint I used on the rast interior) Wow. What a shitty idea. But I was determined to live with my mistake. So I brought it into the living room and stared at it for an hour.

The color is really kinda cool, but it just didn’t work. Remember how I said I was painting our office navy? I decided not to. btw – I have pretty much finished our office. It’s also coming soon.
Oh hey look at that white couch! CUTE!

Anyway, we had bought this last color with the intention of painting the office and I thought it was my only option to save money and a 45th trip to home depot. (behr underwater)
Now you would think I would have to sand this thing like crazy. I repainted it the day I bought it so that makes it four layers of paint at least. And of course I tried. And gave up within 5 minutes. If I paint it again, I will definitely have to get rid of some of the layers because it’s really thick, but you just need paint with primer and you can ignore that.
It’s a pretty good color, way more me but still incorporates a little more color into the room. So whatchu think?

OH MY. Is that a fake plant sitting there? I guess I was serious about that huh…

It basically looks real! Basically. Also, that’s a smock paper box. My most exciting purchase with a coupon at the art store. And a photograph of two children in awesome costumes that I don’t know that has been with me in almost every apartment I’ve lived in.

OH HEY NICE COLOR!


