-
simple iphone cases
i’m in the market for a new iphone case and am pretty into these really classic ones that i wouldn’t get sick of anytime soon.
clockwise from top left – kate spade saturday in windowpane / urban outfitters chambray / zazzle gray and white stripe / j.crew tortoise case / anthropologie metallic leather / society6 wood grain
-
diy metal base coffee table
so here she is. our new coffee table. with my days and days of internet research, i found this raw steel metal base for $58 with local pickup. (they now cost $60, probably because of me not bringing exact change)
the base was raw steel, so we chose to spray paint it matte black.
after spending a good amount of money on the wood for the fauxdenza, we wanted to do this wood for cheap, thinking we can replace it whenever. it’s really hard to find wood that’s an inch thick. we settled on crappy plywood, which they told us would be $60 for the whole piece that we only needed 1/6 of. but they were able to find some scrap of it and we got it for $13. you can tell it’s cheap because it turned orange after we stained it. don’t know what that’s about, but i’m learning to live with it.
DIY COFFEE TABLE
metal base – $58
plywood 41″ x 21″ – $13
spray paint – $6
3/4″ long screws – $1
wood stain – about $6
feed n wax – already hadwe spray painted the base and heavily sanded the piece of wood, really smoothing out the corners and edges.
i added a light coat of what i thought was a very natural wood stain. i think this wood has a very orange undertone, which the stain totally brought out over night. i had wanted to have a more sand colored wood compared to the rest of the room. unfortunately, before noticing how saturated the wood was getting, i used feed n wax to finish the wood. so now we’re kind of stuck with it until we feel like sanding it off and re-staining.
once everything was dry, we measured out where the center was and carefully drilled in six screws.
and we finally have a coffee table again – that cost us $84!
but is it too orange?
i’m kinda feeling that weird marbled stripe on top, makes it feel like his and hers. except that would make my side the smaller one.
the rug is from rugsusa / white lacquer tray from west elm / gold wishbone from jayson home and garden / ezc playing cards / bert stern adventures book was $1 from a yard sale /
agate coasters were super cheap at the nyc natural history museum -
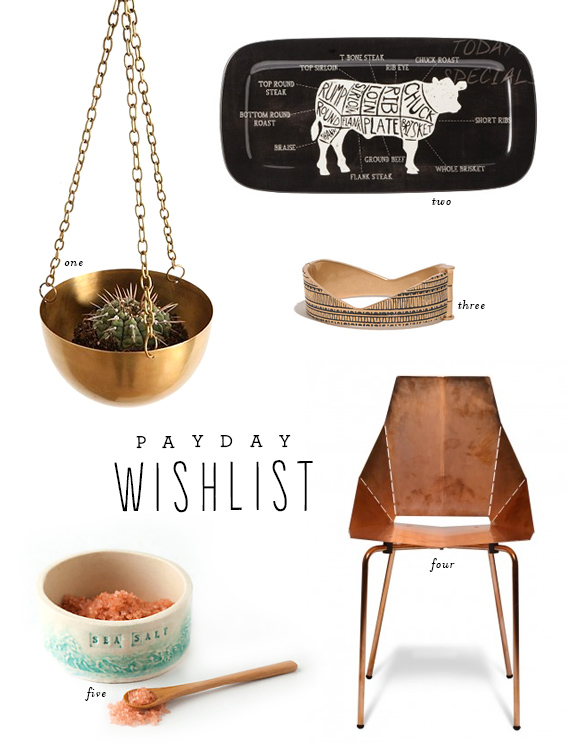
payday wishlist
ONE russell+hazel smartdeck calendar TWO madewell essex saddlebag THREE charles philip sheila chambray flats FOUR curved bangle by jens pirates booty FIVE my favorite leather pouf sold online is from rugsusa!? SIX world market green pacific tumblers
-
roundup : one-piece swimsuits
it’s almost swimsuit weather! this year, i kind of only want to wear one pieces, but for the most part, find most unflattering and dull. so i picked out some cute ones! the black zappos one i liked so much, i bought it and love it on.
j.crew herringbone stripe tank / nordstrom robin piccone ikat twist bandeau swimsuit / zappos kamalikulture shirred mio swimsuit / madewell keyhole tank suit / j.crew painter’s floral tank / asos seafolly shimmer bandeau swimsuit / american apparel nylon tricot halter one-piece / target merona colorblock swimsuit / urban outfitters billabong x maya hayuk one piece
-
diy ikea medicine cabinet
i’m not sure if everyone is desperate need of more storage at all times or if it’s just me forever. but like i’ve said before, we needed more storage. this time in the bathroom! i saw this adorable little medicine cabinet DIYed by door sixteen and thought hey i love first aid too. but we needed tons more storage. like medicine cabinet storage. so we bought a lillången cabinet at ikea.
before assembling the cabinet, we took the door out of the box a month after buying it. with a yard stick, a pencil, and siri my math wizard, we lightly drew out the pattern right onto the cabinet front.
until we finally got the perfectly proportional plus sign.
how did i do such a masterful job taping you ask? well i did damage the door front a little but i used a ruler as a straight edge and exacto-ed the corners of the tape. little scratches aren’t noticeable!
now i bet you’re wondering how’d you screw it up? here’s how! acrylic paint. we tried to prime it but using gesso – it was all we had. it didn’t work and you can’t REALLY tell but the paint job is horribly blotchy. every fix up coat made it worse. so we went back to the original plan that i didn’t mention of just spray painting. we should have done that in the first place and this would have looked perfect. but why would i want it to look perfect? ugh.
ok so here is the TEXTURE from the painting job. i don’t know, maybe the texture like adds a lot of oomph. i’ll go with that. at least my taping job was swell.
IKEA FIRST AID MEDICINE CABINET
a white cabinet
yardstick
t-square
ruler
exacto knife
painters tape
pencil
spray paint1. remove the cabinet door from the box or cabinet if it’s already been assembled.
2. find the exact center point of the door by making an X from corner to corner, mark it with a pencil.
3. use the t-square to draw a cross through the center point at a perfect perpendicular angle. measure to make sure the lines are the same length on either side of the center point. make sure you’re happy with the size in relation to the cabinet.
4. use the t-square to draw the “tips” of the cross. make sure they’re all equal and centered.
5. swear and cuss when they’re not. fix if necessary. ask siri if you’re sizing up or down, she’s good at math and decimals. basically, the width of one “tip” should be one third of the entire line.
6. connect the ends, forming the cross. erase overlapping lines.
7. tape off. start with the easy lines, when you get to the corners, overlap tape and carefully trim off excess with a ruler as your straight edge.
8. cover the rest of the white with a trash bag, spray paint. remove tape. be happy.
we can fit every product and then some in here! we don’t use a ton of products really, but it’s all in here! yay.
-
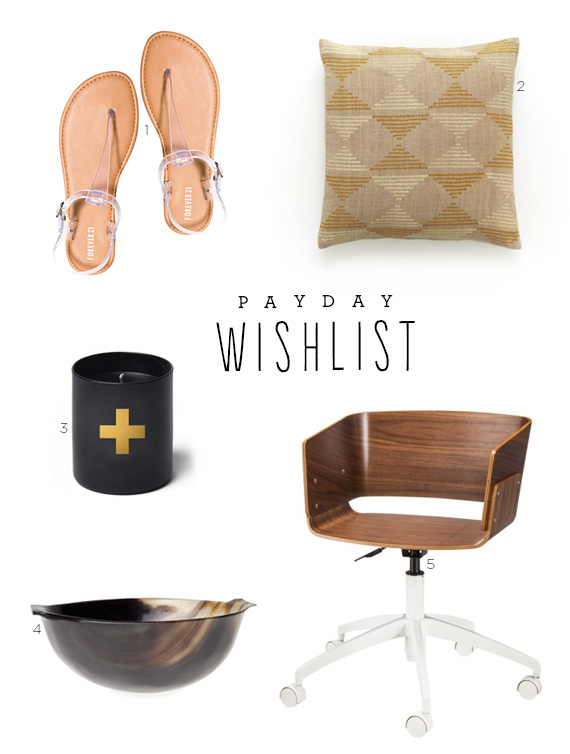
payday wishlist
ONE loving this shibori pillow by rebecca atwood / TWO need supply co. sanders sunglasses / THREE blue opal stud earrings from sweetheartjewelry on etsy / FOUR west elm casa stripe placemats / FIVE j.crew ikat tee / SIX soludos in classic stripe